crwdns2915892:0crwdne2915892:0
The daughterboard is a crucial component that works along with the motherboard, handling tasks like power distribution and additional ports. This guide will show you the proper steps to safely remove the daughterboard.
crwdns2942213:0crwdne2942213:0
-
-
Begin by taking the back plate off of your device. Using a Phillips head screw driver, take out the highlighted screws for your device.
-
-
-
Remove battery from the motherboard by unplugging the cord and removing the screws.
-
-
-
-
Once you have the battery removed, locate the cable for your new battery and connect it on the same port from your old battery. Secure it onto the laptop by using the screws. After this step is complete, complete step 1 in reverse order to secure the plate cover over your motherboard.
-
-
-
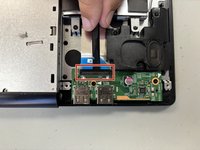
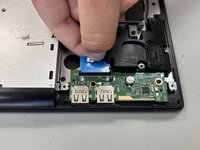
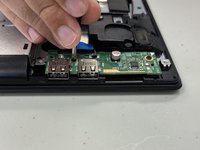
Flip up the black ZIF locking flap. Disconnect the ribbon cable.
-
-
-
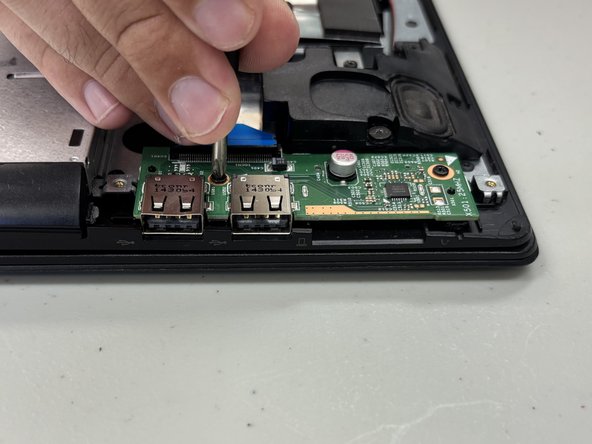
Remove the two 4 mm Phillips #00 screws that secure the daughterboard.
-
-
-
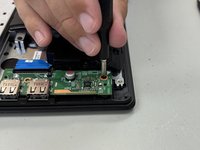
Grab the daughterboard with your fingers and lift it straight up and out of the chassis.
-


To reassemble your device, follow these instructions in reverse order.

crwdns2935287:0crwdne2935287:0

University of North Texas, Team 3-6, Coppersmith Fall 2024 crwdns2935289:0University of North Texas, Team 3-6, Coppersmith Fall 2024crwdne2935289:0
UNT-COPPERSMITH-F24S3G6
crwdns2931471:04crwdne2931471:0
crwdns2935297:04crwdne2935297:0