crwdns2915892:0crwdne2915892:0
The RAM of the computer is responsible for running all of the programs while the computer is powered on. If a user experiences the computer freezing during operation, it may be due to the RAM being too small or too slow. To fix this, upgrading the RAM is often a quick and easy solution to speeding up the performance of your laptop. This guide goes through the necessary steps in order to replace the RAM currently in the computer.
crwdns2942213:0crwdne2942213:0
-
-
Turn off the laptop.
-
Disconnect the charging cable.
-
Turn the computer upside down.
-
-
-
Locate the two switches that lock the battery.
-
Push the right switch outwards to unlock the battery.
-
-
-
Push and hold the left switch outwards to unlock the battery.
-
Pull the battery away from the computer.
-
-
-
-
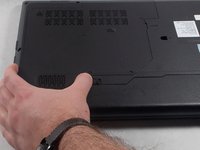
Turn the laptop over so that the bottom side is facing up.
-
-
-
Unscrew the five 5mm Phillips #0 screws that hold the cover in place.
-
-
-
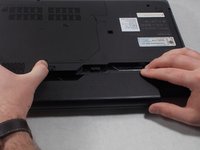
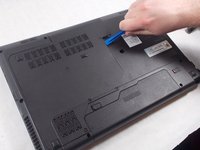
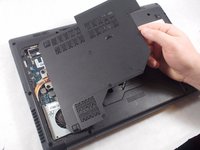
With the screws removed, insert the plastic opening tool into the groove located on the right side.
-
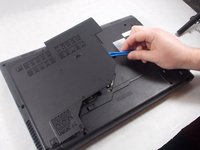
Begin to pry up, and the plate should lift up from the body of the laptop.
-
While lifting up, take the piece in one hand and pull up and to the right to fully remove the back plate.
-
-
-
Using your fingers, hold open the two clips holding the top RAM in place.
-
With the clips held away from the RAM, slide the top stick out from it's connection.
-
-
-
With the top RAM stick removed, repeat the same process for the bottom piece. Begin by holding the two clips away from the RAM.
-
With the clips held out, slide the RAM out from the connection.
-


To reassemble your device, follow these instructions in reverse order.
To reassemble your device, follow these instructions in reverse order.
crwdns2935221:0crwdne2935221:0
crwdns2935229:03crwdne2935229:0
crwdns2915084:0crwdne2915084:0

UMass Dartmouth, Team S1-G1, Simcock Spring 2018 crwdns2935289:0UMass Dartmouth, Team S1-G1, Simcock Spring 2018crwdne2935289:0
UMASSD-SIMCOCK-S18S1G1
crwdns2931471:03crwdne2931471:0
crwdns2935297:06crwdne2935297:0