crwdns2933423:0crwdne2933423:0

Lenovo Essential B570 Hard Drive Replacement

crwdns2942213:0crwdne2942213:0
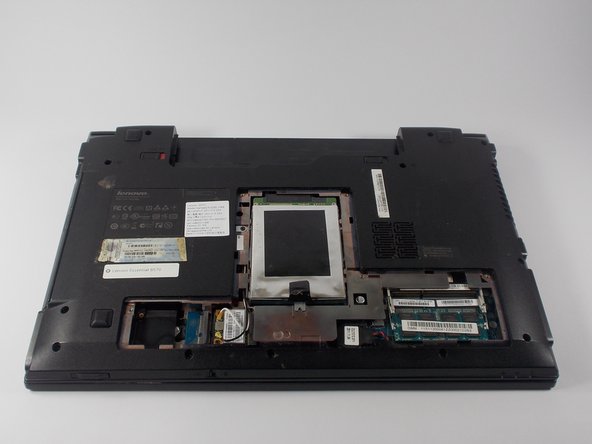
  1. Lenovo Essential B570 Hard Drive Replacement, Battery: crwdns2935265:01crwdnd2935265:01crwdnd2935265:01crwdne2935265:0
    • Turn over laptop.

    • Switch open the left battery lock.

    • If you are replacing inner components of the laptop, it is recommended to remove the battery first to avoid damage to the laptop.

  2. Lenovo Essential B570 Hard Drive Replacement: crwdns2935265:02crwdnd2935265:01crwdnd2935265:01crwdne2935265:0
    • Hold the right battery lock open with one hand while removing the battery itself with the other.

  3. Lenovo Essential B570 Hard Drive Replacement, Back Panel: crwdns2935265:03crwdnd2935265:01crwdnd2935265:01crwdne2935265:0
    • Loosen the five Philips screws that secure the panel.

    • The screws do not actually fully remove from the panel. Loosening them as much as you can will be enough to disconnect them from the laptop.

  4. Lenovo Essential B570 Hard Drive Replacement: crwdns2935265:04crwdnd2935265:01crwdnd2935265:03crwdne2935265:0 Lenovo Essential B570 Hard Drive Replacement: crwdns2935265:04crwdnd2935265:02crwdnd2935265:03crwdne2935265:0 Lenovo Essential B570 Hard Drive Replacement: crwdns2935265:04crwdnd2935265:03crwdnd2935265:03crwdne2935265:0
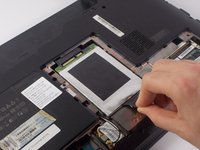
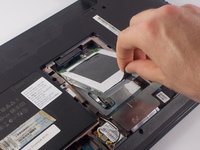
    • Prop open the cover with a plastic opening tool.

    • If the cover does not come off easily, do not force it. Make sure all screws are loosened.

  5. Lenovo Essential B570 Hard Drive Replacement, Hard Drive: crwdns2935265:05crwdnd2935265:01crwdnd2935265:03crwdne2935265:0 Lenovo Essential B570 Hard Drive Replacement, Hard Drive: crwdns2935265:05crwdnd2935265:02crwdnd2935265:03crwdne2935265:0 Lenovo Essential B570 Hard Drive Replacement, Hard Drive: crwdns2935265:05crwdnd2935265:03crwdnd2935265:03crwdne2935265:0
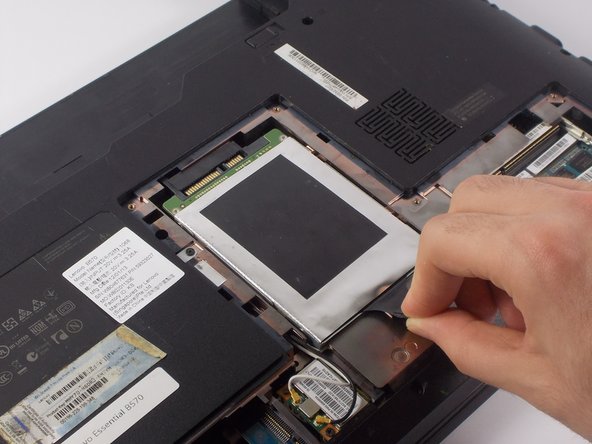
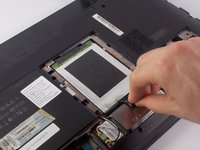
    • Pull the Hard Drive out of its socket.

    • Lift the tab upwards to remove the hard drive.

    • If you cannot pull the hard drive out of its socket, there is a possibility that there is a 4mm Phillips #1 screw securing it. Locate it and remove it before continuing. It is in very close proximity to the black tab.

crwdns2915888:0crwdne2915888:0

To reassemble your device, follow these instructions in reverse order.

crwdns2935229:03crwdne2935229:0

Samuel Filliettaz

crwdns2935283:010/20/15crwdne2935283:0

855 crwdns2915208:0crwdne2915208:0

crwdns2935297:05crwdne2935297:0

crwdns2915084:0crwdne2915084:0

UMass Dartmouth, Team 4-5, Catania Fall 2015 crwdns2935289:0UMass Dartmouth, Team 4-5, Catania Fall 2015crwdne2935289:0

UMASSD-CATANIA-F15S4G5

crwdns2931471:04crwdne2931471:0

crwdns2935297:06crwdne2935297:0

crwdns2944067:00crwdne2944067:0

crwdns2917038:0crwdne2917038:0

crwdns2936625:0crwdne2936625:0:

crwdns2936751:024crwdne2936751:0 1

crwdns2936753:07crwdne2936753:0 5

crwdns2936753:030crwdne2936753:0 18

crwdns2942667:0crwdne2942667:0 4,750