crwdns2915892:0crwdne2915892:0
The guide will show you how to remove the motherboard from the laptop. The process requires a lot of disarming, and a place to safely deposit screws is recommended.
crwdns2942213:0crwdne2942213:0
-
-
Using the Phillips #0 screwdriver, remove the (11) eleven 5.4 mm screws from the back panel.
-
-
-
Using a plastic opening tool, pull out the back panel from the laptop.
-
-
-
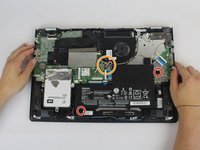
Using the Phillips #0 screwdriver, remove the (2) 5.4 mm screws.
-
Disconnect the battery connector from the motherboard.
-
-
-
Pull the battery outward and remove it from the rest of the laptop.
-
-
-
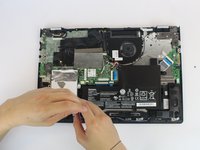
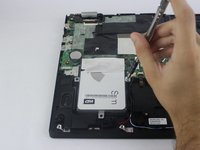
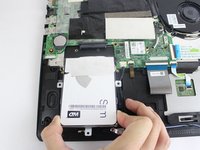
Using the Phillips #0 screwdriver, remove the (3) three 3 mm screws.
-
-
-
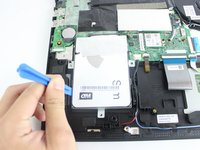
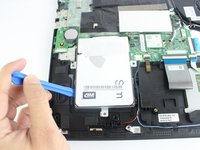
Slide the drive away from the connector by applying pressure on the two side tabs where screws were removed. Use a plastic opening tool as a lever to lift the drive out.
-
-
-
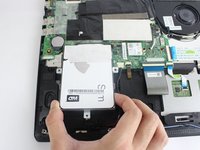
Carefully, using your hand, remove the hard drive from the laptop.
-
-
-
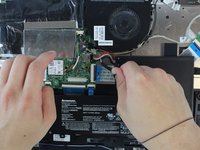
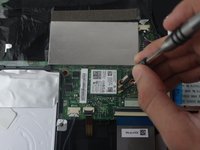
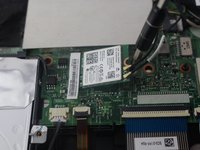
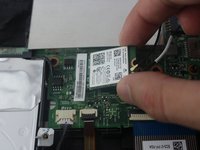
Remove the 5.4 mm Phillips #0 screw holding the Wireless Network Card.
-
-
-
-
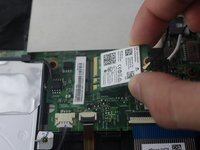
Grab the network card and gently pull it out.
-
-
-
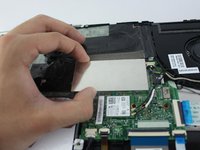
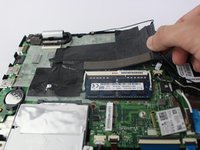
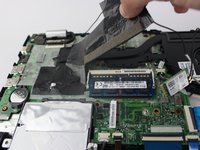
Grab the black insulating tape and pull it out.
-
-
-
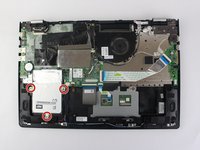
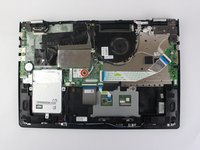
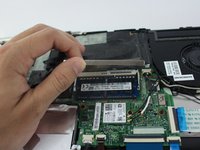
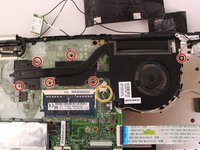
Using the Phillips #0 screwdriver, remove the (6) six fan screws from the device.
-
Disconnect the fan from the motherboard.
-
-
-
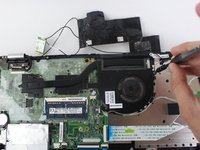
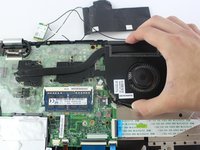
Unplug the Fan connector from its socket on the motherboard.
-
-
-
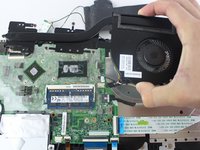
Carefully remove the fan from the laptop.
-
-
-
Using the Phillips #0 screwdriver, remove the (2) two 5.4 mm Phillips screws.
-
Disconnect these connectors from the motherboard.
-
Disconnect the four ribbon cables from the motherboard.
-
Unscrew and remove the (2) two Phillips #0 screws.
-
-
-
Lift up the black latch of the ribbon cable with the brown tab on top by holding the cable in to the motherboard.
-
Grab the tab with a pair of pliers and pull out the cable.
-
-
crwdns2935267:0crwdne2935267:0Tweezers$4.99
-
Lift the beige latch of the ribbon cable with the blue tab by holding the cable in to the motherboard, and with a pair of tweezers, pull out the cable.
-
-
-
Lift up the black latch of the ribbon cable with the blue tab at the lower right corner of the motherboard and disconnect it with a pair of tweezers.
-
Grab the tab and pull out the cable.
-
-
-
Locate the last ribbon cable with a blue tab and lift the beige latch holding the cable in to the motherboard.
-
With a pair of tweezers grab the tab and remove the cable.
-
-
-
Lift the black latch of the black connector at the top left corner of the motherboard by holding it in to the motherboard.
-
Grab the cable and pull it outwards to remove it.
-
-
-
Pull the wire besides the brown tab ribbon cable out and disconnect it.
-
-
-
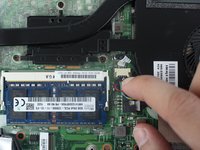
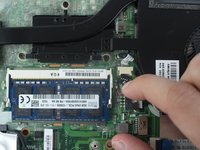
Grab the small black connector by the RAM module and disconnect it from the motherboard.
-
-
-
Unplug the remaining connector besides the RAM module and remove it from the motherboard.
-
-
-
Gently grab the motherboard and pull it up lightly. Then pull it towards you and remove the motherboard.
-


To reassemble your device, follow these instructions in reverse order.
crwdns2935221:0crwdne2935221:0
crwdns2935229:04crwdne2935229:0
crwdns2935287:0crwdne2935287:0

USF Tampa, Team S14-G1, Boczar Fall 2017 crwdns2935289:0USF Tampa, Team S14-G1, Boczar Fall 2017crwdne2935289:0
USFT-BOCZAR-F17S14G1
crwdns2931471:04crwdne2931471:0
crwdns2935297:05crwdne2935297:0