crwdns2933423:0crwdne2933423:0

Left Temple

crwdns2862623:0crwdne2862623:0
crwdns2942641:0crwdne2942641:0

crwdns2942213:0crwdne2942213:0

  1. Left Temple, Remove the screw covers: crwdns2935265:01crwdnd2935265:01crwdnd2935265:02crwdne2935265:0 Left Temple, Remove the screw covers: crwdns2935265:01crwdnd2935265:02crwdnd2935265:02crwdne2935265:0
    crwdns2935267:0crwdne2935267:0
    Tweezers
    $4.99
    • Use tweezers to remove the six screw covers from the left temple.

  2. Left Temple, Unfasten the left temple: crwdns2935265:02crwdnd2935265:01crwdnd2935265:02crwdne2935265:0 Left Temple, Unfasten the left temple: crwdns2935265:02crwdnd2935265:02crwdnd2935265:02crwdne2935265:0
    • Use a T5 Torx screwdriver to remove the six 4.9 mm‑long screws securing the two left temple halves.

    • Use a T5 Torx screwdriver to remove the two 3.5 mm‑long screws securing the left hinge cover.

  3. Left Temple, Remove the outer hinge cover: crwdns2935265:03crwdnd2935265:01crwdnd2935265:03crwdne2935265:0 Left Temple, Remove the outer hinge cover: crwdns2935265:03crwdnd2935265:02crwdnd2935265:03crwdne2935265:0 Left Temple, Remove the outer hinge cover: crwdns2935265:03crwdnd2935265:03crwdnd2935265:03crwdne2935265:0
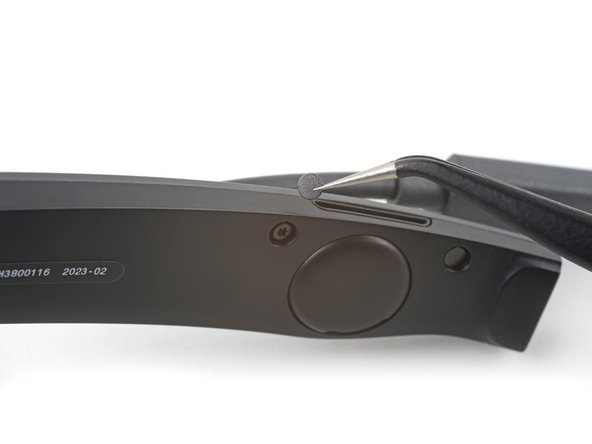
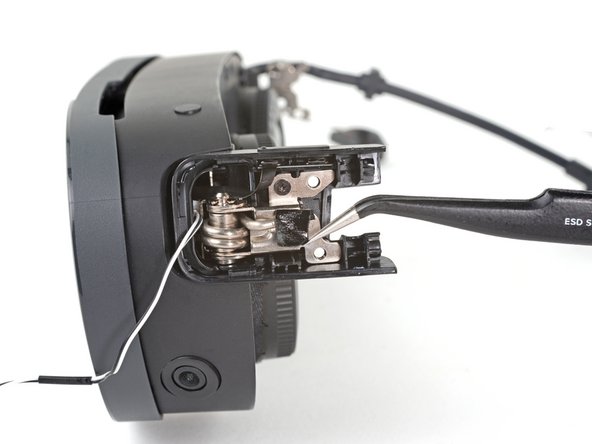
    • Insert the flat end of a spudger in the gap between the left outer and inner hinge covers.

    • Slide the spudger along the gap to separate the clips securing the outer hinge cover.

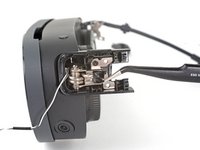
    • Remove the outer hinge cover.

  4. Left Temple, Remove the left temple: crwdns2935265:04crwdnd2935265:01crwdnd2935265:02crwdne2935265:0 Left Temple, Remove the left temple: crwdns2935265:04crwdnd2935265:02crwdnd2935265:02crwdne2935265:0
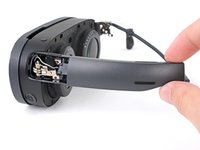
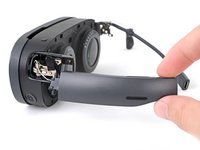
    • Pull the left temple out of its slot in the hinge.

    • Don't try to fully remove it yet, as it's still connected by a cable.

  5. Left Temple: crwdns2935265:05crwdnd2935265:01crwdnd2935265:02crwdne2935265:0 Left Temple: crwdns2935265:05crwdnd2935265:02crwdnd2935265:02crwdne2935265:0
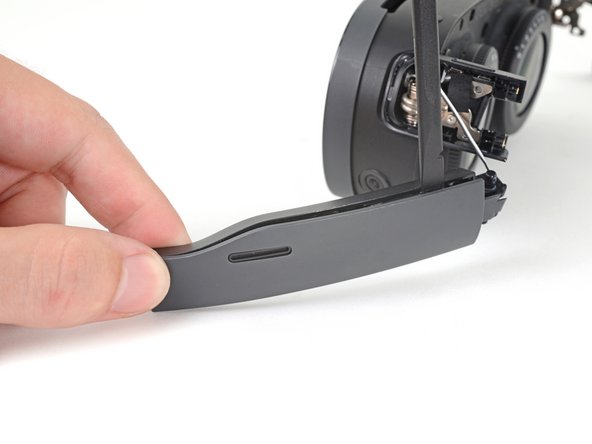
    • Insert the flat end of a spudger in the gap between the outer and inner temple.

    • Slide the spudger along the gap to separate the plastic clips securing the outer temple.

  6. Left Temple: crwdns2935265:06crwdnd2935265:01crwdnd2935265:02crwdne2935265:0 Left Temple: crwdns2935265:06crwdnd2935265:02crwdnd2935265:02crwdne2935265:0
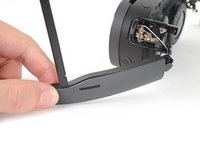
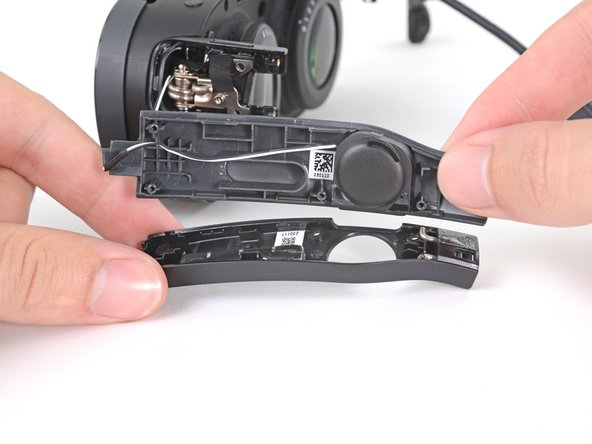
    • Pull the outer temple off of its inner half to completely release its plastic clips.

  7. Left Temple: crwdns2935265:07crwdnd2935265:01crwdnd2935265:02crwdne2935265:0 Left Temple: crwdns2935265:07crwdnd2935265:02crwdnd2935265:02crwdne2935265:0
    crwdns2935267:0crwdne2935267:0
    Tesa 61395 Tape
    $6.99
    • The speaker is lightly adhered to the outer temple.

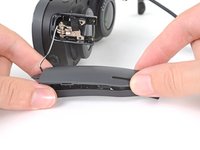
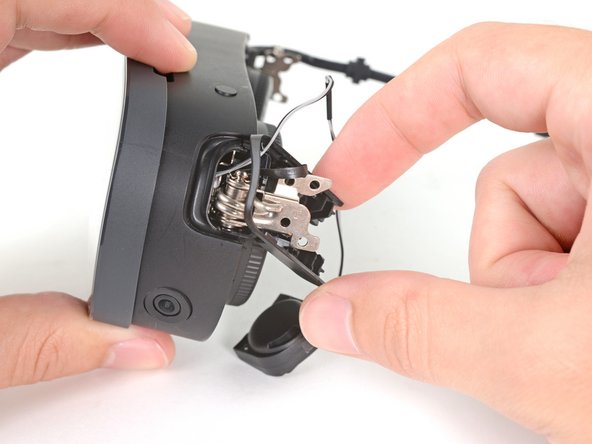
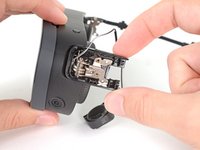
    • Slide the flat end of a spudger under the speaker to separate its adhesive.

    • Let the speaker rest next to the headset before continuing.

    • During reassembly, if your speaker adhesive isn't sticky, use Tesa 61395 Tape to re-adhere the speaker to the outer temple.

  8. Left Temple, Peel the hinge tape: crwdns2935265:08crwdnd2935265:01crwdnd2935265:02crwdne2935265:0 Left Temple, Peel the hinge tape: crwdns2935265:08crwdnd2935265:02crwdnd2935265:02crwdne2935265:0
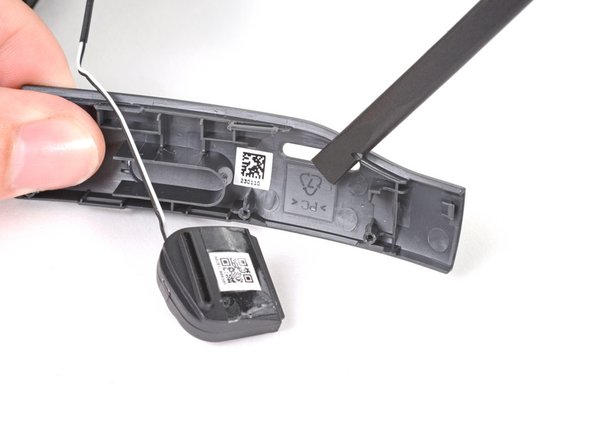
    • Use tweezers to peel back the black tape covering one of the inner hinge cover screws.

  9. Left Temple, Unfasten the inner hinge cover: crwdns2935265:09crwdnd2935265:01crwdnd2935265:01crwdne2935265:0
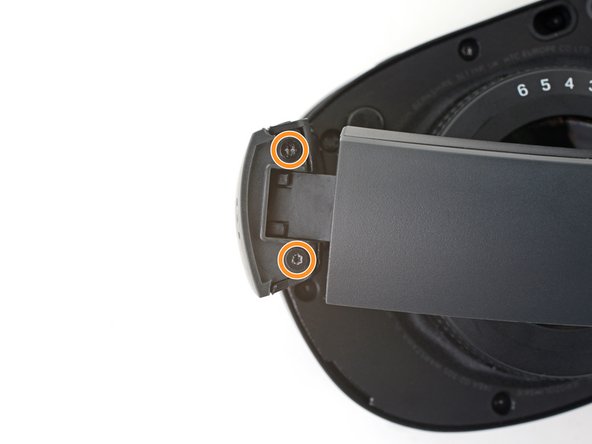
    • Use a T5 Torx screwdriver to remove the two screws securing the inner hinge cover:

    • One 3.5 mm‑long screw

    • One 4.9 mm‑long screw

  10. Left Temple, Reposition the inner hinge cover: crwdns2935265:010crwdnd2935265:01crwdnd2935265:03crwdne2935265:0 Left Temple, Reposition the inner hinge cover: crwdns2935265:010crwdnd2935265:02crwdnd2935265:03crwdne2935265:0 Left Temple, Reposition the inner hinge cover: crwdns2935265:010crwdnd2935265:03crwdnd2935265:03crwdne2935265:0
    • Don't fully remove the inner hinge cover, as it's connected by the volume button cable.

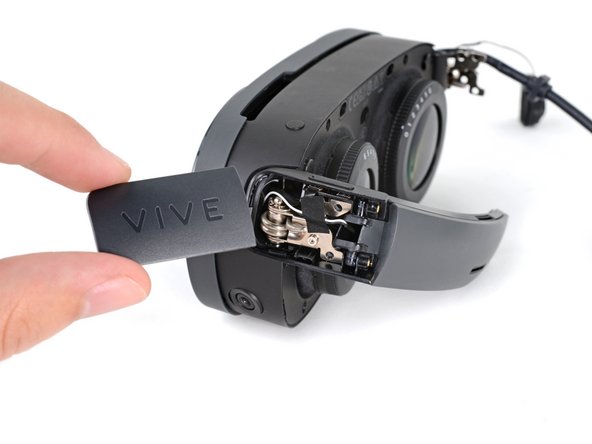
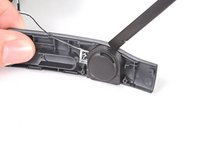
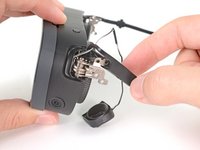
    • Rotate the inner hinge cover off its groove in the frame.

    • Let the cover hang off its volume button cable for now.

crwdns2915888:0crwdne2915888:0

To reassemble your device, follow these instructions in reverse order.

Alex Diaz-Kokaisl

crwdns2935283:001/16/22crwdne2935283:0

164,726 crwdns2915208:0crwdne2915208:0

crwdns2935297:0769crwdne2935297:0

crwdns2915084:0crwdne2915084:0

iFixit crwdns2935289:0iFixitcrwdne2935289:0

Staff

crwdns2931471:0121crwdne2931471:0

crwdns2935297:019,776crwdne2935297:0

crwdns2947412:00crwdne2947412:0

crwdns2917038:0crwdne2917038:0

crwdns2936625:0crwdne2936625:0:

crwdns2936751:024crwdne2936751:0 0

crwdns2936753:07crwdne2936753:0 0

crwdns2936753:030crwdne2936753:0 13

crwdns2942667:0crwdne2942667:0 59