crwdns2933423:0crwdne2933423:0
Leather Stitching Replacement

Leather Stitching Replacement

Mimansa (Momo) Tyagi

crwdns2944107:0crwdnd2944107:0Mimansa (Momo) Tyagicrwdnd2944107:0crwdnd2944107:0crwdnd2944107:02crwdnd2944107:0crwdne2944107:0

crwdns2944111:0July 17, 2023crwdne2944111:0

20 - 45 crwdns2931279:0crwdne2931279:0
crwdns2937799:0crwdne2937799:0

crwdns2915892:0crwdne2915892:0

crwdns2942287:0crwdne2942287:0

If you ever notice that the stitching on your wallet or leather electronic case is frayed or torn, follow this guide to replace the leather thread.

The leather stitching holds two pieces of leather together. The stitching can become torn or frayed through natural use or even by an accidental cut. If you choose not to replace it, the pieces will fall apart or even become too loose and let dirt, water, or grime inside.

This guide uses the Saddle-Stitch method but has a few adjustments to make it simpler for a first-time user. For other stitching techniques and tools, click here.

  1. Leather Stitching Replacement, Leather Stitching: crwdns2935265:01crwdnd2935265:01crwdnd2935265:03crwdne2935265:0 Leather Stitching Replacement, Leather Stitching: crwdns2935265:01crwdnd2935265:02crwdnd2935265:03crwdne2935265:0 Leather Stitching Replacement, Leather Stitching: crwdns2935265:01crwdnd2935265:03crwdnd2935265:03crwdne2935265:0
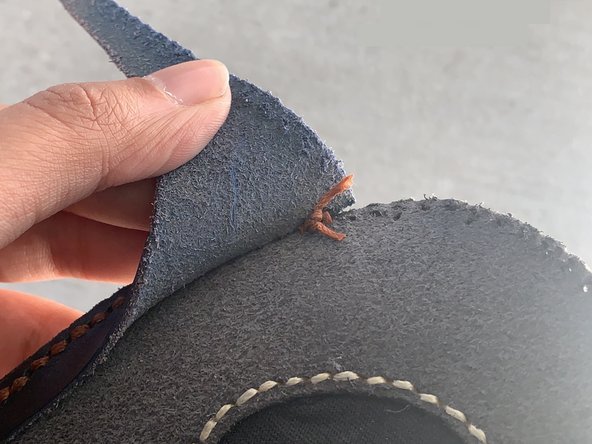
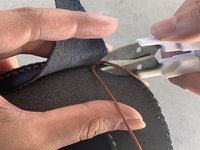
    • Using scissors, cut the thread at the seams.

  2. Leather Stitching Replacement: crwdns2935265:02crwdnd2935265:01crwdnd2935265:03crwdne2935265:0 Leather Stitching Replacement: crwdns2935265:02crwdnd2935265:02crwdnd2935265:03crwdne2935265:0 Leather Stitching Replacement: crwdns2935265:02crwdnd2935265:03crwdnd2935265:03crwdne2935265:0
    • Take the thread out with your fingers.

  3. Leather Stitching Replacement: crwdns2935265:03crwdnd2935265:01crwdnd2935265:02crwdne2935265:0 Leather Stitching Replacement: crwdns2935265:03crwdnd2935265:02crwdnd2935265:02crwdne2935265:0
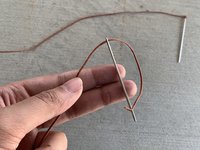
    • The new piece of leather thread should be three times the length of the stitch plus the length of the two needles.

    • Cut the thread.

    • Push one end of the thread through the eye of the needle.

    • Do the same for the other end, with the second needle.

  4. Leather Stitching Replacement: crwdns2935265:04crwdnd2935265:01crwdnd2935265:03crwdne2935265:0 Leather Stitching Replacement: crwdns2935265:04crwdnd2935265:02crwdnd2935265:03crwdne2935265:0 Leather Stitching Replacement: crwdns2935265:04crwdnd2935265:03crwdnd2935265:03crwdne2935265:0
    • To tie the thread, bring the open end of the thread to the tip of the needle.

    • Push the needle all the way through the thread.

    • Pull the thread to secure the knot at the top.

    • You do not want a short end because the knot will come loose.

  5. Leather Stitching Replacement: crwdns2935265:05crwdnd2935265:01crwdnd2935265:03crwdne2935265:0 Leather Stitching Replacement: crwdns2935265:05crwdnd2935265:02crwdnd2935265:03crwdne2935265:0 Leather Stitching Replacement: crwdns2935265:05crwdnd2935265:03crwdnd2935265:03crwdne2935265:0
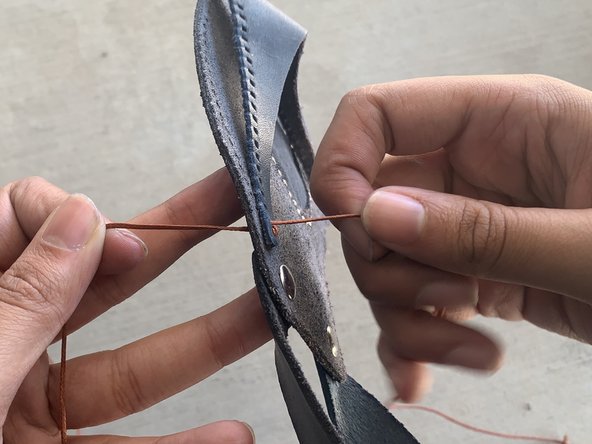
    • Line up the first hole on both pieces.

    • Push one needle all the way through.

    • Pull till the length of the thread is equal on each side.

  6. Leather Stitching Replacement: crwdns2935265:06crwdnd2935265:01crwdnd2935265:03crwdne2935265:0 Leather Stitching Replacement: crwdns2935265:06crwdnd2935265:02crwdnd2935265:03crwdne2935265:0 Leather Stitching Replacement: crwdns2935265:06crwdnd2935265:03crwdnd2935265:03crwdne2935265:0
    • You should have a needle on the right side of the leather and one on the left.

    • Push the right side needle through the second hole.

    • Push the left side need through the same hole.

    • Tug each side to tighten the stitch.

    • After tugging, you will end up having a needle on the right side and left side.

  7. Leather Stitching Replacement: crwdns2935265:07crwdnd2935265:01crwdnd2935265:01crwdne2935265:0
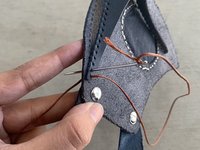
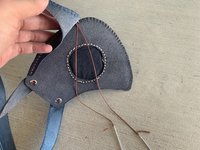
    • With each hole, make sure both needles go through to the other side and are pulled together to tighten the stitch.

    • Continue this pattern until the end.

  8. Leather Stitching Replacement: crwdns2935265:08crwdnd2935265:01crwdnd2935265:03crwdne2935265:0 Leather Stitching Replacement: crwdns2935265:08crwdnd2935265:02crwdnd2935265:03crwdne2935265:0 Leather Stitching Replacement: crwdns2935265:08crwdnd2935265:03crwdnd2935265:03crwdne2935265:0
    • To finish the stitch, we are going to push the needle into the second-to-last hole.

    • It should not pass through both pieces, only the one piece.

    • Do this for both sides.

  9. Leather Stitching Replacement: crwdns2935265:09crwdnd2935265:01crwdnd2935265:03crwdne2935265:0 Leather Stitching Replacement: crwdns2935265:09crwdnd2935265:02crwdnd2935265:03crwdne2935265:0 Leather Stitching Replacement: crwdns2935265:09crwdnd2935265:03crwdnd2935265:03crwdne2935265:0
    • Tie the finishing knot by crossing the threads and pushing the needle through the made hole.

    • Pull to tighten and repeat once.

  10. Leather Stitching Replacement: crwdns2935265:010crwdnd2935265:01crwdnd2935265:03crwdne2935265:0 Leather Stitching Replacement: crwdns2935265:010crwdnd2935265:02crwdnd2935265:03crwdne2935265:0 Leather Stitching Replacement: crwdns2935265:010crwdnd2935265:03crwdnd2935265:03crwdne2935265:0
    • Use the scissors to cut off the excess thread.

crwdns2935217:0crwdne2935217:0

crwdns2935227:0crwdne2935227:0

Mimansa (Momo) Tyagi

crwdns2935283:008/27/20crwdne2935283:0

405 crwdns2915208:0crwdne2915208:0

crwdns2935295:0crwdne2935295:0

crwdns2915084:0crwdne2915084:0

Embry-Riddle Aeronautical University, Team S3-G21, Cromer Twal Fall 2020 crwdns2935289:0Embry-Riddle Aeronautical University, Team S3-G21, Cromer Twal Fall 2020crwdne2935289:0

ERAU-CROMER TWAL-F20S3G21

crwdns2934841:01crwdne2934841:0

crwdns2935297:02crwdne2935297:0

crwdns2947412:00crwdne2947412:0

crwdns2917038:0crwdne2917038:0

crwdns2936625:0crwdne2936625:0:

crwdns2936751:024crwdne2936751:0 2

crwdns2936753:07crwdne2936753:0 4

crwdns2936753:030crwdne2936753:0 51

crwdns2942667:0crwdne2942667:0 1,789