crwdns2915892:0crwdne2915892:0
The gaskets on these machines need to be replaced from time to time as they are subject to heavy wear. This repair is not very difficult.
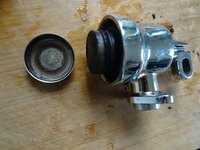
The repair is shown on the Professional model, but is basically the same for all these machines. Replacing the boiler gasket is not shown.
crwdns2942213:0crwdne2942213:0
-
-
Unscrew and remove the tank cap. Pour out any remaining water.
-
Remove the drip tray.
-
Remove the steam pipe.
-
If necessary, replace the two gaskets on the steam pipe.
-
-
-
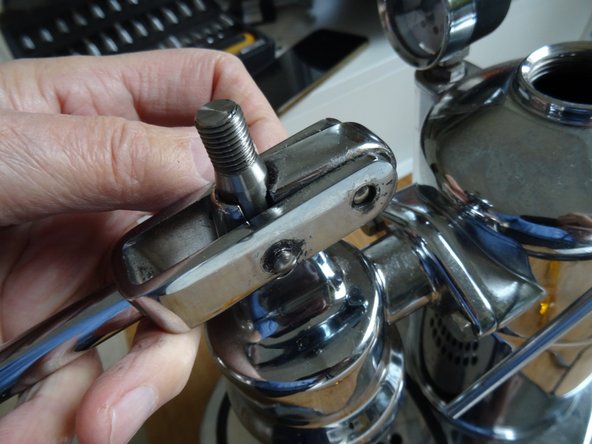
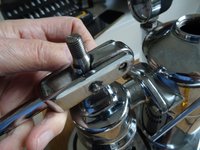
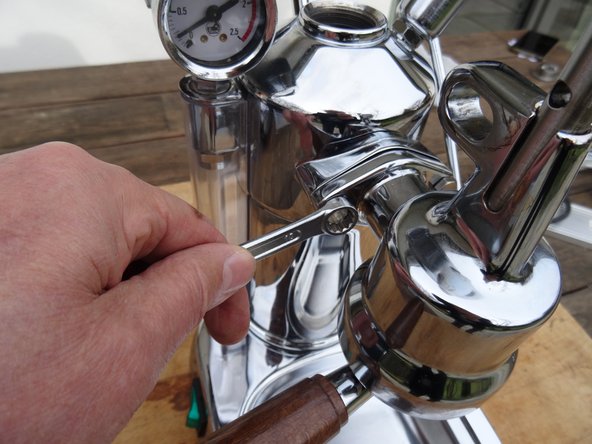
The two M14 cap nuts at the top of the piston rod are locked against each other. Hold the lower nut in place with an open-end wrench and unscrew the upper nut.
-
Remove both nuts and keep them in a safe place.
-
-
-
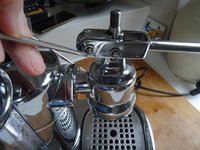
Push the two ring pins out of their grooves on one side, using a suitable tool. Be careful not to scratch the chrome finish, so it's best to use a plastic tool. Remove the rings.
-
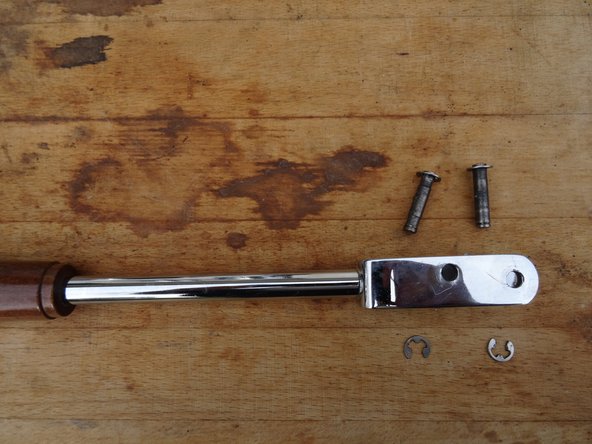
Push the pins out. The lever is now ready to be removed.
-
The rear pin slides into a metal tube. Push it out and keep it in a safe place.
-
-
-
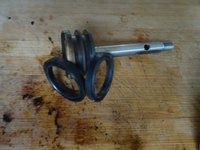
Keep the lever arm and its components in a safe place.
-
Clean everything thoroughly.
-
-
-
-
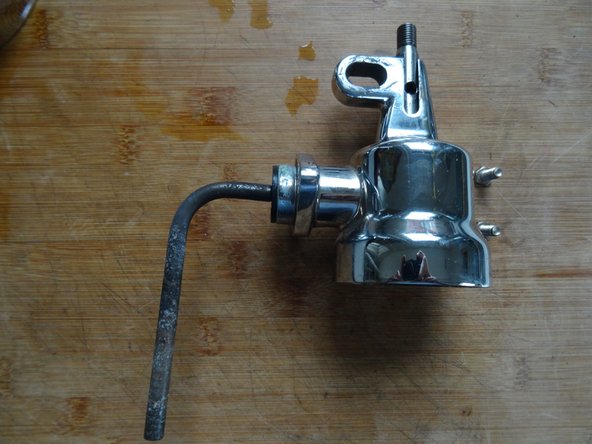
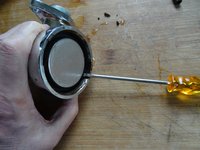
The unit is attached to the boiler with two M10 hexagon screws. Unscrew the two screws.
-
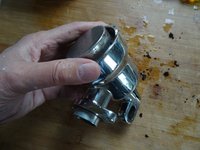
Remove the unit.
-
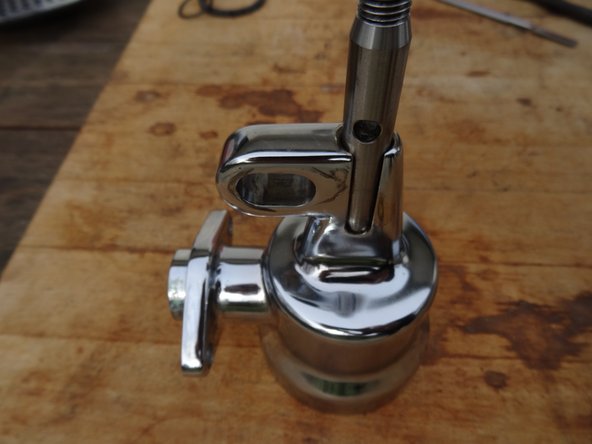
Pay attention to the riser pipe. You can carefully unscrew it. Replace the black sealing plug during reassembly if necessary.
-
-
-
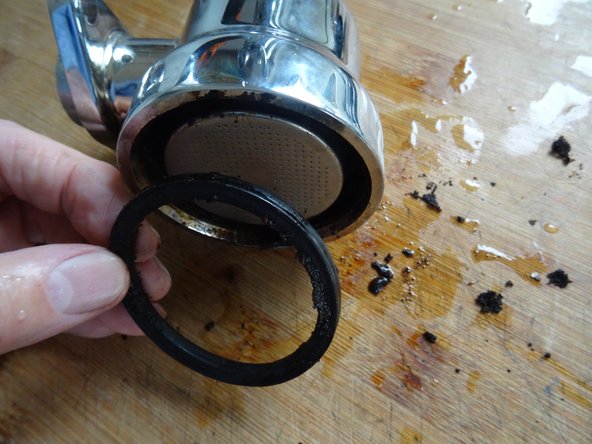
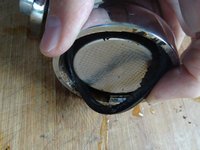
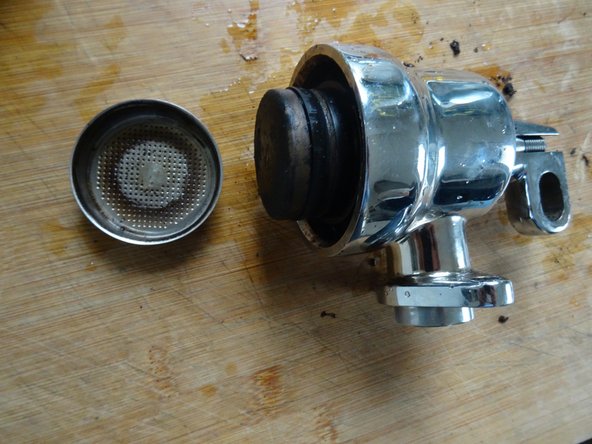
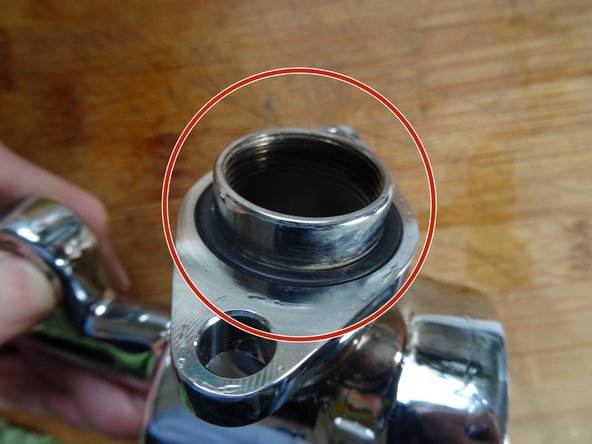
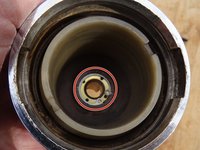
Now remove the large gasket on the sieve, using a suitable tool. Work extra carefully, so you don't damage the metal surfaces.
-
When reassembling, pay attention to how the gasket is positioned; it is not symmetrical, the flat side is on the outside.
-
-
-
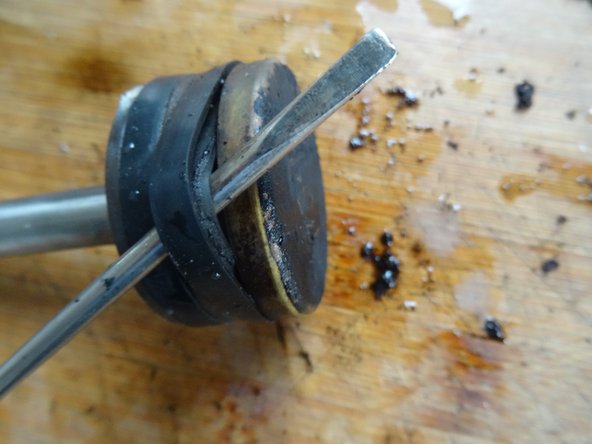
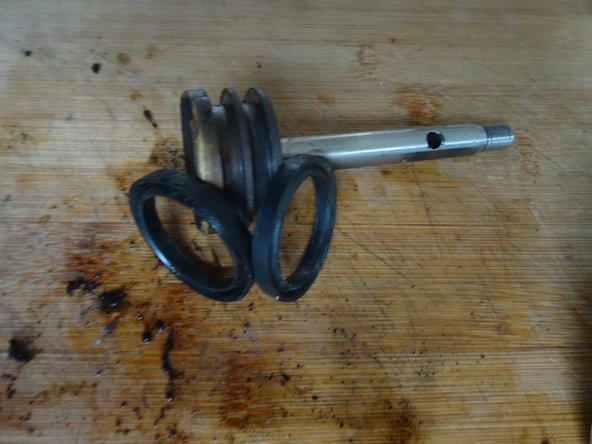
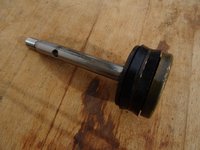
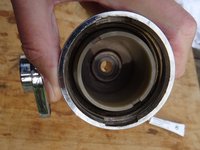
Remove both lip gasket rings on the piston.
-
Be mindful of the direction when assembling: The lip always points to the pressure side, so for the upper gasket it points up, and for the lower one it points down.
-
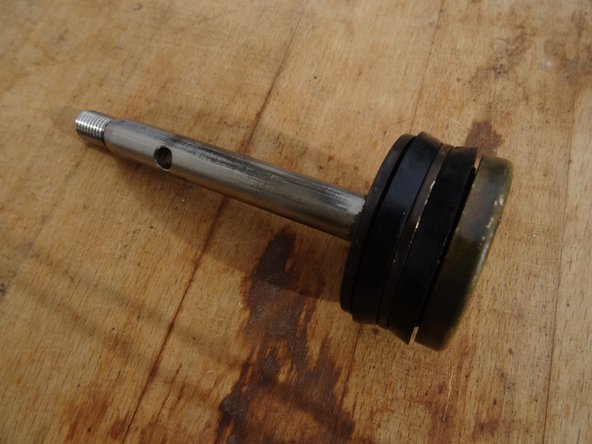
Picture 3 shows the clean piston with two new gaskets.
-
-
-
Remove the gasket between the unit and the boiler.
-
-
-
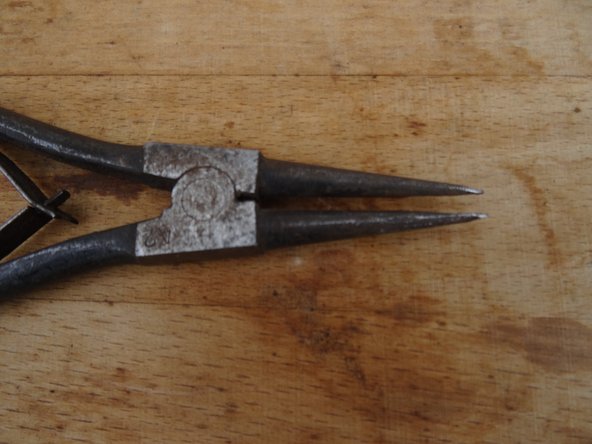
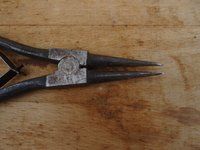
The piston rod inside the cylinder is sealed with a silicone lip gasket. To replace it, you must first loosen the circlip. This is a bit tricky, so special circlip pliers are a big help.
-
Press both holes on the circlip together. You can then remove the ring from its groove.
-
There is a perforated brass disc under the circlip, and a silicone gasket under that. Remove the brass disc. Use a plastic tool to push the silicone gasket out from the other side.
-
-
-
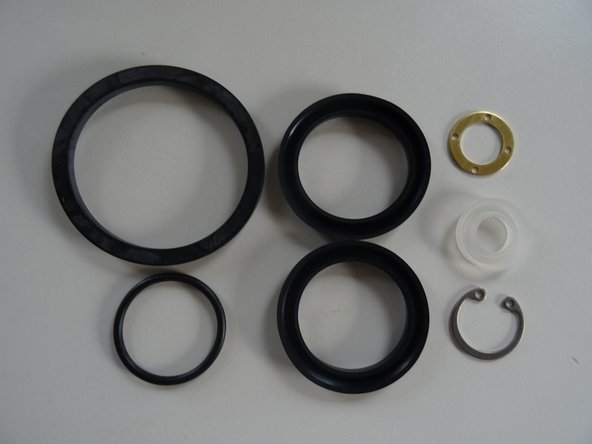
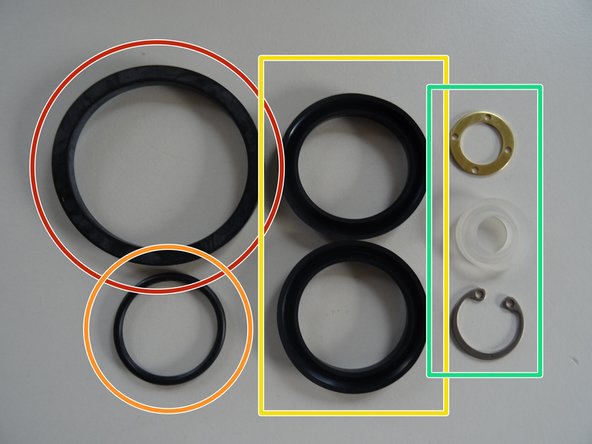
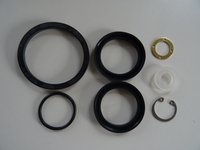
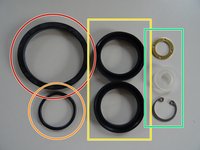
Here are the new rings:
-
Gasket on the sieve
-
Gasket between the unit and boiler
-
Two piston rings
-
Brass disc, silicone gasket and circlip on the piston rod
-
Clean each part thoroughly. If you notice limescale in the boiler, now is a good time to remove it.
-
Lightly grease the new sealing rings and sliding parts with food-safe silicone and reassemble everything.
-


Follow the steps in reverse order to reassemble your machine.
crwdns2935221:0crwdne2935221:0
crwdns2935227:0crwdne2935227:0
crwdns2934873:0crwdne2934873:0
100%


crwdns2934885:0crwdne2934885:0 crwdns2934875:0crwdne2934875:0
crwdns2934877:0crwdne2934877:0 ›
crwdns2935287:0crwdne2935287:0

Repair is War on Entropy crwdns2935289:0Repair is War on Entropycrwdne2935289:0
Community
crwdns2931471:032crwdne2931471:0
crwdns2935297:01.563crwdne2935297:0
crwdns2947410:01crwdne2947410:0
Sehr anschaulich beschrieben. Gute und hilfreiche Bilder. Mille Gracie.