crwdns2915892:0crwdne2915892:0
In this guide you will be removing the back panel to access the motherboard. Once you have reached the motherboard you will remove the camera lens from the motherboard.
crwdns2942213:0crwdne2942213:0
-
-
Place the phone face down on the table.
-
Pull down the tab below the battery with your fingernail or an opening tool.
-
Lift the battery out.
-
-
-
Locate the five rubber covers on the back panel of the phone.
-
Use a metal probe to remove each rubber cover and expose the screws underneath.
-
-
-
-
Locate the six 2.5-millimeter Phillips #00 screws on the back panel.
-
Remove all six screws with a Phillips #00 screwdriver.
-
-
-
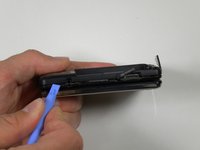
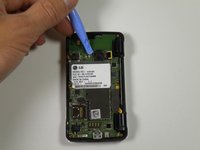
Locate the seam around the edge of the phone.
-
Insert a plastic opening tool into the seam and gently pry to release the tabs.
-
Work around the phone until all tabs are released.
-
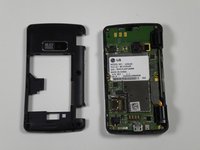
Remove the back panel.
-
-
-
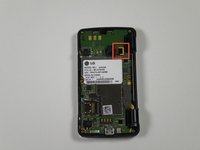
Locate the ribbon attached to the lens of the camera.
-
Place the plastic opening tool in between the logic board and ribbon.
-
Lift up the plastic opening to detach the ribbon from the logic board.
-
-
-
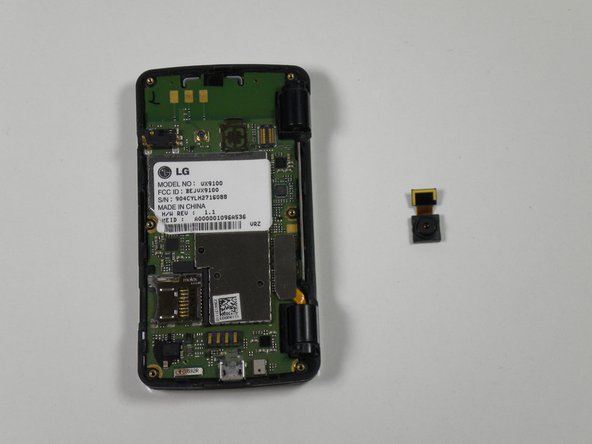
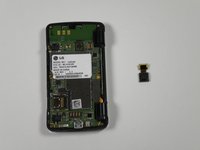
Place the plastic opening tool in between the lens and the logic board.
-
Detach the lens from the logic board using the plastic opening tool by popping it out.
-
Take the entire lens and ribbon off of the logic board.
-


To reassemble your device, follow these instructions in reverse order.
crwdns2935221:0crwdne2935221:0
crwdns2935227:0crwdne2935227:0
crwdns2935287:0crwdne2935287:0

Cal Poly, Team 16-55, Forte Fall 2012 crwdns2935289:0Cal Poly, Team 16-55, Forte Fall 2012crwdne2935289:0
CPSU-FORTE-F12S16G55
crwdns2931471:05crwdne2931471:0
crwdns2935297:014crwdne2935297:0