crwdns2933423:0crwdne2933423:0
crwdns2947577:0crwdnd2947577:0crwdne2947577:0

LG Xenon Speaker Replacement

crwdns2942213:0crwdne2942213:0

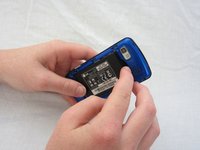
  1. LG Xenon Speaker Replacement, Back Case: crwdns2935265:01crwdnd2935265:01crwdnd2935265:01crwdne2935265:0
    • Turn the phone so the back side is face up.

    crwdns2952109:0crwdne2952109:0
  2. LG Xenon Speaker Replacement: crwdns2935265:02crwdnd2935265:01crwdnd2935265:02crwdne2935265:0 LG Xenon Speaker Replacement: crwdns2935265:02crwdnd2935265:02crwdnd2935265:02crwdne2935265:0
    • Use your thumb to press on the small ridge at the bottom of the phone, then push upward to slide off the back casing.

    crwdns2952109:0crwdne2952109:0
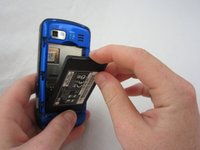
  3. LG Xenon Speaker Replacement, Battery: crwdns2935265:03crwdnd2935265:01crwdnd2935265:02crwdne2935265:0 LG Xenon Speaker Replacement, Battery: crwdns2935265:03crwdnd2935265:02crwdnd2935265:02crwdne2935265:0
    • Use your index finger to pull the top of the battery out from the top center divot. Then pull the battery towards yourself to remove it from the compartment.

    crwdns2952109:0crwdne2952109:0
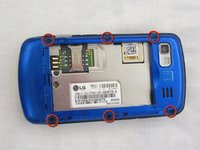
  4. LG Xenon Speaker Replacement, Motherboard: crwdns2935265:04crwdnd2935265:01crwdnd2935265:02crwdne2935265:0 LG Xenon Speaker Replacement, Motherboard: crwdns2935265:04crwdnd2935265:02crwdnd2935265:02crwdne2935265:0
    • Use a Phillips #00 screwdriver to remove the six 2.4mm screws, which secure the back panel.

    crwdns2952109:0crwdne2952109:0
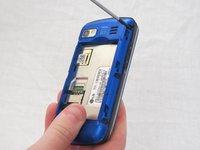
  5. LG Xenon Speaker Replacement: crwdns2935265:05crwdnd2935265:01crwdnd2935265:01crwdne2935265:0
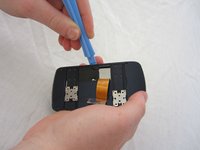
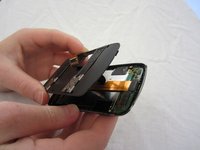
    • Push a spudger or small tool under the inner edge of the back panel and gently pry upward to separate it from the main body.

    crwdns2952109:0crwdne2952109:0
  6. LG Xenon Speaker Replacement: crwdns2935265:06crwdnd2935265:01crwdnd2935265:02crwdne2935265:0 LG Xenon Speaker Replacement: crwdns2935265:06crwdnd2935265:02crwdnd2935265:02crwdne2935265:0
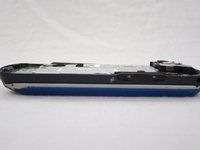
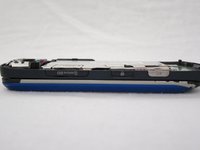
    • Pop off the camera, lock, and volume buttons from the side of the phone using tweezers.

    crwdns2952109:0crwdne2952109:0
  7. LG Xenon Speaker Replacement: crwdns2935265:07crwdnd2935265:01crwdnd2935265:02crwdne2935265:0 LG Xenon Speaker Replacement: crwdns2935265:07crwdnd2935265:02crwdnd2935265:02crwdne2935265:0
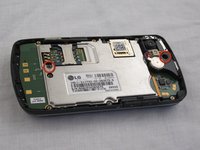
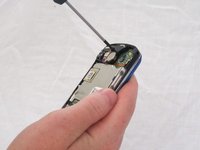
    • Use the Phillips #00 screwdriver to remove the two 3mm screws, which secure the motherboard.

    crwdns2952109:0crwdne2952109:0
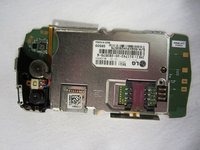
  8. LG Xenon Speaker Replacement: crwdns2935265:08crwdnd2935265:01crwdnd2935265:02crwdne2935265:0 LG Xenon Speaker Replacement: crwdns2935265:08crwdnd2935265:02crwdnd2935265:02crwdne2935265:0
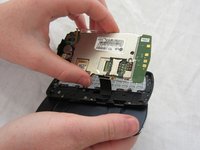
    • Carefully lift and remove the motherboard from the main body.

    • The connector cable will still be attached to the motherboard. Any damage to the connector cable may permanently disable the phone.

    crwdns2952109:0crwdne2952109:0
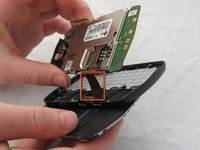
  9. LG Xenon Speaker Replacement: crwdns2935265:09crwdnd2935265:01crwdnd2935265:02crwdne2935265:0 LG Xenon Speaker Replacement: crwdns2935265:09crwdnd2935265:02crwdnd2935265:02crwdne2935265:0
    • Carefully unclip the metal tab to separate the connector cable from the motherboard.

    crwdns2952109:0crwdne2952109:0
  10. LG Xenon Speaker Replacement: crwdns2935265:010crwdnd2935265:01crwdnd2935265:02crwdne2935265:0 LG Xenon Speaker Replacement: crwdns2935265:010crwdnd2935265:02crwdnd2935265:02crwdne2935265:0
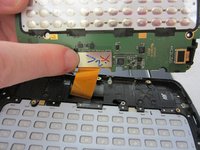
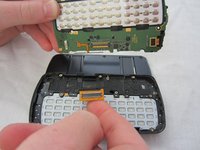
    • Once the connector cable is detached from the motherboard, you have successfully removed the motherboard from the phone.

    crwdns2952109:0crwdne2952109:0
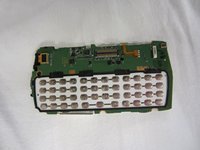
  11. LG Xenon Speaker Replacement, Keyboard: crwdns2935265:011crwdnd2935265:01crwdnd2935265:01crwdne2935265:0
    • Turn the motherboard over and carefully remove the keypad from the motherboard.

    • The keyboard may be sitting loosely in the case (not attached to the motherboard). Carefully remove keyboard from case.

    crwdns2952109:0crwdne2952109:0
  12. LG Xenon Speaker Replacement, LCD: crwdns2935265:012crwdnd2935265:01crwdnd2935265:01crwdne2935265:0
    • After removing the motherboard and keyboard, unscrew eight 1.6mm Phillips #00 screws in the middle of the phone.

    crwdns2952109:0crwdne2952109:0
  13. LG Xenon Speaker Replacement: crwdns2935265:013crwdnd2935265:01crwdnd2935265:01crwdne2935265:0
    • Remove slider piece.

    • Pay close attention that you don’t lose the spring.

    • Carefully remove the spring.

    crwdns2952109:0crwdne2952109:0
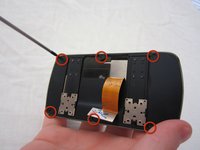
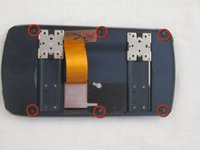
  14. LG Xenon Speaker Replacement: crwdns2935265:014crwdnd2935265:01crwdnd2935265:02crwdne2935265:0 LG Xenon Speaker Replacement: crwdns2935265:014crwdnd2935265:02crwdnd2935265:02crwdne2935265:0
    • Remove six 2.25mm Phillips #00 screws along the outside of the case.

    crwdns2952109:0crwdne2952109:0
  15. LG Xenon Speaker Replacement: crwdns2935265:015crwdnd2935265:01crwdnd2935265:02crwdne2935265:0 LG Xenon Speaker Replacement: crwdns2935265:015crwdnd2935265:02crwdnd2935265:02crwdne2935265:0
    • Using the plastic opening tool, carefully open and remove the case. Slide the tool along the edge and pry upwards to open.

    crwdns2952109:0crwdne2952109:0
  16. LG Xenon Speaker Replacement: crwdns2935265:016crwdnd2935265:01crwdnd2935265:01crwdne2935265:0
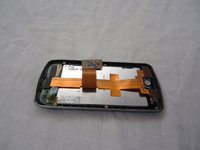
    • Remove the black electrical tape holding the LCD to the screen.

    crwdns2952109:0crwdne2952109:0
  17. LG Xenon Speaker Replacement: crwdns2935265:017crwdnd2935265:01crwdnd2935265:01crwdne2935265:0
    • Un-clasp the small tab in the top right corner.

    crwdns2952109:0crwdne2952109:0
  18. LG Xenon Speaker Replacement: crwdns2935265:018crwdnd2935265:01crwdnd2935265:03crwdne2935265:0 LG Xenon Speaker Replacement: crwdns2935265:018crwdnd2935265:02crwdnd2935265:03crwdne2935265:0 LG Xenon Speaker Replacement: crwdns2935265:018crwdnd2935265:03crwdnd2935265:03crwdne2935265:0
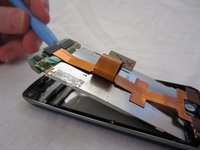
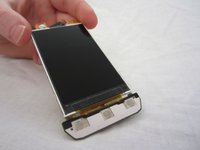
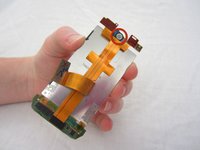
    • Unhook the LCD from tabs on the bottom using the plastic opening tool.

    • Remove the LCD. Be careful, the LCD screen is fragile.

    crwdns2952109:0crwdne2952109:0
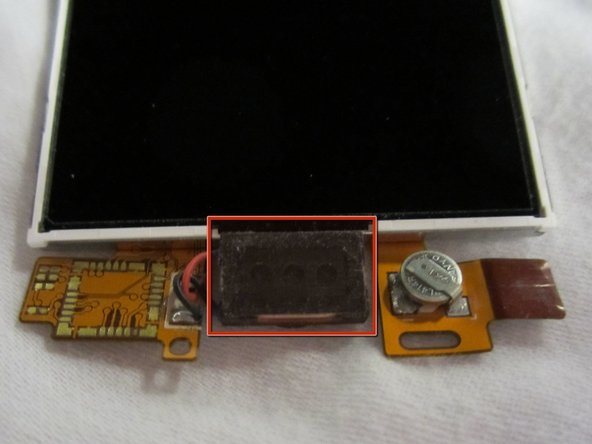
  19. LG Xenon Speaker Replacement, Speaker: crwdns2935265:019crwdnd2935265:01crwdnd2935265:02crwdne2935265:0 LG Xenon Speaker Replacement, Speaker: crwdns2935265:019crwdnd2935265:02crwdnd2935265:02crwdne2935265:0
    • The speaker is attached to the top of the LCD.

    crwdns2952109:0crwdne2952109:0
crwdns2915888:0crwdne2915888:0

To reassemble your device, follow these instructions in reverse order.

crwdns2935227:0crwdne2935227:0

Micaela Saqui

crwdns2935283:004/19/12crwdne2935283:0

78 crwdns2915208:0crwdne2915208:0

crwdns2935297:07crwdne2935297:0

crwdns2935287:0crwdne2935287:0

Cal Poly, Team 9-41, Regan Spring 2012 crwdns2935289:0Cal Poly, Team 9-41, Regan Spring 2012crwdne2935289:0

CPSU-REGAN-S12S9G41

crwdns2931471:05crwdne2931471:0

crwdns2935297:019crwdne2935297:0

crwdns2947412:00crwdne2947412:0

crwdns2917038:0crwdne2917038:0

crwdns2936625:0crwdne2936625:0:

crwdns2936751:024crwdne2936751:0 3

crwdns2936753:07crwdne2936753:0 9

crwdns2936753:030crwdne2936753:0 49

crwdns2942667:0crwdne2942667:0 1,127