crwdns2933423:0crwdne2933423:0

LG Tribute Touchscreen Replacement

crwdns2942213:0crwdne2942213:0

  1. LG Tribute Touchscreen Replacement, Battery: crwdns2935265:01crwdnd2935265:01crwdnd2935265:02crwdne2935265:0 LG Tribute Touchscreen Replacement, Battery: crwdns2935265:01crwdnd2935265:02crwdnd2935265:02crwdne2935265:0
    • Use the plastic opening tool to pry off the back cover.

  2. LG Tribute Touchscreen Replacement: crwdns2935265:02crwdnd2935265:01crwdnd2935265:01crwdne2935265:0
    • Lift the battery out of place.

    • When replacing the battery, the (+) and (-) symbols must match up with the phone's charging nodes.

  3. LG Tribute Touchscreen Replacement, Mid-panel: crwdns2935265:03crwdnd2935265:01crwdnd2935265:02crwdne2935265:0 LG Tribute Touchscreen Replacement, Mid-panel: crwdns2935265:03crwdnd2935265:02crwdnd2935265:02crwdne2935265:0
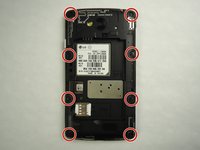
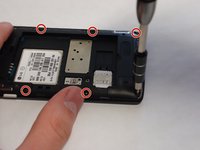
    • Remove eight 4mm screws using a Phillips head 000 screwdriver (PH000).

  4. LG Tribute Touchscreen Replacement: crwdns2935265:04crwdnd2935265:01crwdnd2935265:02crwdne2935265:0 LG Tribute Touchscreen Replacement: crwdns2935265:04crwdnd2935265:02crwdnd2935265:02crwdne2935265:0
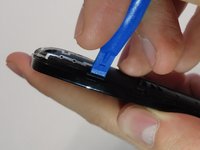
    • Use a plastic opening tool to loosen the tabs around the edge of the phone.

    • Inserting a thin piece of plastic will help prevent opened tabs from locking back into place.

    • This step can be frustrating, but requires patience. Avoid the temptation to pry the panel loose. Using excessive force may break the delicate tabs.

  5. LG Tribute Touchscreen Replacement, Motherboard: crwdns2935265:05crwdnd2935265:01crwdnd2935265:01crwdne2935265:0
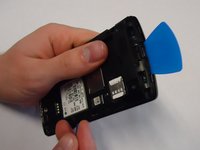
    • Use a plastic opening tool to disconnect the touchscreen from the motherboard.

    • The motherboard will be completely free from the front panel after this step.

  6. LG Tribute Touchscreen Replacement, Touchscreen: crwdns2935265:06crwdnd2935265:01crwdnd2935265:03crwdne2935265:0 LG Tribute Touchscreen Replacement, Touchscreen: crwdns2935265:06crwdnd2935265:02crwdnd2935265:03crwdne2935265:0 LG Tribute Touchscreen Replacement, Touchscreen: crwdns2935265:06crwdnd2935265:03crwdnd2935265:03crwdne2935265:0
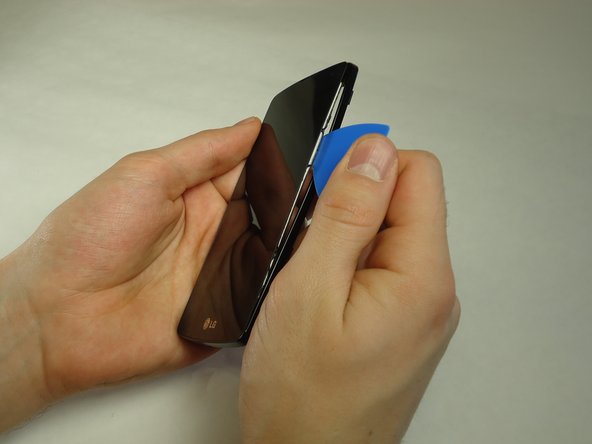
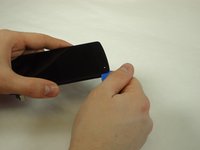
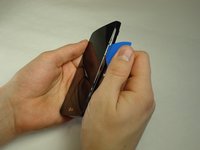
    • Use a thin piece of plastic to carefully peel the frame away from the touchscreen glass.

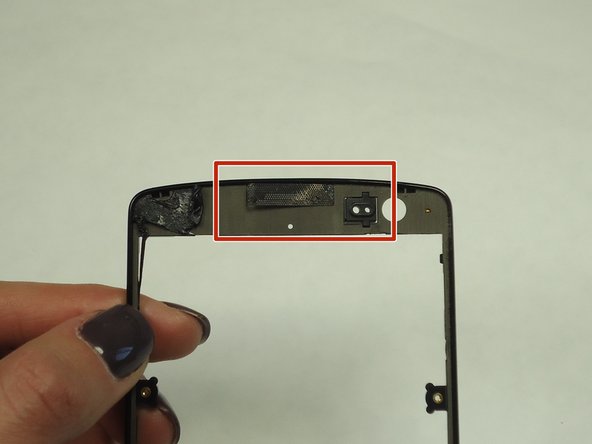
    • When the frame is completely free, remove all of the glue.

    • When removing the glue, be sure the speaker grill and LED light spacer do not dislodge.

crwdns2915888:0crwdne2915888:0

To reassemble your device, follow these instructions in reverse order.

crwdns2935229:012crwdne2935229:0

Aaron Amdall

crwdns2935283:001/25/16crwdne2935283:0

940 crwdns2915208:0crwdne2915208:0

crwdns2935297:04crwdne2935297:0

crwdns2915084:0crwdne2915084:0

University of Wisconsin Stout, Team 1-1, Schneider-Bateman Spring 2016 crwdns2935289:0University of Wisconsin Stout, Team 1-1, Schneider-Bateman Spring 2016crwdne2935289:0

UWSTOUT-SCHNEIDER-BATEMAN-S16S1G1

crwdns2931471:03crwdne2931471:0

crwdns2935297:016crwdne2935297:0

crwdns2944067:04crwdne2944067:0

thank you for all ypu work at web site

salah dholman - crwdns2934203:0crwdne2934203:0

Can you peel away lens without taking apart ?

mikeknapik1 - crwdns2934203:0crwdne2934203:0

Must I remove the motherboard to replace the front cover with the glass?

Deb Schell - crwdns2934203:0crwdne2934203:0

I messed up the speaker is there a way to replace or fix it

bigestbabybratt - crwdns2934203:0crwdne2934203:0

crwdns2917038:0crwdne2917038:0

crwdns2936625:0crwdne2936625:0:

crwdns2936751:024crwdne2936751:0 0

crwdns2936753:07crwdne2936753:0 2

crwdns2936753:030crwdne2936753:0 15

crwdns2942667:0crwdne2942667:0 16,136