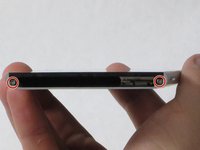
crwdns2915892:0crwdne2915892:0
In this guide, you will be removing the rear camera sensor. Use this guide if you find the rear camera has trouble focusing.
crwdns2942213:0crwdne2942213:0
-
-
While holding the battery release button, pull the bottom end of the phone out of the body.
-
-
-
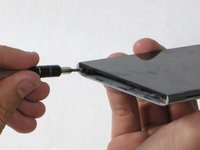
Insert the sim card eject tool (0.8mm sim card eject head) into the small hole on the sim card tray.
-
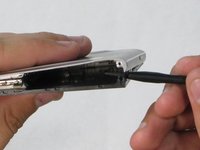
Press inward with some force to eject the tray.
-
Pull the sim card tray out of the phone.
-
-
-
Remove the two 5.5mm Phillips #00 screws from the base of the phone.
-
-
-
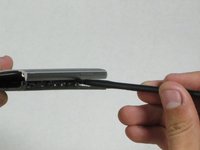
Insert the plastic opening tool into the seam between the glass screen and the metal body.
-
Pry the glass from the body only a slight amount.
Holy this step is hard
It is, i can’t seem to do it too easily either. Maybe i need to heat it up? I don’t want to damage it as it will still be used as a camera.
ayeeeee -
-
-
-
-
Insert the Spudger into the now open space between the body and screen.
-
Push inward to separate the screen even more.
-
Slowly slide the nylon spudger up the edge the phone till the screen pops out of the body.
My LCD started to let loose using this way to saparate the top and bottom of the phone.
I used a guitar pick and slided it from the bottom to the top like the dude in this video: https://www.youtube.com/watch?v=XV10zyw8...
Didn’t had to use a lot of force this way, and my screen almost didn’t bend !
Yep! I did it also with this method. Wayy better and easier ;)
My screen cracked taking it out following ifixit method . Right when I got to the part where it starts to curve at the top. Just shattered.
I found it easier to run the tool or a pick along the sides, and then sort of hinge the thing open at the top rather than running completely around the screen. It gets a little dicey where the glass starts to curve.
-
-
-
Peel the screen away from the body. The two parts should be completely separated.
-
-
-
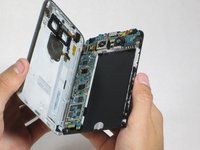
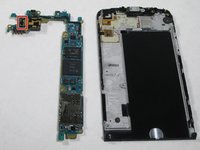
Once the screen has been separated from the back of the phone, now you can remove the motherboard.
-
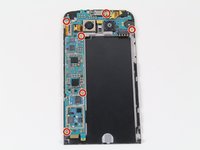
Using the #00 Philips head, remove the six 2.7mm Phillips screws.
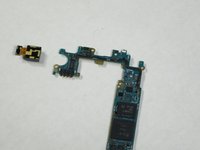
Pry up on the connector to remove the camera before trying to lift motherboard
That is so important he needs to edit this quickly
need to remove the 1 back & the fromt camera connectors..
-
-
-
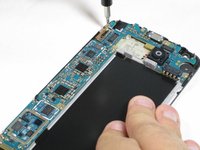
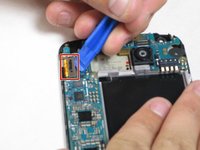
Insert the plastic opening tool between the screen-ribbon-connector and the motherboard, then pull up. It should pop out easily.
-
-
-
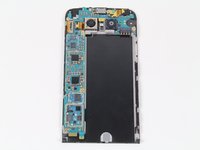
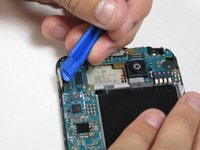
Separate the motherboard of the phone from the screen of the phone
Don't forget to take out the speaker and the rubber parts that need to be transferred to the other frame.
where and the !&&* are pictures or even any explanation whatsoever of replacing a cracked screen one wrong move via this poor por set instruction fricking breaks it all this guide should be removed now!
I had to move over from old to new assembly:
rubberpart next to speaker contacts
flat plasticpart under speaker
speaker
rubberpart between speaker and front camera, sits then on two tiny sensors on motherboard
all 3 cameras
We had to move to the new assembly:
tiny rubber part to the left of the speaker contacts (pinned by the plastic speaker housing)
speaker (aka earpiece - step 10)
plastic speaker housing (aka earpiece casing - step 11)
tiny front facing camera
left rear camera (the middle rear camera stayed on the logic board).
other than that, the guide, combined with careful observation, was help us successfully replace the broken screen.
-
-
crwdns2935267:0crwdne2935267:0Tweezers$4.99
-
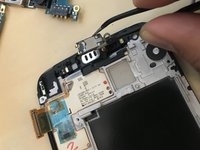
Make sure to transfer the earpiece from the old screen to the new screen or else you wouldn't be able to hear anyone when you make phone calls!
-
The component is fragile so don't try to force it to come out with a pair of tweezers. A pick should be able to wedge it out.
-
Be careful with the adhesive that's connected to it. It's easy to pull out.
I have a G5 SE. The earpiece is slightly different. I pried close to the screw and the whole plastic casing came out as one. Skip step 11. The regular G5 looks like this guide.
-
-
-
Also remove the earpiece casing from the old screen by popping it out with a pair of tweezers.
-
-
-
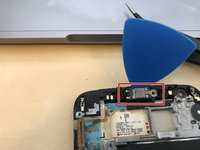
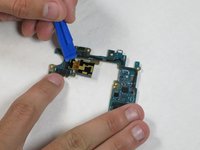
Using the plastic opening tool, remove the ribbon attaching the sensor to the motherboard.
-


To reassemble your device, follow these instructions in reverse order.
To reassemble your device, follow these instructions in reverse order.
crwdns2935221:0crwdne2935221:0
crwdns2935229:06crwdne2935229:0

crwdns2915084:0crwdne2915084:0

Cal Poly, Team 18-2, Forte Fall 2016 crwdns2935289:0Cal Poly, Team 18-2, Forte Fall 2016crwdne2935289:0
CPSU-FORTE-F16S18G2
crwdns2931471:04crwdne2931471:0
crwdns2935297:015crwdne2935297:0
crwdns2947410:01crwdne2947410:0
Is that the camera sensor that has been removed or the wide angle camera?