crwdns2933423:0crwdne2933423:0

Kyvol Cybovac L20 Sensor Replacement

crwdns2942213:0crwdne2942213:0

  1. Kyvol Cybovac L20 Sensor Replacement, Battery: crwdns2935265:01crwdnd2935265:01crwdnd2935265:01crwdne2935265:0
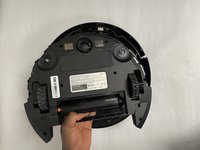
    • Begin with the device laying on a flat surface with the power button facing up.

  2. Kyvol Cybovac L20 Sensor Replacement: crwdns2935265:02crwdnd2935265:01crwdnd2935265:02crwdne2935265:0 Kyvol Cybovac L20 Sensor Replacement: crwdns2935265:02crwdnd2935265:02crwdnd2935265:02crwdne2935265:0
    • Remove both of the side brushes.

  3. Kyvol Cybovac L20 Sensor Replacement: crwdns2935265:03crwdnd2935265:01crwdnd2935265:01crwdne2935265:0
    • Use a Phillips #1 screwdriver to remove two 1 mm screws that secure the panel.

    • Remove the battery panel.

  4. Kyvol Cybovac L20 Sensor Replacement: crwdns2935265:04crwdnd2935265:01crwdnd2935265:02crwdne2935265:0 Kyvol Cybovac L20 Sensor Replacement: crwdns2935265:04crwdnd2935265:02crwdnd2935265:02crwdne2935265:0
    • Slightly lift the battery out of the compartment.

    • Disconnect the battery connector.

    • Completely remove the battery.

  5. Kyvol Cybovac L20 Sensor Replacement, Sensor: crwdns2935265:05crwdnd2935265:01crwdnd2935265:01crwdne2935265:0
    • Remove the eight 12.2 mm Phillips screws.

  6. Kyvol Cybovac L20 Sensor Replacement: crwdns2935265:06crwdnd2935265:01crwdnd2935265:03crwdne2935265:0 Kyvol Cybovac L20 Sensor Replacement: crwdns2935265:06crwdnd2935265:02crwdnd2935265:03crwdne2935265:0 Kyvol Cybovac L20 Sensor Replacement: crwdns2935265:06crwdnd2935265:03crwdnd2935265:03crwdne2935265:0
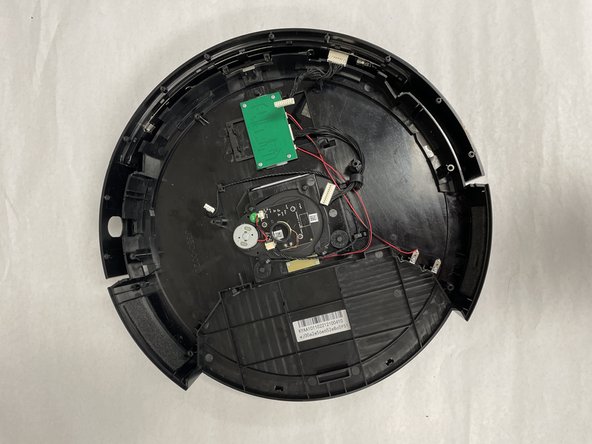
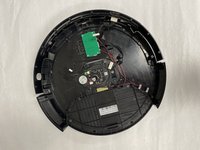
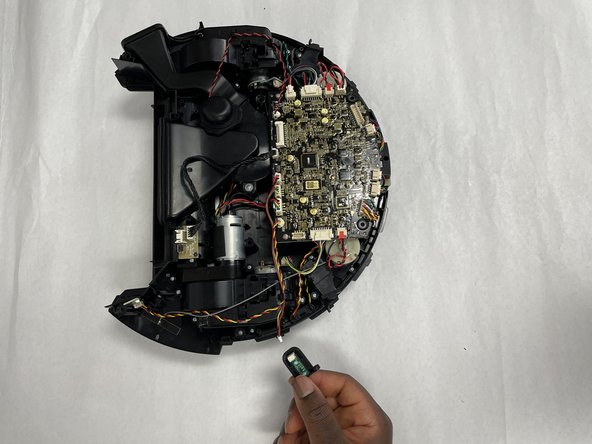
    • Lift the body away from the base and disconnect all connectors between the two halves.

  7. Kyvol Cybovac L20 Sensor Replacement: crwdns2935265:07crwdnd2935265:01crwdnd2935265:01crwdne2935265:0
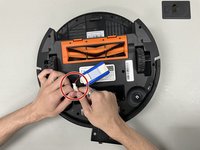
    • Remove the two 8 mm Phillips screws that secure the sensor.

  8. Kyvol Cybovac L20 Sensor Replacement: crwdns2935265:08crwdnd2935265:01crwdnd2935265:02crwdne2935265:0 Kyvol Cybovac L20 Sensor Replacement: crwdns2935265:08crwdnd2935265:02crwdnd2935265:02crwdne2935265:0
    • Use a spudger or your fingernails to gently walk the white connector directly out of its port.

    • Remove the sensor.

crwdns2915888:0crwdne2915888:0

To reassemble your device, follow these instructions in reverse order.

Brad

crwdns2935283:004/01/24crwdne2935283:0

397 crwdns2915208:0crwdne2915208:0

crwdns2935297:03crwdne2935297:0

crwdns2915084:0crwdne2915084:0

IUPUI, Team 1-1, Harley Spring 2024 crwdns2935289:0IUPUI, Team 1-1, Harley Spring 2024crwdne2935289:0

IUPUI-HARLEY-S24S1G1

crwdns2931471:03crwdne2931471:0

crwdns2935297:03crwdne2935297:0

crwdns2947412:00crwdne2947412:0

crwdns2917038:0crwdne2917038:0

crwdns2936625:0crwdne2936625:0:

crwdns2936751:024crwdne2936751:0 1

crwdns2936753:07crwdne2936753:0 6

crwdns2936753:030crwdne2936753:0 16

crwdns2942667:0crwdne2942667:0 161