crwdns2933423:0crwdne2933423:0

Kyocera Zio M6000 Digitizer Replacement

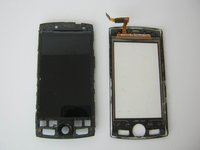
crwdns2942213:0crwdne2942213:0

  1. Kyocera Zio M6000 Digitizer Replacement, Battery: crwdns2935265:01crwdnd2935265:01crwdnd2935265:02crwdne2935265:0 Kyocera Zio M6000 Digitizer Replacement, Battery: crwdns2935265:01crwdnd2935265:02crwdnd2935265:02crwdne2935265:0
    • Press down on the back of the phone, applying moderate pressure.

    • Slide the back casing down to separate it.

  2. Kyocera Zio M6000 Digitizer Replacement: crwdns2935265:02crwdnd2935265:01crwdnd2935265:02crwdne2935265:0 Kyocera Zio M6000 Digitizer Replacement: crwdns2935265:02crwdnd2935265:02crwdnd2935265:02crwdne2935265:0
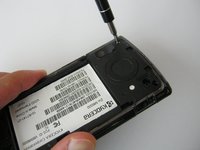
    • Remove the back casing to expose the battery.

    • Use a plastic spudger to lift the battery out using the battery's groove on its top left corner.

  3. Kyocera Zio M6000 Digitizer Replacement, Motherboard: crwdns2935265:03crwdnd2935265:01crwdnd2935265:02crwdne2935265:0 Kyocera Zio M6000 Digitizer Replacement, Motherboard: crwdns2935265:03crwdnd2935265:02crwdnd2935265:02crwdne2935265:0
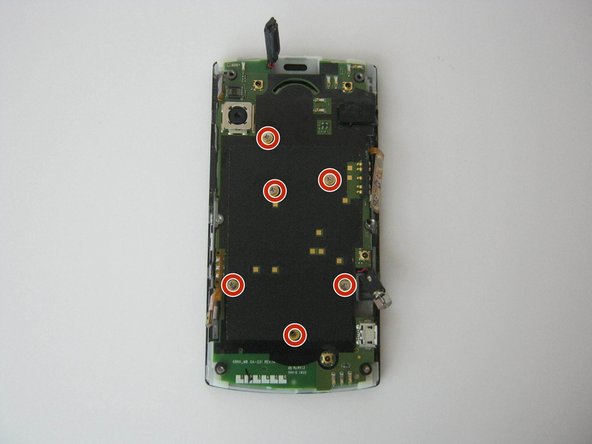
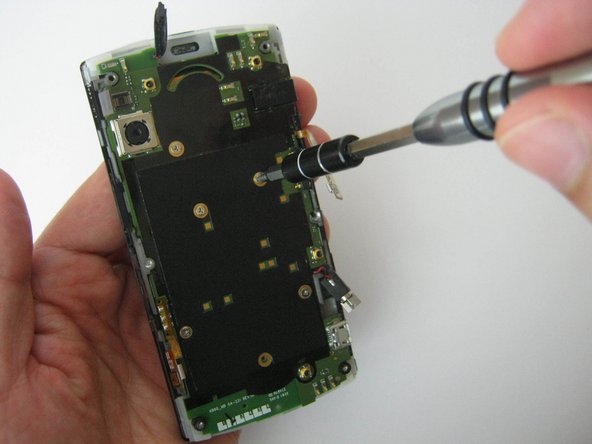
    • Remove the six 3.18 mm screws using a Phillips 00 screwdriver.

  4. Kyocera Zio M6000 Digitizer Replacement: crwdns2935265:04crwdnd2935265:01crwdnd2935265:02crwdne2935265:0 Kyocera Zio M6000 Digitizer Replacement: crwdns2935265:04crwdnd2935265:02crwdnd2935265:02crwdne2935265:0
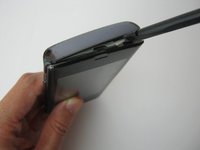
    • Insert the flat end of the spudger between the front and back panels, and pry it apart by running the spudger along the side to further separate them.

    • Go all the way around, prying as you go, until the back casing completely separates from the rest of the phone.

  5. Kyocera Zio M6000 Digitizer Replacement: crwdns2935265:05crwdnd2935265:01crwdnd2935265:03crwdne2935265:0 Kyocera Zio M6000 Digitizer Replacement: crwdns2935265:05crwdnd2935265:02crwdnd2935265:03crwdne2935265:0 Kyocera Zio M6000 Digitizer Replacement: crwdns2935265:05crwdnd2935265:03crwdnd2935265:03crwdne2935265:0
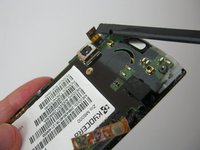
    • Unclip the two flex cables -- a small one located on the left side on the lower half of the motherboard, and a longer one on the right side, higher up.

  6. Kyocera Zio M6000 Digitizer Replacement: crwdns2935265:06crwdnd2935265:01crwdnd2935265:03crwdne2935265:0 Kyocera Zio M6000 Digitizer Replacement: crwdns2935265:06crwdnd2935265:02crwdnd2935265:03crwdne2935265:0 Kyocera Zio M6000 Digitizer Replacement: crwdns2935265:06crwdnd2935265:03crwdnd2935265:03crwdne2935265:0
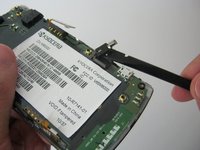
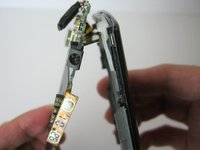
    • Pry out the earpiece speaker using the spudger.

    • Pry out the vibration motor using the spudger.

  7. Kyocera Zio M6000 Digitizer Replacement: crwdns2935265:07crwdnd2935265:01crwdnd2935265:02crwdne2935265:0 Kyocera Zio M6000 Digitizer Replacement: crwdns2935265:07crwdnd2935265:02crwdnd2935265:02crwdne2935265:0
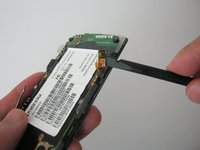
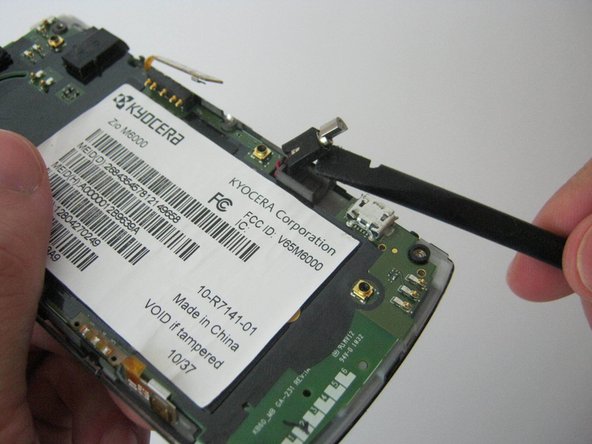
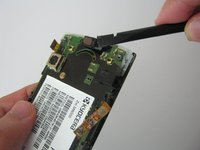
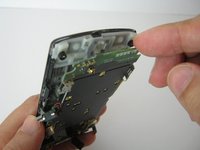
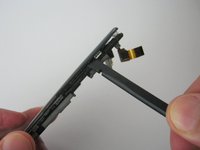
    • Place the flat end of the spudger underneath the digitizer connector and pry it up to disconnect it.

  8. Kyocera Zio M6000 Digitizer Replacement: crwdns2935265:08crwdnd2935265:01crwdnd2935265:03crwdne2935265:0 Kyocera Zio M6000 Digitizer Replacement: crwdns2935265:08crwdnd2935265:02crwdnd2935265:03crwdne2935265:0 Kyocera Zio M6000 Digitizer Replacement: crwdns2935265:08crwdnd2935265:03crwdnd2935265:03crwdne2935265:0
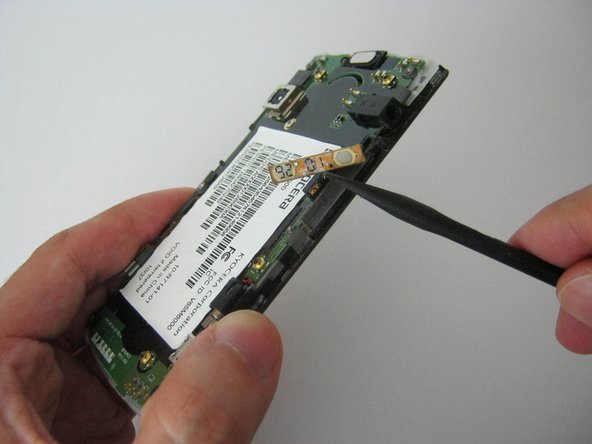
    • Remove the sticker to uncover the screws underneath.

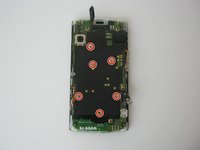
    • Remove the six 1.59 mm screws using a Phillips 00 screwdriver.

  9. Kyocera Zio M6000 Digitizer Replacement: crwdns2935265:09crwdnd2935265:01crwdnd2935265:03crwdne2935265:0 Kyocera Zio M6000 Digitizer Replacement: crwdns2935265:09crwdnd2935265:02crwdnd2935265:03crwdne2935265:0 Kyocera Zio M6000 Digitizer Replacement: crwdns2935265:09crwdnd2935265:03crwdnd2935265:03crwdne2935265:0
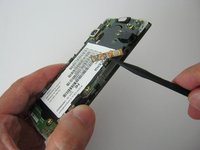
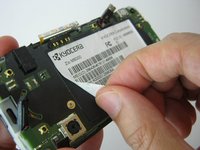
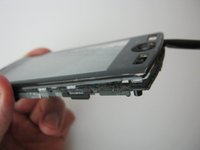
    • Lift the bottom portion of the motherboard away from the front panel.

    • Do not forcefully pull the components apart as there is another connector on the underside of the motherboard attaching it to the panel.

    • Insert the flat end of the spudger in between the panel and motherboard to unfasten the connector.

  10. Kyocera Zio M6000 Digitizer Replacement, Digitizer: crwdns2935265:010crwdnd2935265:01crwdnd2935265:03crwdne2935265:0 Kyocera Zio M6000 Digitizer Replacement, Digitizer: crwdns2935265:010crwdnd2935265:02crwdnd2935265:03crwdne2935265:0 Kyocera Zio M6000 Digitizer Replacement, Digitizer: crwdns2935265:010crwdnd2935265:03crwdnd2935265:03crwdne2935265:0
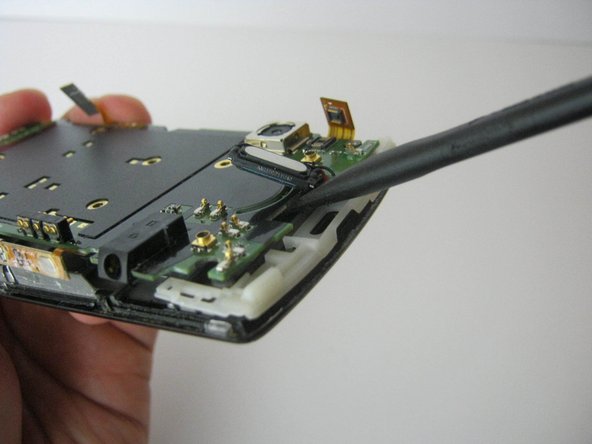
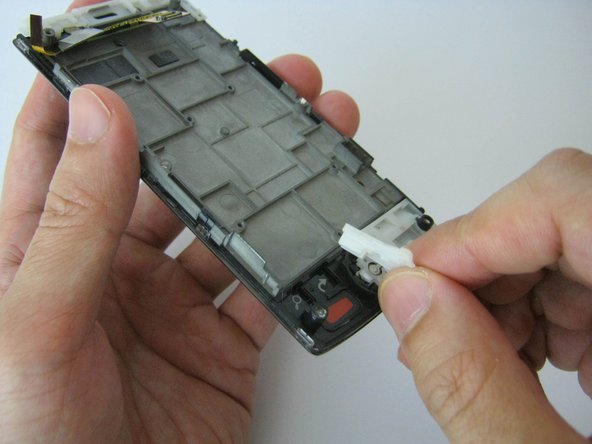
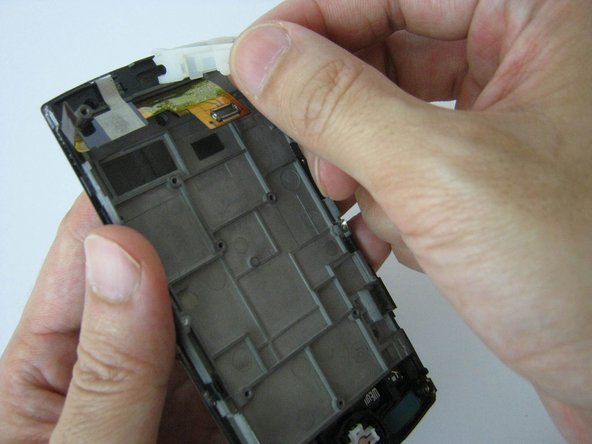
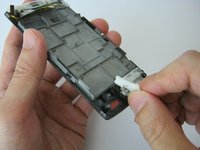
    • Remove the two rubber pieces from the ends of the panel.

  11. Kyocera Zio M6000 Digitizer Replacement: crwdns2935265:011crwdnd2935265:01crwdnd2935265:03crwdne2935265:0 Kyocera Zio M6000 Digitizer Replacement: crwdns2935265:011crwdnd2935265:02crwdnd2935265:03crwdne2935265:0 Kyocera Zio M6000 Digitizer Replacement: crwdns2935265:011crwdnd2935265:03crwdnd2935265:03crwdne2935265:0
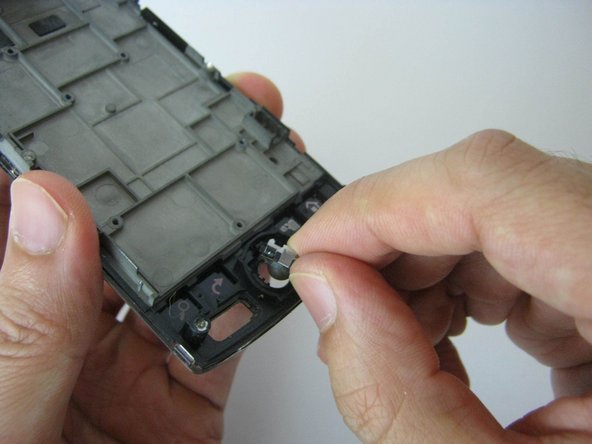
    • Remove the red Power button and green Talk button from the bottom of the casing.

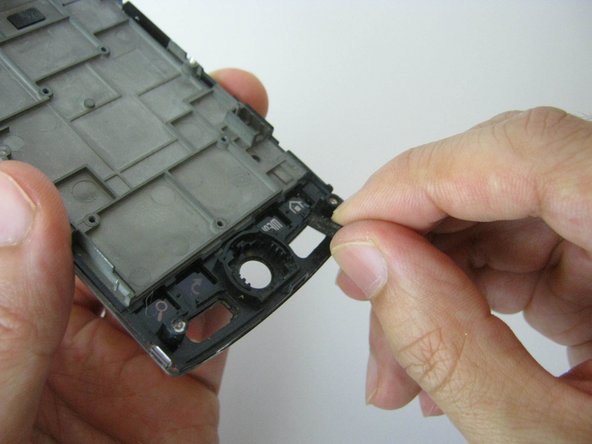
    • Remove the trackball, also at the bottom of the casing.

  12. Kyocera Zio M6000 Digitizer Replacement: crwdns2935265:012crwdnd2935265:01crwdnd2935265:03crwdne2935265:0 Kyocera Zio M6000 Digitizer Replacement: crwdns2935265:012crwdnd2935265:02crwdnd2935265:03crwdne2935265:0 Kyocera Zio M6000 Digitizer Replacement: crwdns2935265:012crwdnd2935265:03crwdnd2935265:03crwdne2935265:0
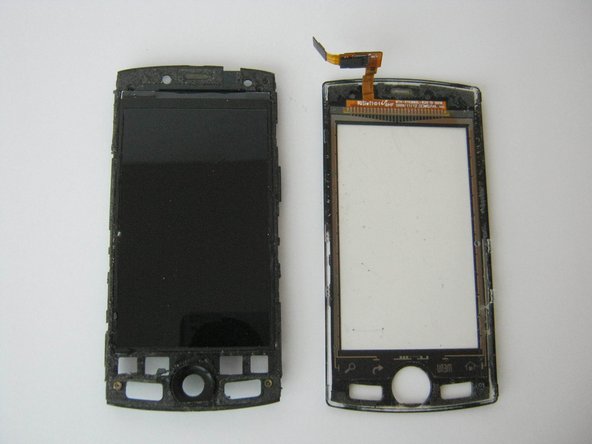
    • Pry the bottom edge of the bezel with the flat end of the spudger.

    • Carefully run the spudger up the sides until the digitizer is free.

crwdns2915888:0crwdne2915888:0

To reassemble your device, follow these instructions in reverse order.

crwdns2935229:02crwdne2935229:0

Scott Nguyen

crwdns2935283:009/16/15crwdne2935283:0

522 crwdns2915208:0crwdne2915208:0

crwdns2935297:03crwdne2935297:0

crwdns2915084:0crwdne2915084:0

USF Sarasota-Manatee, Team 1-2, Stewart Fall 2015 crwdns2935289:0USF Sarasota-Manatee, Team 1-2, Stewart Fall 2015crwdne2935289:0

USFSM-STEWART-F15S1G2

crwdns2931471:05crwdne2931471:0

crwdns2935297:020crwdne2935297:0

crwdns2947412:00crwdne2947412:0

crwdns2917038:0crwdne2917038:0

crwdns2936625:0crwdne2936625:0:

crwdns2936751:024crwdne2936751:0 0

crwdns2936753:07crwdne2936753:0 0

crwdns2936753:030crwdne2936753:0 15

crwdns2942667:0crwdne2942667:0 393