crwdns2915892:0crwdne2915892:0
Accessing the battery is straight-forward, but the replacement requires soldering, and that can be tricky. Soldering involves melting two pieces of metal together so that they become one piece. Replacing the battery should prevent the Kurio 7 from malfunctioning.
crwdns2942213:0crwdne2942213:0
-
-
Begin by removing the rubber cover from the Kurio 7.
-
-
-
Remove the four 30 mm Phillips #00 screws from the outer case.
-
-
-
-
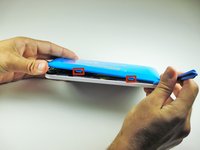
Insert the plastic opening tool in the gap between the front cover and the back cover of the device.
-
Slide the plastic opening tool around the edge of the device. Gently pry apart the tabs that hold the front cover and the back cover together.
-
-
-
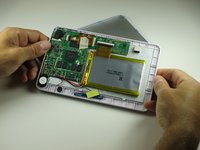
Once all of the tabs are removed, the back cover should come off easily.
-
-
-
Use a credit card, or other thin object, to separate the battery from the screen.
-
-
-
Desolder, or separate using the desoldering braid, the marked areas on the motherboard to remove the old battery.
-
Refer to our soldering guide on how to solder and desolder.
-


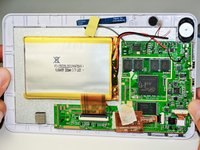


Solder in the new battery. To reassemble your device, follow these instructions in reverse order.
crwdns2935221:0crwdne2935221:0
crwdns2935229:02crwdne2935229:0

crwdns2935287:0crwdne2935287:0

Cal Poly, Team 12-36, Maness Spring 2014 crwdns2935289:0Cal Poly, Team 12-36, Maness Spring 2014crwdne2935289:0
CPSU-MANESS-S14S12G36
crwdns2931471:04crwdne2931471:0
crwdns2935297:014crwdne2935297:0
crwdns2947410:01crwdne2947410:0
Can the charging port be replaced in the kurio 7s tablet