crwdns2915892:0crwdne2915892:0
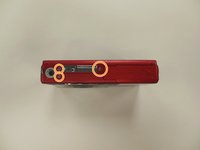
Technology in the lens can often become dysfunctional. This guide will show you how to remove it, so you can clean or replace it. Lens Part Number: k9711061632 2ba
crwdns2942213:0crwdne2942213:0
-
-
First, press in and slide forward the battery latch as indicated by the arrow.
-
-
-
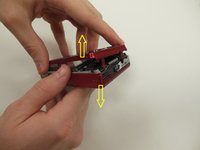
Press down on battery until you hear a click and release it. Battery should easily slide out.
-
-
-
Remove the two 3.85 mm screws on the bottom right of the camera, as indicated.
-
-
-
Remove dial button located on top of camera, by gently pulling up.
-
-
-
Starting at one side, carefully work the chrome frame off of the camera itself.
-
-
-
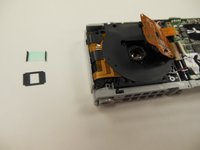
On the right side of the camera, locate and remove the two 3.25 mm screws as highlighted.
-
-
-
-
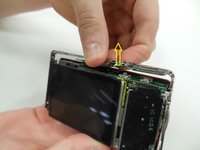
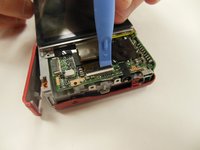
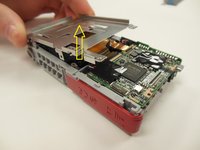
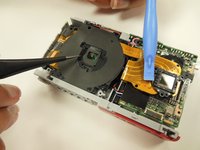
Carefully lift the motherboard panel up, pulling towards the left. Make sure you do not rip the blue ribbon.
-
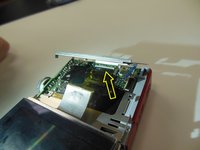
Using a plastic opening tool, gently lift up on the ribbon fastener until it is in an upright position.
-
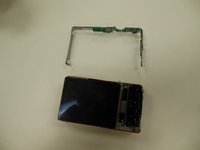
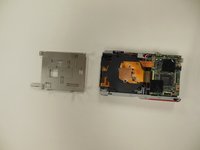
Slide panel away from camera.
-
-
-
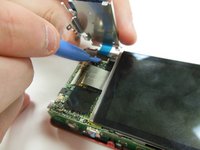
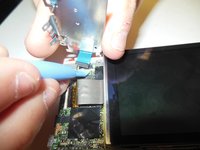
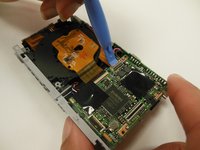
Using a plastic opening tool, gently lift ribbon clamp as indicated to remove the screen ribbon from the motherboard.
-
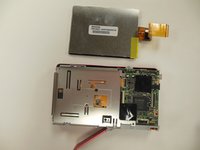
Screen should now be detached. Gently lift it away from the base of the camera.
-
-
-
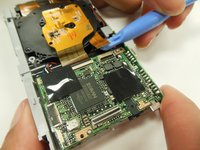
Remove the 3.9 mm frame screws using a Phillips #00 screwdriver.
-
-
-
Using both hands, carefully pull the frame apart from the camera.
-
-
-
Locate and remove the four 3.25 mm screws securing the back panel to the frame of the camera using the Phillips #00 screwdriver.
-
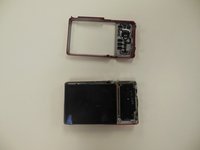
Lift up and remove panel, detaching it from the camera frame.
-
-
-
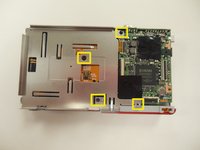
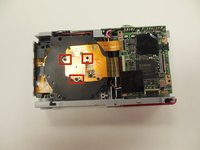
Remove the three 3.25 mm screws securing the hexagon-shaped, copper panel to the optical device.
-
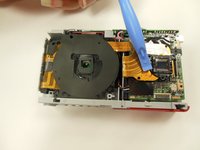
Gently peel back the main optic ribbon, ensuring it is securely out of the way.
-
-
-
Remove the six 3.25 mm screws securing the optic lens to the camera frame.
-
-
-
Carefully remove the square lens film, ensuring you do not bend it. This film will be in two pieces: a black cover, and a glass square piece. It is very fragile, so handle with care.
-
-
-
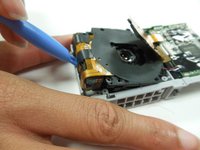
There is a small ribbon attaching the optical lens piece to the motherboard. Using a plastic opening tool, gently lift up on this ribbon's clamp, detaching it from the motherboard.
-
-
-
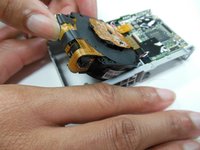
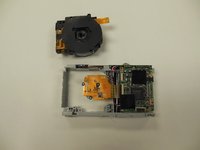
The optic assembly should now be free. Use a pry tool to lift it far enough up that you can grab and remove it.
-


To reassemble your device, follow these instructions in reverse order.
To reassemble your device, follow these instructions in reverse order.
crwdns2915084:0crwdne2915084:0

University of Kentucky Louisville, Team 1-4, Rountree Winter 2015 crwdns2935289:0University of Kentucky Louisville, Team 1-4, Rountree Winter 2015crwdne2935289:0
LOUISVILLE-ROUNTREE-W15S1G4
crwdns2931471:04crwdne2931471:0
crwdns2935297:014crwdne2935297:0
crwdns2947410:01crwdne2947410:0
I'm with ya up 'til step 2. The right hand back of my camera has controls (zoom in/out, trash/list/info, right/left/up/down, etc. on it and no visible screws as in your step 3 picture. It appears that another panel has been removed to expose these screws. Can you elaborate?