crwdns2933423:0crwdne2933423:0

KitchenAid KUDS01DJSS0 Electronic Control Board Replacement

crwdns2942213:0crwdne2942213:0

  1. KitchenAid KUDS01DJSS0 Electronic Control Board Replacement, Electronic Control Board: crwdns2935265:01crwdnd2935265:01crwdnd2935265:03crwdne2935265:0 KitchenAid KUDS01DJSS0 Electronic Control Board Replacement, Electronic Control Board: crwdns2935265:01crwdnd2935265:02crwdnd2935265:03crwdne2935265:0 KitchenAid KUDS01DJSS0 Electronic Control Board Replacement, Electronic Control Board: crwdns2935265:01crwdnd2935265:03crwdnd2935265:03crwdne2935265:0
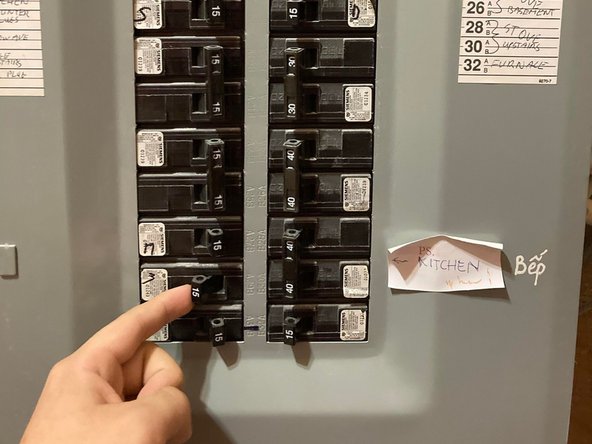
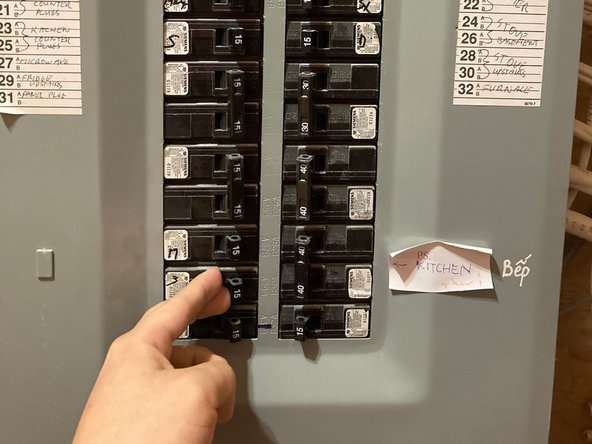
    • Unplug the dishwasher or shut off the house circuit breaker for the dishwasher.

    • To verify that power is disconnected, make sure that the control panel doesn’t light up when you press a control button or the power button.

  2. KitchenAid KUDS01DJSS0 Electronic Control Board Replacement: crwdns2935265:02crwdnd2935265:01crwdnd2935265:03crwdne2935265:0 KitchenAid KUDS01DJSS0 Electronic Control Board Replacement: crwdns2935265:02crwdnd2935265:02crwdnd2935265:03crwdne2935265:0 KitchenAid KUDS01DJSS0 Electronic Control Board Replacement: crwdns2935265:02crwdnd2935265:03crwdnd2935265:03crwdne2935265:0
    • Open the dishwasher door.

  3. KitchenAid KUDS01DJSS0 Electronic Control Board Replacement: crwdns2935265:03crwdnd2935265:01crwdnd2935265:03crwdne2935265:0 KitchenAid KUDS01DJSS0 Electronic Control Board Replacement: crwdns2935265:03crwdnd2935265:02crwdnd2935265:03crwdne2935265:0 KitchenAid KUDS01DJSS0 Electronic Control Board Replacement: crwdns2935265:03crwdnd2935265:03crwdnd2935265:03crwdne2935265:0
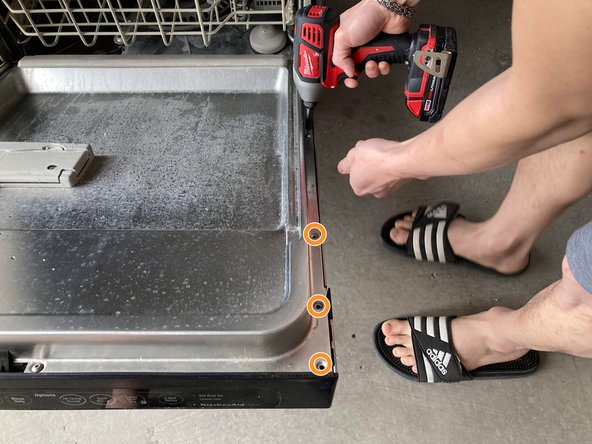
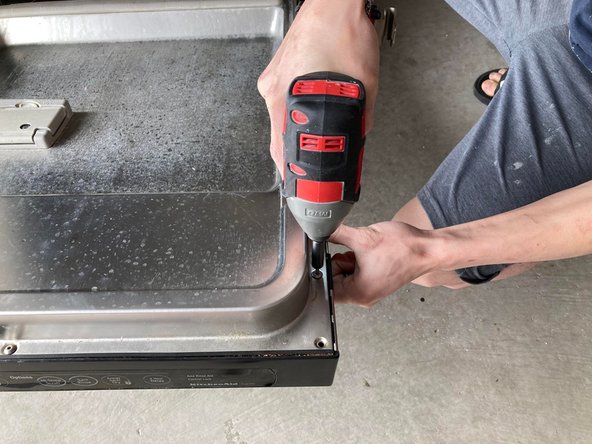
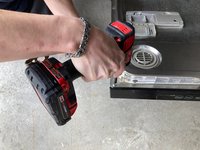
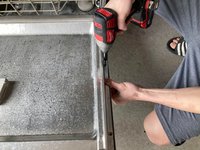
    • Remove the four screws from each side of the dishwasher door (eight screws total).

    • Removing the three screws from each side of the dishwasher (six screws total).

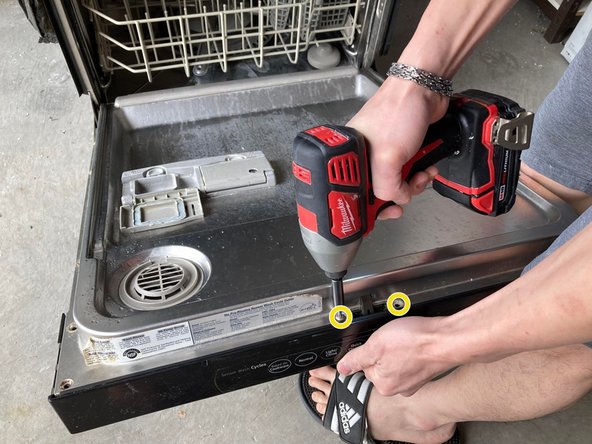
    • Support the outer door panel with one hand as you remove the final two screws at the top of the dishwasher door.

    • There are total of sixteen (16) screws.

  4. KitchenAid KUDS01DJSS0 Electronic Control Board Replacement: crwdns2935265:04crwdnd2935265:01crwdnd2935265:02crwdne2935265:0 KitchenAid KUDS01DJSS0 Electronic Control Board Replacement: crwdns2935265:04crwdnd2935265:02crwdnd2935265:02crwdne2935265:0
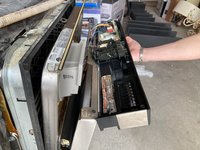
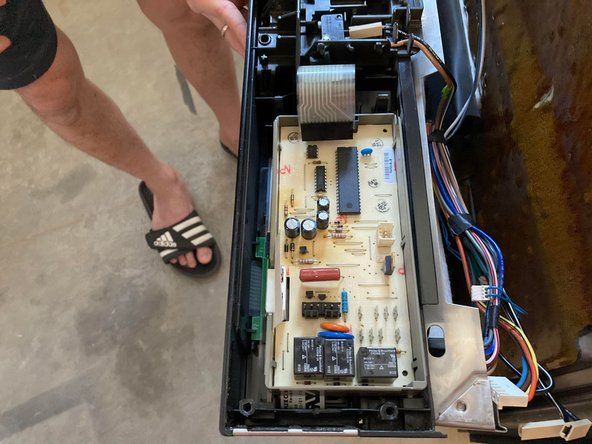
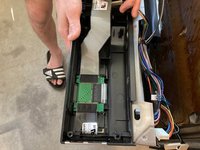
    • Use your hands to pull off the outer door panel with the control panel.

  5. KitchenAid KUDS01DJSS0 Electronic Control Board Replacement: crwdns2935265:05crwdnd2935265:01crwdnd2935265:02crwdne2935265:0 KitchenAid KUDS01DJSS0 Electronic Control Board Replacement: crwdns2935265:05crwdnd2935265:02crwdnd2935265:02crwdne2935265:0
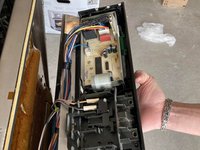
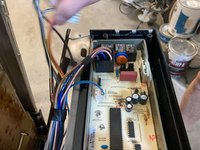
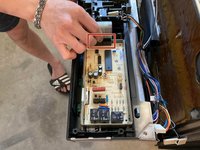
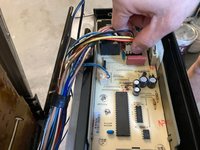
    • Disconnect the two white outer wires by pulling them out.

    • The two white connectors have the same size and are close together.

    • Use one hand to hold the control panel while disconnecting the electrical connections from the old board.

  6. KitchenAid KUDS01DJSS0 Electronic Control Board Replacement: crwdns2935265:06crwdnd2935265:01crwdnd2935265:03crwdne2935265:0 KitchenAid KUDS01DJSS0 Electronic Control Board Replacement: crwdns2935265:06crwdnd2935265:02crwdnd2935265:03crwdne2935265:0 KitchenAid KUDS01DJSS0 Electronic Control Board Replacement: crwdns2935265:06crwdnd2935265:03crwdnd2935265:03crwdne2935265:0
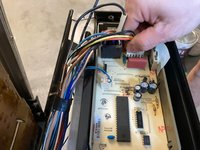
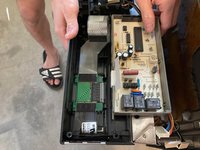
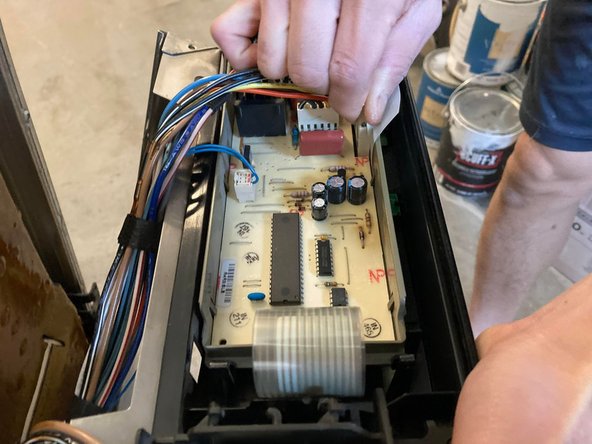
    • Remove the white rectangular connector that has six colored wires connected to it.

  7. KitchenAid KUDS01DJSS0 Electronic Control Board Replacement: crwdns2935265:07crwdnd2935265:01crwdnd2935265:02crwdne2935265:0 KitchenAid KUDS01DJSS0 Electronic Control Board Replacement: crwdns2935265:07crwdnd2935265:02crwdnd2935265:02crwdne2935265:0
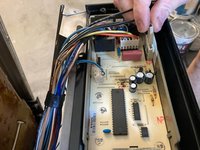
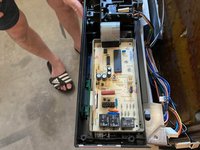
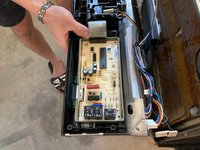
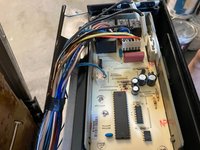
    • Use one hand to hold the control panel while detaching the black connector.

    • The black connector is the main connector to the control board.

  8. KitchenAid KUDS01DJSS0 Electronic Control Board Replacement: crwdns2935265:08crwdnd2935265:01crwdnd2935265:03crwdne2935265:0 KitchenAid KUDS01DJSS0 Electronic Control Board Replacement: crwdns2935265:08crwdnd2935265:02crwdnd2935265:03crwdne2935265:0 KitchenAid KUDS01DJSS0 Electronic Control Board Replacement: crwdns2935265:08crwdnd2935265:03crwdnd2935265:03crwdne2935265:0
    • Detach the white and gray ribbon cable attached to the black connector.

  9. KitchenAid KUDS01DJSS0 Electronic Control Board Replacement: crwdns2935265:09crwdnd2935265:01crwdnd2935265:02crwdne2935265:0 KitchenAid KUDS01DJSS0 Electronic Control Board Replacement: crwdns2935265:09crwdnd2935265:02crwdnd2935265:02crwdne2935265:0
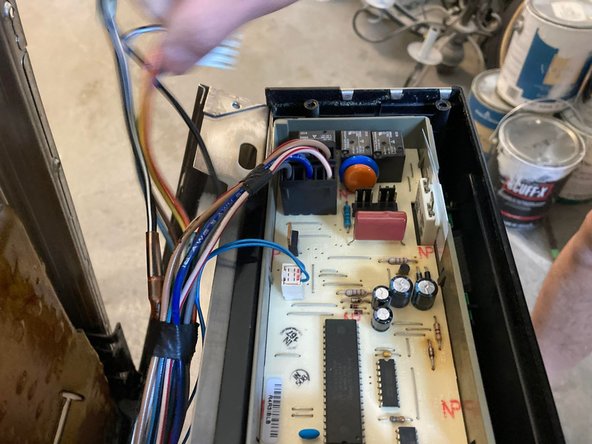
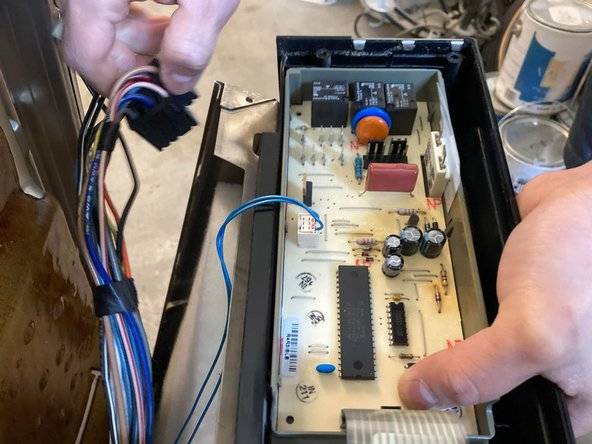
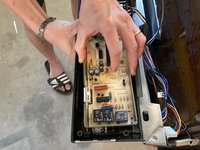
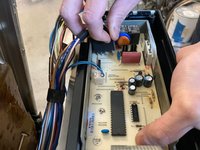
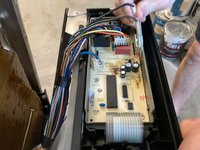
    • Use your hands to pull the electronic control board out the mounting slots.

  10. KitchenAid KUDS01DJSS0 Electronic Control Board Replacement: crwdns2935265:010crwdnd2935265:01crwdnd2935265:02crwdne2935265:0 KitchenAid KUDS01DJSS0 Electronic Control Board Replacement: crwdns2935265:010crwdnd2935265:02crwdnd2935265:02crwdne2935265:0
    • Push the new electronic control board into the mounting slots.

    • Slide it to the right to engage the locking tab until you hear a click.

  11. KitchenAid KUDS01DJSS0 Electronic Control Board Replacement: crwdns2935265:011crwdnd2935265:01crwdnd2935265:02crwdne2935265:0 KitchenAid KUDS01DJSS0 Electronic Control Board Replacement: crwdns2935265:011crwdnd2935265:02crwdnd2935265:02crwdne2935265:0
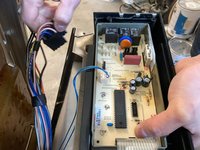
    • Reconnect the black connector wires to the new electronic control board.

  12. KitchenAid KUDS01DJSS0 Electronic Control Board Replacement: crwdns2935265:012crwdnd2935265:01crwdnd2935265:03crwdne2935265:0 KitchenAid KUDS01DJSS0 Electronic Control Board Replacement: crwdns2935265:012crwdnd2935265:02crwdnd2935265:03crwdne2935265:0 KitchenAid KUDS01DJSS0 Electronic Control Board Replacement: crwdns2935265:012crwdnd2935265:03crwdnd2935265:03crwdne2935265:0
    • Reconnect the white rectangular connector with six wires to the new electronic control board.

  13. KitchenAid KUDS01DJSS0 Electronic Control Board Replacement: crwdns2935265:013crwdnd2935265:01crwdnd2935265:03crwdne2935265:0 KitchenAid KUDS01DJSS0 Electronic Control Board Replacement: crwdns2935265:013crwdnd2935265:02crwdnd2935265:03crwdne2935265:0 KitchenAid KUDS01DJSS0 Electronic Control Board Replacement: crwdns2935265:013crwdnd2935265:03crwdnd2935265:03crwdne2935265:0
    • Reconnect the two white outer connector wires to the new electronic control board.

  14. KitchenAid KUDS01DJSS0 Electronic Control Board Replacement: crwdns2935265:014crwdnd2935265:01crwdnd2935265:03crwdne2935265:0 KitchenAid KUDS01DJSS0 Electronic Control Board Replacement: crwdns2935265:014crwdnd2935265:02crwdnd2935265:03crwdne2935265:0 KitchenAid KUDS01DJSS0 Electronic Control Board Replacement: crwdns2935265:014crwdnd2935265:03crwdnd2935265:03crwdne2935265:0
    • Reinstall the outer door panel and control panel on the inner door panel and reattach the user interface control wire harness.

    • Reinstall the sixteen mounting screws.

  15. KitchenAid KUDS01DJSS0 Electronic Control Board Replacement: crwdns2935265:015crwdnd2935265:01crwdnd2935265:03crwdne2935265:0 KitchenAid KUDS01DJSS0 Electronic Control Board Replacement: crwdns2935265:015crwdnd2935265:02crwdnd2935265:03crwdne2935265:0 KitchenAid KUDS01DJSS0 Electronic Control Board Replacement: crwdns2935265:015crwdnd2935265:03crwdnd2935265:03crwdne2935265:0
    • Connect the dishwasher and reset the circuit breaker for your house to restore electricity.

    • To verify that power is connected, make sure that the control panel does light up when you press a control button or the power button.

crwdns2935217:0crwdne2935217:0

crwdns2935229:02crwdne2935229:0

Thuan Trang

crwdns2935283:001/13/22crwdne2935283:0

345 crwdns2915208:0crwdne2915208:0

crwdns2935295:0crwdne2935295:0

crwdns2915084:0crwdne2915084:0

York University, Team S-29, Woodhouse Winter 2022 crwdns2935289:0York University, Team S-29, Woodhouse Winter 2022crwdne2935289:0

YORK-WOODHOUSE-W22SSG29

crwdns2934841:01crwdne2934841:0

crwdns2935297:02crwdne2935297:0

crwdns2944067:04crwdne2944067:0

عمل فنى رائع وجميل وبدقة متناهية

khaliddabnoun - crwdns2934203:0crwdne2934203:0

عمل فنى جميل ورائع وبدقة متناهية

khaliddabnoun - crwdns2934203:0crwdne2934203:0

Excellent how to! However the part attached to purchase doesn’t look like the original control board. Help!

magdelena kormusis - crwdns2934203:0crwdne2934203:0

crwdns2917038:0crwdne2917038:0

crwdns2936625:0crwdne2936625:0:

crwdns2936751:024crwdne2936751:0 4

crwdns2936753:07crwdne2936753:0 14

crwdns2936753:030crwdne2936753:0 41

crwdns2942667:0crwdne2942667:0 1,339