crwdns2933423:0crwdne2933423:0

Kitchen Smith 1.7L Electric Kettle KE01102-UL Disassembly

crwdns2942213:0crwdne2942213:0

  1. Kitchen Smith 1.7L Electric Kettle KE01102-UL Disassembly, Kitchen Smith 1.7L Electric Kettle KE01102-UL Disassembly: crwdns2935265:01crwdnd2935265:01crwdnd2935265:02crwdne2935265:0 Kitchen Smith 1.7L Electric Kettle KE01102-UL Disassembly, Kitchen Smith 1.7L Electric Kettle KE01102-UL Disassembly: crwdns2935265:01crwdnd2935265:02crwdnd2935265:02crwdne2935265:0
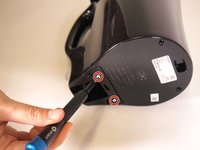
    • At the bottom of the kettle pot, remove two 10 mm screws with a Phillips #2 screwdriver.

  2. Kitchen Smith 1.7L Electric Kettle KE01102-UL Disassembly: crwdns2935265:02crwdnd2935265:01crwdnd2935265:03crwdne2935265:0 Kitchen Smith 1.7L Electric Kettle KE01102-UL Disassembly: crwdns2935265:02crwdnd2935265:02crwdnd2935265:03crwdne2935265:0 Kitchen Smith 1.7L Electric Kettle KE01102-UL Disassembly: crwdns2935265:02crwdnd2935265:03crwdnd2935265:03crwdne2935265:0
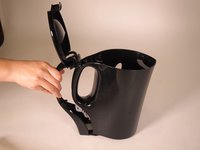
    • Open the lid of the kettle

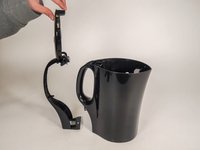
    • Remove two 12 mm screws at the top of the handle with a Phillips #2 screwdriver.

  3. Kitchen Smith 1.7L Electric Kettle KE01102-UL Disassembly: crwdns2935265:03crwdnd2935265:01crwdnd2935265:02crwdne2935265:0 Kitchen Smith 1.7L Electric Kettle KE01102-UL Disassembly: crwdns2935265:03crwdnd2935265:02crwdnd2935265:02crwdne2935265:0
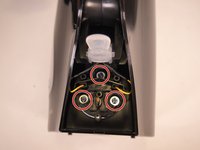
    • The exterior of the plastic handle and lid can now be removed from the kettle to expose the electric components.

    • The plastic cover may need a little wiggling to pop off.

  4. Kitchen Smith 1.7L Electric Kettle KE01102-UL Disassembly: crwdns2935265:04crwdnd2935265:01crwdnd2935265:03crwdne2935265:0 Kitchen Smith 1.7L Electric Kettle KE01102-UL Disassembly: crwdns2935265:04crwdnd2935265:02crwdnd2935265:03crwdne2935265:0 Kitchen Smith 1.7L Electric Kettle KE01102-UL Disassembly: crwdns2935265:04crwdnd2935265:03crwdnd2935265:03crwdne2935265:0
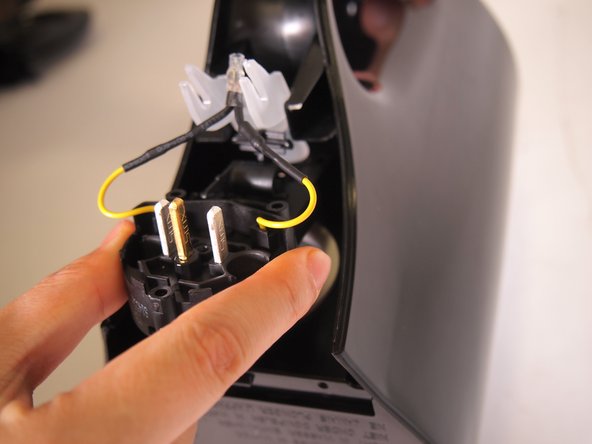
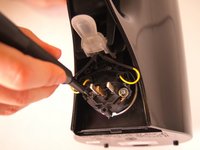
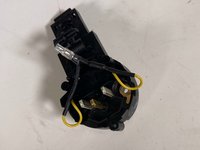
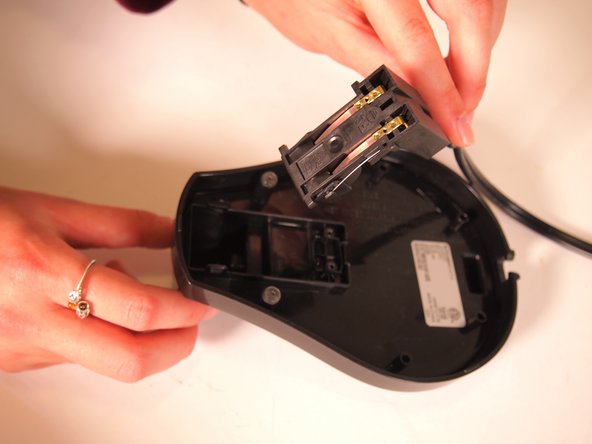
    • Turn the kettle over to the back of the handle.

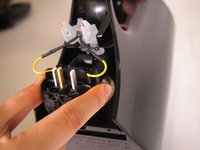
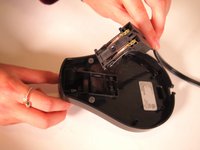
    • Remove three 10 mm screws connecting the switch circuit to the heating element with a Phillips #2 screwdriver.

    • The heating element should disconnect, allowing you to remove it.

  5. Kitchen Smith 1.7L Electric Kettle KE01102-UL Disassembly: crwdns2935265:05crwdnd2935265:01crwdnd2935265:02crwdne2935265:0 Kitchen Smith 1.7L Electric Kettle KE01102-UL Disassembly: crwdns2935265:05crwdnd2935265:02crwdnd2935265:02crwdne2935265:0
    • The pronged power element, removed in Step 4, will have a dry-heating safety feature on the opposite side.

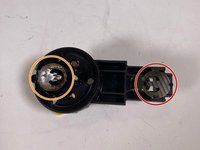
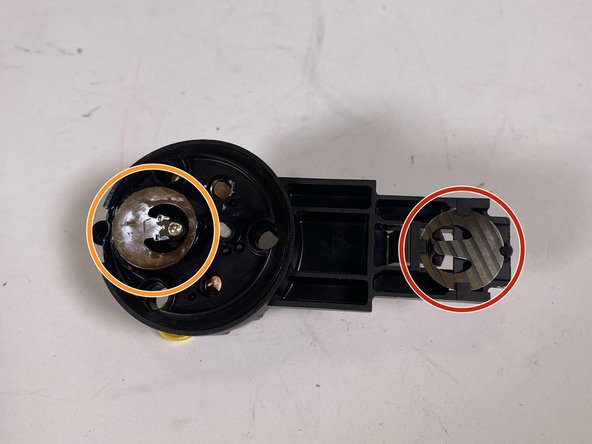
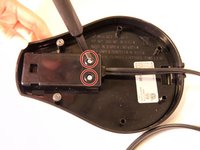
    • This switch turns off the kettle once steam is detected, indicating the water is boiling.

    • This is the boil dry protection switch.

  6. Kitchen Smith 1.7L Electric Kettle KE01102-UL Disassembly: crwdns2935265:06crwdnd2935265:01crwdnd2935265:02crwdne2935265:0 Kitchen Smith 1.7L Electric Kettle KE01102-UL Disassembly: crwdns2935265:06crwdnd2935265:02crwdnd2935265:02crwdne2935265:0
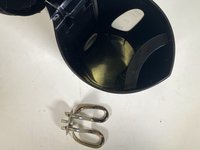
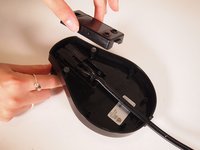
    • The inner heating element can now be removed after the completion of Step 4.

  7. Kitchen Smith 1.7L Electric Kettle KE01102-UL Disassembly: crwdns2935265:07crwdnd2935265:01crwdnd2935265:03crwdne2935265:0 Kitchen Smith 1.7L Electric Kettle KE01102-UL Disassembly: crwdns2935265:07crwdnd2935265:02crwdnd2935265:03crwdne2935265:0 Kitchen Smith 1.7L Electric Kettle KE01102-UL Disassembly: crwdns2935265:07crwdnd2935265:03crwdnd2935265:03crwdne2935265:0
    • Looking at the bottom of the base, remove two 12 mm screws from the base with a Triangle #2 screwdriver.

    • You are now able to take the black plastic cover off and remove the cord.

crwdns2915888:0crwdne2915888:0

To reassemble your device, follow these instructions in reverse order.

crwdns2935103:0crwdne2935103:0

Amanda Yan

crwdns2935283:009/14/22crwdne2935283:0

195 crwdns2915208:0crwdne2915208:0

crwdns2935295:0crwdne2935295:0

crwdns2915084:0crwdne2915084:0

Tufts University School of Engineering, Team 1-2, Bell Fall 2022 crwdns2935289:0Tufts University School of Engineering, Team 1-2, Bell Fall 2022crwdne2935289:0

TUFTS-BELL-F22S1G2

crwdns2931471:02crwdne2931471:0

crwdns2935297:02crwdne2935297:0

crwdns2944067:00crwdne2944067:0

crwdns2917038:0crwdne2917038:0

crwdns2936625:0crwdne2936625:0:

crwdns2936751:024crwdne2936751:0 1

crwdns2936753:07crwdne2936753:0 6

crwdns2936753:030crwdne2936753:0 23

crwdns2942667:0crwdne2942667:0 385