crwdns2915892:0crwdne2915892:0
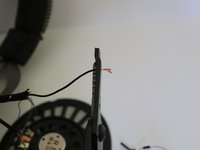
How to replace the connection cable on the Kingston HyperX CloudX Headset for Xbox One/Windows. Ensure the cable is the issue by plugging the headset into a compatible device and testing the sound. Move the cable near the base of the cable jack to see if any sound is produced:
- if so, you may proceed with this guide, but a cable jack replacement may also fix this issue.
- If no sound is produced, create the same wire movement around the base of the earphone where the wire makes contact with the headset. If any sound is produced, the connection cable replacement will fix this issue.
- If neither movement produces sound, the following are some possible issues:
- Complete cable disconnection
- The speakers are damaged
Note: This guide could still fix the complete cable disconnection issue, but until the new connection cable is installed, this issue is hard to diagnose, given NO power is delivered to the speakers/microphone.
crwdns2942213:0crwdne2942213:0
-
-
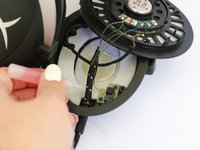
Remove the microphone from the headset.
-
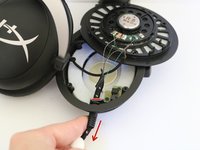
Remove the ear cushion on the earphone with the connection cable.
-
Carefully tug the edges of the cushion and ensure no tearing occurs.
-
-
-
Remove the four 11.2 mm screws securing the speaker plate to the earphone using a Phillips #2 screwdriver.
-
-
-
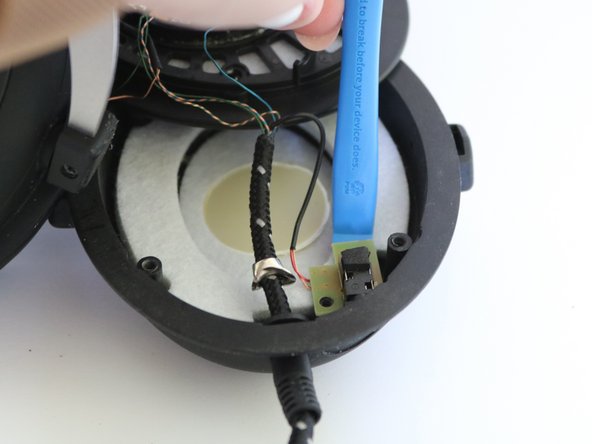
Remove the two 6.1 mm microphone jack input screws using a Phillips #0 screwdriver.
-
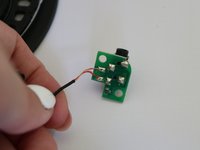
Gently place an iFixit opening tool under the microphone jack board, and remove the microphone jack insert.
-
-
-
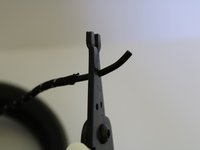
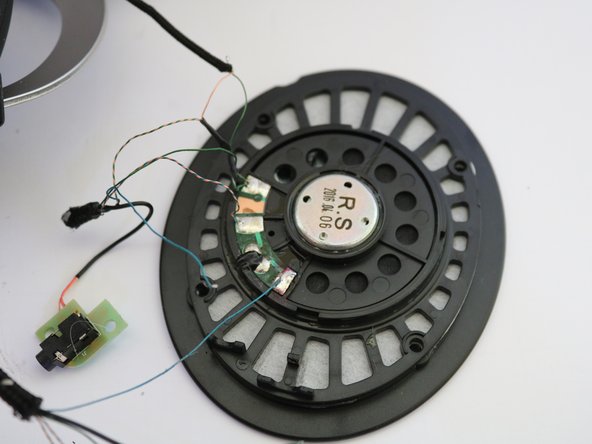
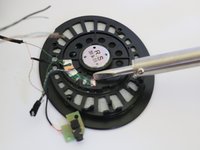
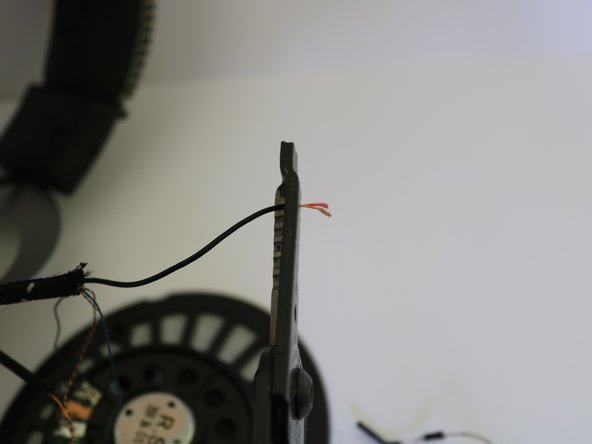
Cut the old cable from the speaker approximately 1 inch below where they all meet to ensure they are still joined at the bottom using a pair of wire cutters.
-
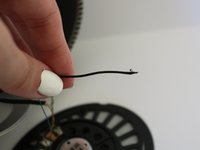
Remove the remaining old cable from the headset earphone insert.
-
-
-
-
Run a new cable through the earphone insert to prepare for attachment to the speaker.
-
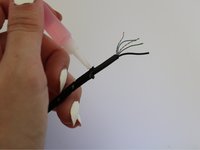
Remove approximately 2 inches of the new connection cable protective sleeve using a pair of wire strippers.
-
-
-
Carefully remove approximately half of the wire insulation from the exposed cable from Step 4 using a pair of wire strippers.
-
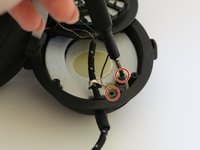
Carefully separate the wires by color.
-
-
-
Use a soldering iron to solder the edges of your new cable wires.
-
Desolder the old wire from the speaker and solder the new wire to the speaker with the same color until the old cable connection wires are completely removed and the new cable connection wires are soldered to the speaker.
-
-
-
Solder the edges of the green and orange wires together.
-
Cover the ends of the wires using heat shrink tubing.
-
-
-
Using wire strippers and solder, remove the insulation and follow the same color match and solder process from Step 7.
-
-
-
Place heat shrink tubing on transition (insulation to protective sleeve) and heat with the heat gun until secured.
-
Place the microphone jack input back into the earphone and re-screw using a Phillips #0 screwdriver.
-
-
-
Place where the wiring will sit within the earphone.
-


For reassembly, follow Steps 1 and 2 in reverse order.
Prior knowledge of Soldering, working with wires, and multimeter usage is advised.
If no sound is produced after performing this guide, the following are some possible causes:
- Error performing the guide
- The new connection cable is defective
- Different connection cable from the original connection cable compatibility
- Example: 3 pole instead of 4 pole connection
- Possible speaker damage
If the problem still exists, a new headset may be necessary.
crwdns2935287:0crwdne2935287:0

University of Delaware, Team 12-4, McGuire Spring 2023 crwdns2935289:0University of Delaware, Team 12-4, McGuire Spring 2023crwdne2935289:0
UD-MCGUIRE-S23S12G4
crwdns2931471:05crwdne2931471:0
crwdns2935297:04crwdne2935297:0