crwdns2933423:0crwdne2933423:0

Kindle Paperwhite 2nd Generation Motherboard Replacement

crwdns2942213:0crwdne2942213:0

  1. Kindle Paperwhite 2nd Generation Motherboard Replacement, Battery: crwdns2935265:01crwdnd2935265:01crwdnd2935265:02crwdne2935265:0 Kindle Paperwhite 2nd Generation Motherboard Replacement, Battery: crwdns2935265:01crwdnd2935265:02crwdnd2935265:02crwdne2935265:0
    • Insert plastic opening tool into the corners of the Paperwhite and slide around the edge perimeter to remove bezel.

    • Be sure to begin prying along the outer edges , these are the optimal points for removing the bezel.

    • Be careful and do not slide prying tool deeper than 3-4 mm under the side bezel or you could peel off screen protector film.

  2. Kindle Paperwhite 2nd Generation Motherboard Replacement: crwdns2935265:02crwdnd2935265:01crwdnd2935265:02crwdne2935265:0 Kindle Paperwhite 2nd Generation Motherboard Replacement: crwdns2935265:02crwdnd2935265:02crwdnd2935265:02crwdne2935265:0
    • Using a Screw Driver, Remove the eleven 3.2 mm Phillips 000 screws from corners of the mid-frame and from behind the black strip as shown.

    • Do not forget the screw in the middle of the black adhesive strip.

  3. Kindle Paperwhite 2nd Generation Motherboard Replacement: crwdns2935265:03crwdnd2935265:01crwdnd2935265:01crwdne2935265:0
    • Carefully remove the mid-frame from the back cover.

  4. Kindle Paperwhite 2nd Generation Motherboard Replacement: crwdns2935265:04crwdnd2935265:01crwdnd2935265:02crwdne2935265:0 Kindle Paperwhite 2nd Generation Motherboard Replacement: crwdns2935265:04crwdnd2935265:02crwdnd2935265:02crwdne2935265:0
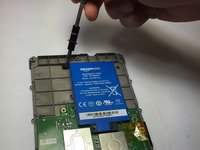
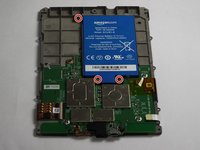
    • Use a screwdriver to remove the three 3.0 mm Phillips 000 screws that are holding the battery in place as shown.

  5. Kindle Paperwhite 2nd Generation Motherboard Replacement: crwdns2935265:05crwdnd2935265:01crwdnd2935265:01crwdne2935265:0
    • Carefully lift the battery and remove it from the device.

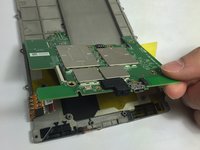
  6. Kindle Paperwhite 2nd Generation Motherboard Replacement, Motherboard: crwdns2935265:06crwdnd2935265:01crwdnd2935265:02crwdne2935265:0 Kindle Paperwhite 2nd Generation Motherboard Replacement, Motherboard: crwdns2935265:06crwdnd2935265:02crwdnd2935265:02crwdne2935265:0
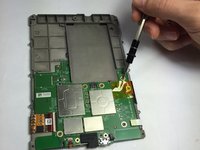
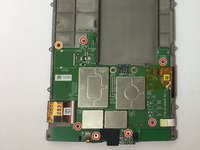
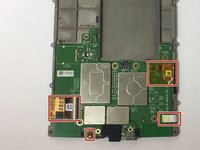
    • Use a screwdriver to remove the seven 3.0 mm Phillips 000 screws that are holding the motherboard in place as shown.

    • Don't lose the washer that is highlighted with an orange marker as shown. It is a necessary component to protect the screw.

  7. Kindle Paperwhite 2nd Generation Motherboard Replacement: crwdns2935265:07crwdnd2935265:01crwdnd2935265:02crwdne2935265:0 Kindle Paperwhite 2nd Generation Motherboard Replacement: crwdns2935265:07crwdnd2935265:02crwdnd2935265:02crwdne2935265:0
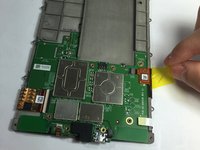
    • Gently disconnect the zif connectors.

    • Some of these connectors are very thin and fragile, handle with care!

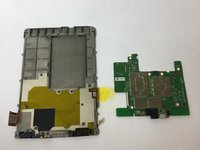
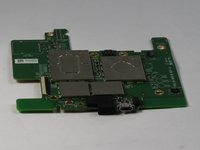
  8. Kindle Paperwhite 2nd Generation Motherboard Replacement: crwdns2935265:08crwdnd2935265:01crwdnd2935265:03crwdne2935265:0 Kindle Paperwhite 2nd Generation Motherboard Replacement: crwdns2935265:08crwdnd2935265:02crwdnd2935265:03crwdne2935265:0 Kindle Paperwhite 2nd Generation Motherboard Replacement: crwdns2935265:08crwdnd2935265:03crwdnd2935265:03crwdne2935265:0
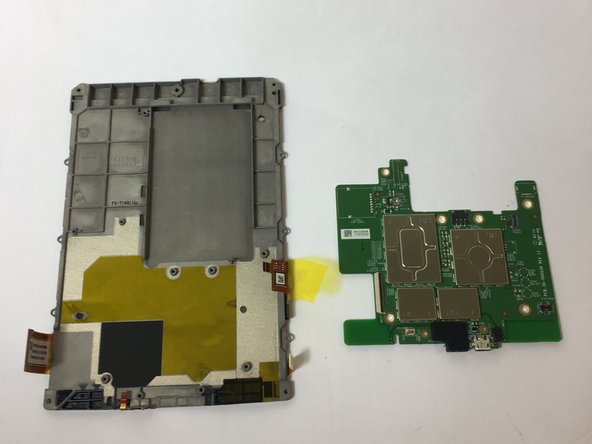
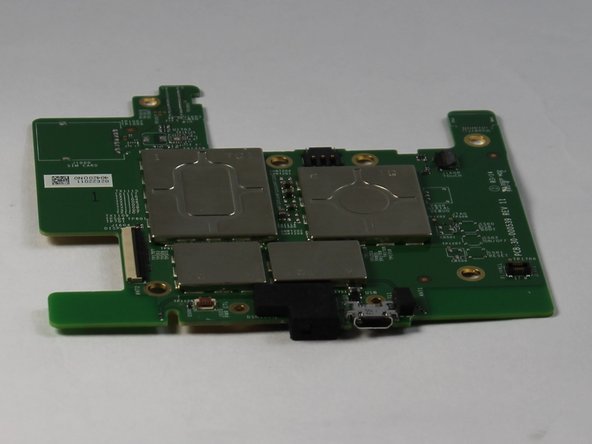
    • Gently remove the motherboard.

crwdns2915888:0crwdne2915888:0

To reassemble your device, follow these instructions in reverse order.

crwdns2935229:03crwdne2935229:0

Tyler Davis

crwdns2935283:009/15/16crwdne2935283:0

1,574 crwdns2915208:0crwdne2915208:0

crwdns2935297:05crwdne2935297:0

crwdns2915084:0crwdne2915084:0

USF Tampa, Team 11-2, Blackwell Fall 2016 crwdns2935289:0USF Tampa, Team 11-2, Blackwell Fall 2016crwdne2935289:0

USFT-BLACKWELL-F16S11G2

crwdns2931471:04crwdne2931471:0

crwdns2935297:06crwdne2935297:0

crwdns2944067:00crwdne2944067:0

crwdns2917038:0crwdne2917038:0

crwdns2936625:0crwdne2936625:0:

crwdns2936751:024crwdne2936751:0 0

crwdns2936753:07crwdne2936753:0 36

crwdns2936753:030crwdne2936753:0 80

crwdns2942667:0crwdne2942667:0 3,176