crwdns2933423:0crwdne2933423:0

Kaffelogic Nano 7/LINK (C-N Serial) USB Daughterboard Replacement

crwdns2942213:0crwdne2942213:0

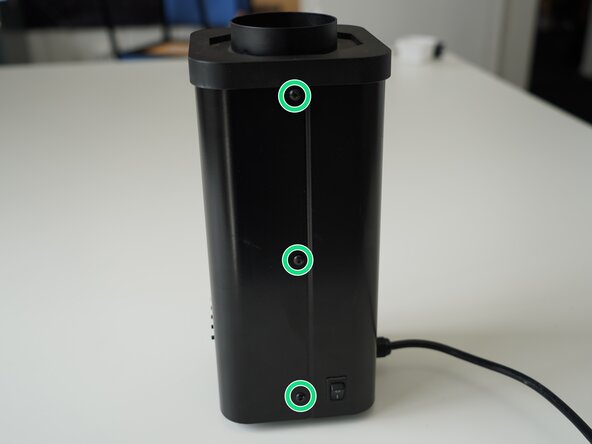
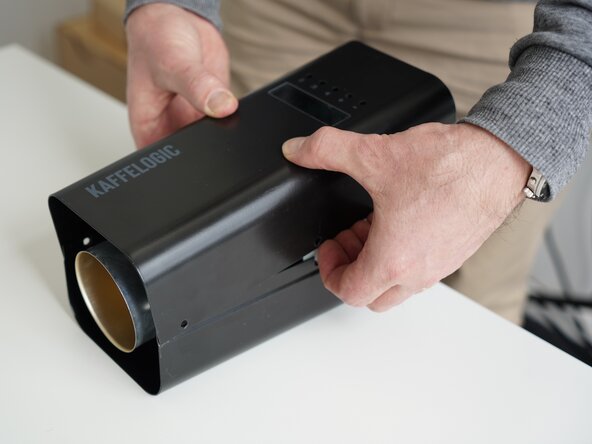
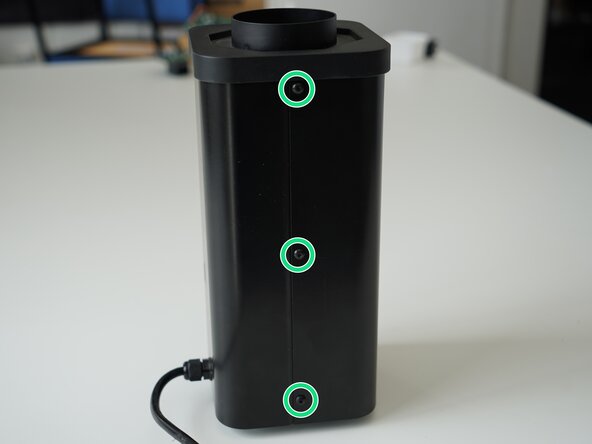
  1. Kaffelogic Nano 7/LINK (C-N Serial) USB Daughterboard Replacement, Removing Panel Screws: crwdns2935265:01crwdnd2935265:01crwdnd2935265:02crwdne2935265:0 Kaffelogic Nano 7/LINK (C-N Serial) USB Daughterboard Replacement, Removing Panel Screws: crwdns2935265:01crwdnd2935265:02crwdnd2935265:02crwdne2935265:0
    • Remove the 6x 2.5mm Hex screws on the left and right side of the roaster.

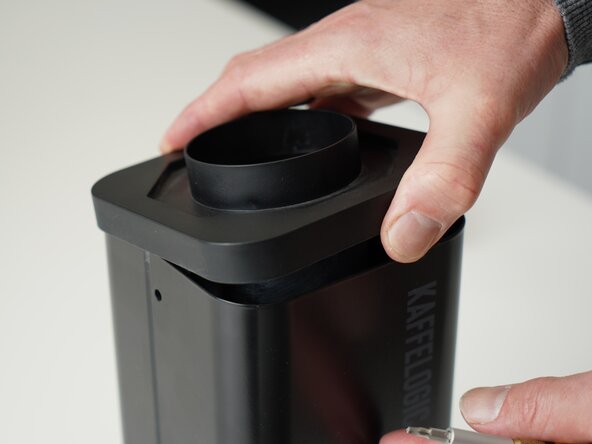
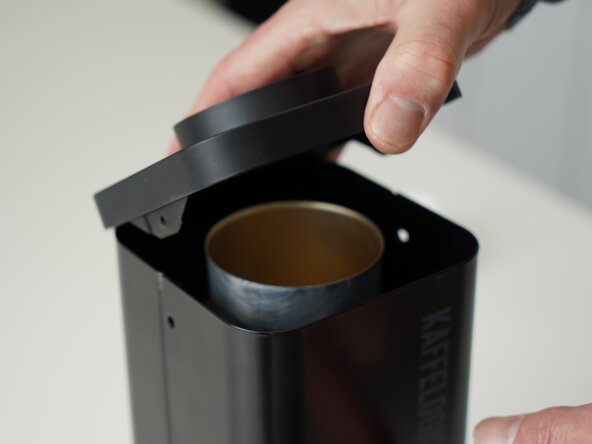
  2. Kaffelogic Nano 7/LINK (C-N Serial) USB Daughterboard Replacement, Lift the closure: crwdns2935265:02crwdnd2935265:01crwdnd2935265:02crwdne2935265:0 Kaffelogic Nano 7/LINK (C-N Serial) USB Daughterboard Replacement, Lift the closure: crwdns2935265:02crwdnd2935265:02crwdnd2935265:02crwdne2935265:0
    • Hold the roaster steady while removing the plastic top/closure.

    • Panels may spring apart slightly once removed.

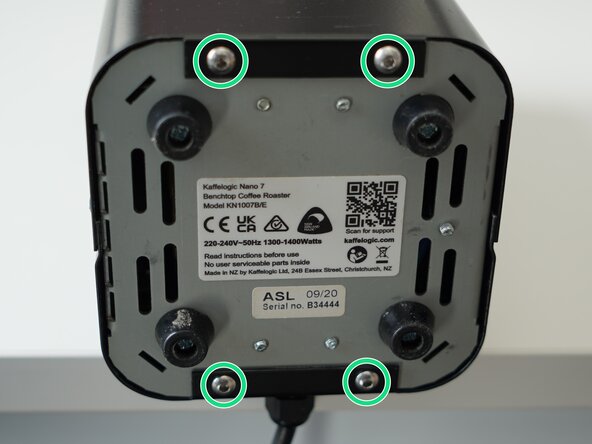
  3. Kaffelogic Nano 7/LINK (C-N Serial) USB Daughterboard Replacement, Remove bottom panel screws: crwdns2935265:03crwdnd2935265:01crwdnd2935265:03crwdne2935265:0 Kaffelogic Nano 7/LINK (C-N Serial) USB Daughterboard Replacement, Remove bottom panel screws: crwdns2935265:03crwdnd2935265:02crwdnd2935265:03crwdne2935265:0 Kaffelogic Nano 7/LINK (C-N Serial) USB Daughterboard Replacement, Remove bottom panel screws: crwdns2935265:03crwdnd2935265:03crwdnd2935265:03crwdne2935265:0
    • Remove the 4x 2.5mm Hex screws on the bottom of the roaster.

  4. Kaffelogic Nano 7/LINK (C-N Serial) USB Daughterboard Replacement, Remove the front panel: crwdns2935265:04crwdnd2935265:01crwdnd2935265:03crwdne2935265:0 Kaffelogic Nano 7/LINK (C-N Serial) USB Daughterboard Replacement, Remove the front panel: crwdns2935265:04crwdnd2935265:02crwdnd2935265:03crwdne2935265:0 Kaffelogic Nano 7/LINK (C-N Serial) USB Daughterboard Replacement, Remove the front panel: crwdns2935265:04crwdnd2935265:03crwdnd2935265:03crwdne2935265:0
    • Pull away the front panel carefully.

    • Take care not to damage the buttons while maneuvering the front panel.

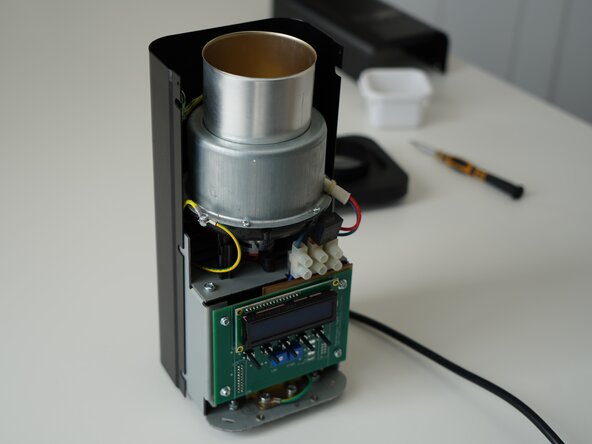
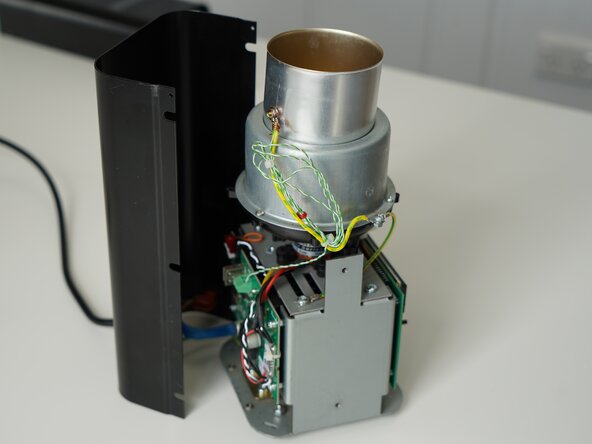
  5. Kaffelogic Nano 7/LINK (C-N Serial) USB Daughterboard Replacement, Remove rear panel: crwdns2935265:05crwdnd2935265:01crwdnd2935265:03crwdne2935265:0 Kaffelogic Nano 7/LINK (C-N Serial) USB Daughterboard Replacement, Remove rear panel: crwdns2935265:05crwdnd2935265:02crwdnd2935265:03crwdne2935265:0 Kaffelogic Nano 7/LINK (C-N Serial) USB Daughterboard Replacement, Remove rear panel: crwdns2935265:05crwdnd2935265:03crwdnd2935265:03crwdne2935265:0
    • Stand the roaster up again and pull away the rear panel from the chassis to expose the remaining components.

    • The mains cable is routed through the panel and it will remain attached, place the panel in a soft bag if you wish to protect the paint throughout the rest of your repairs.

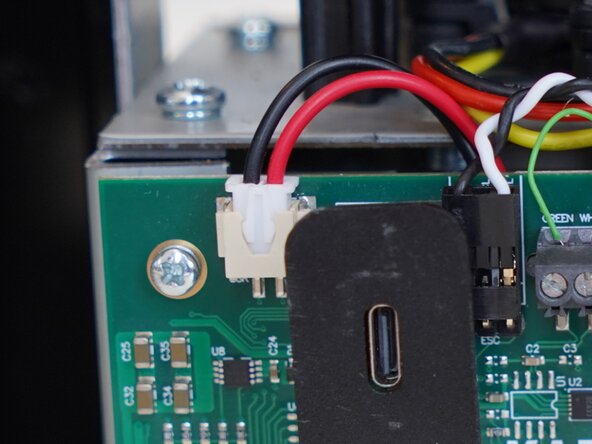
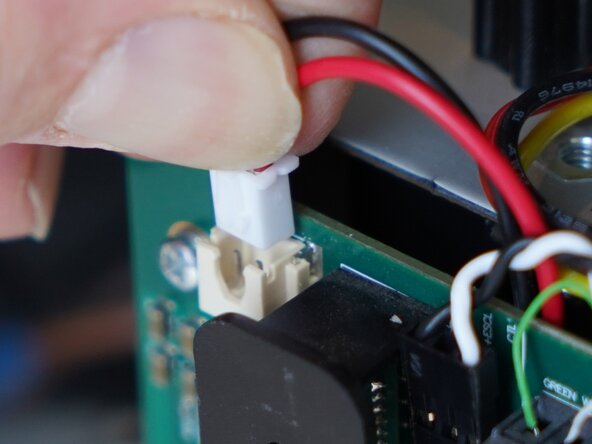
  6. Kaffelogic Nano 7/LINK (C-N Serial) USB Daughterboard Replacement, Disconnect the SSR signal: crwdns2935265:06crwdnd2935265:01crwdnd2935265:02crwdne2935265:0 Kaffelogic Nano 7/LINK (C-N Serial) USB Daughterboard Replacement, Disconnect the SSR signal: crwdns2935265:06crwdnd2935265:02crwdnd2935265:02crwdne2935265:0
    • Pull upwards on the SSR signal connector to remove it.

  7. Kaffelogic Nano 7/LINK (C-N Serial) USB Daughterboard Replacement, Disconnect the motor: crwdns2935265:07crwdnd2935265:01crwdnd2935265:01crwdne2935265:0
    • Unplug your motor if your roaster is fitted with a connector, otherwise leave the connections in place.

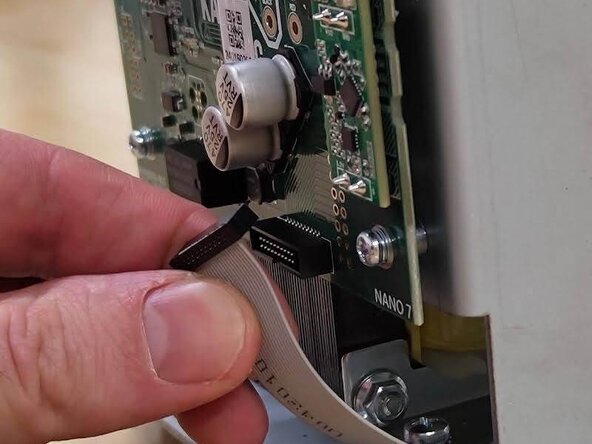
  8. Kaffelogic Nano 7/LINK (C-N Serial) USB Daughterboard Replacement, Disconnect the ribbon cable: crwdns2935265:08crwdnd2935265:01crwdnd2935265:01crwdne2935265:0
    • Carefully pull on the ribbon cable to remove it.

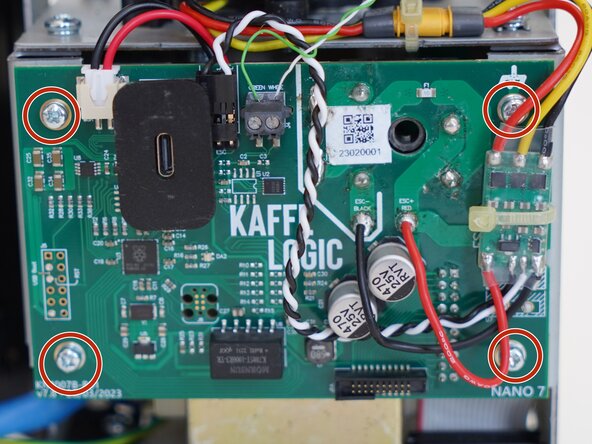
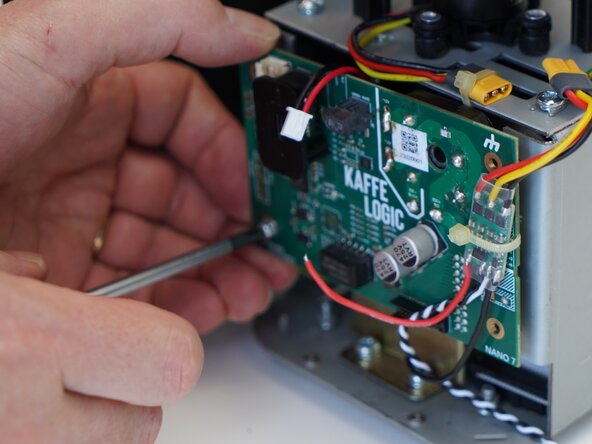
  9. Kaffelogic Nano 7/LINK (C-N Serial) USB Daughterboard Replacement, Remove PCB screws: crwdns2935265:09crwdnd2935265:01crwdnd2935265:01crwdne2935265:0
    • Remove the 4x PH2 PCB screws.

  10. Kaffelogic Nano 7/LINK (C-N Serial) USB Daughterboard Replacement, Pull the board: crwdns2935265:010crwdnd2935265:01crwdnd2935265:01crwdne2935265:0
    • Pull the board away from the chassis carefully, taking care with any wires still attached. We need to get to the back of the board.

  11. Kaffelogic Nano 7/LINK (C-N Serial) USB Daughterboard Replacement, Remove shroud screws: crwdns2935265:011crwdnd2935265:01crwdnd2935265:02crwdne2935265:0 Kaffelogic Nano 7/LINK (C-N Serial) USB Daughterboard Replacement, Remove shroud screws: crwdns2935265:011crwdnd2935265:02crwdnd2935265:02crwdne2935265:0
    • Remove the 2x 1.5mm hex screws securing the plastic USB shroud.

  12. Kaffelogic Nano 7/LINK (C-N Serial) USB Daughterboard Replacement, Remove shroud: crwdns2935265:012crwdnd2935265:01crwdnd2935265:01crwdne2935265:0
    • Slide the plastic shroud away from the PCB

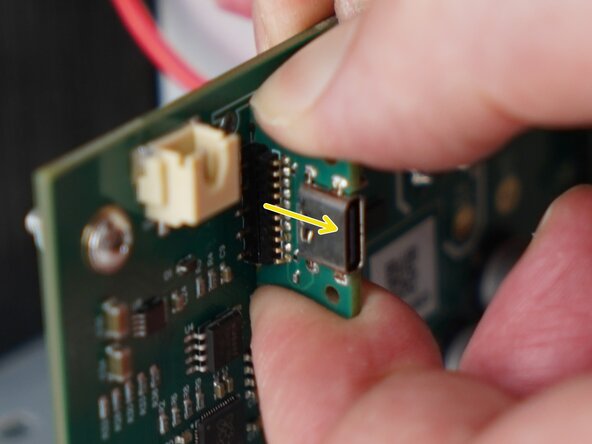
  13. Kaffelogic Nano 7/LINK (C-N Serial) USB Daughterboard Replacement, Remove the daughterboard: crwdns2935265:013crwdnd2935265:01crwdnd2935265:02crwdne2935265:0 Kaffelogic Nano 7/LINK (C-N Serial) USB Daughterboard Replacement, Remove the daughterboard: crwdns2935265:013crwdnd2935265:02crwdnd2935265:02crwdne2935265:0
    • Pull away on the daughterboard to remove it from the main PCB.

crwdns2915888:0crwdne2915888:0

To reassemble your device, follow these instructions in reverse order.
Kaffelogic

crwdns2935283:007/23/25crwdne2935283:0

46 crwdns2915208:0crwdne2915208:0

crwdns2935297:017crwdne2935297:0

crwdns2915084:0crwdne2915084:0

Kaffelogic Staff crwdns2935289:0Kaffelogic Staffcrwdne2935289:0

Community

crwdns2931471:02crwdne2931471:0

crwdns2935297:017crwdne2935297:0

crwdns2947412:00crwdne2947412:0

crwdns2917038:0crwdne2917038:0

crwdns2936625:0crwdne2936625:0:

crwdns2936751:024crwdne2936751:0 2

crwdns2936753:07crwdne2936753:0 7

crwdns2936753:030crwdne2936753:0 23

crwdns2942667:0crwdne2942667:0 23