crwdns2933423:0crwdne2933423:0

Kaffelogic Nano 7/LINK (A/B/C-N Serial) Motor Replacement

crwdns2942213:0crwdne2942213:0

  1. Kaffelogic Nano 7/LINK (A/B/C-N Serial) Motor Replacement, Removing Panel Screws: crwdns2935265:01crwdnd2935265:01crwdnd2935265:02crwdne2935265:0 Kaffelogic Nano 7/LINK (A/B/C-N Serial) Motor Replacement, Removing Panel Screws: crwdns2935265:01crwdnd2935265:02crwdnd2935265:02crwdne2935265:0
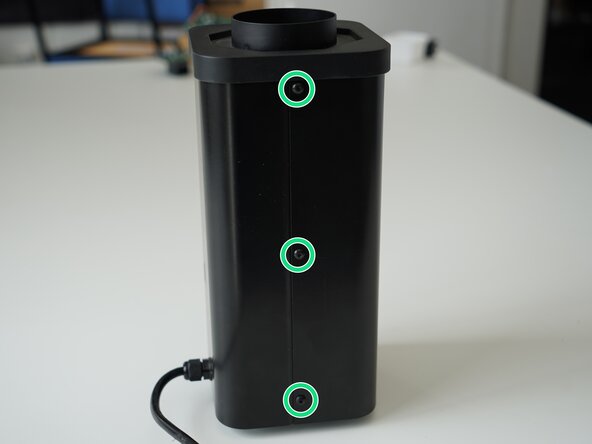
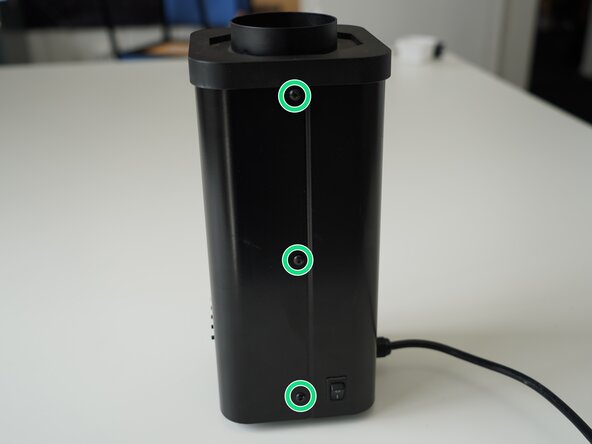
    • Remove the 6x 2.5mm Hex screws on the left and right side of the roaster.

  2. Kaffelogic Nano 7/LINK (A/B/C-N Serial) Motor Replacement, Lift the closure: crwdns2935265:02crwdnd2935265:01crwdnd2935265:02crwdne2935265:0 Kaffelogic Nano 7/LINK (A/B/C-N Serial) Motor Replacement, Lift the closure: crwdns2935265:02crwdnd2935265:02crwdnd2935265:02crwdne2935265:0
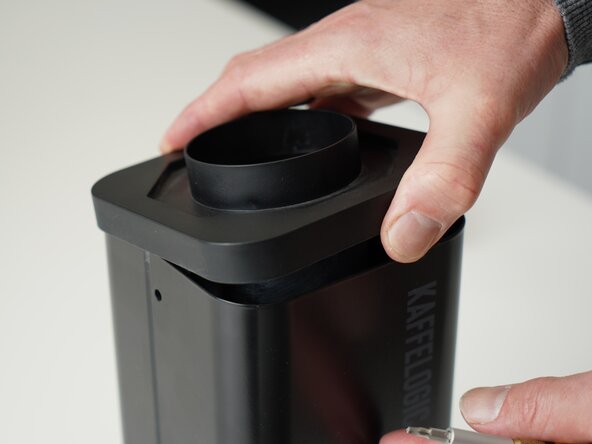
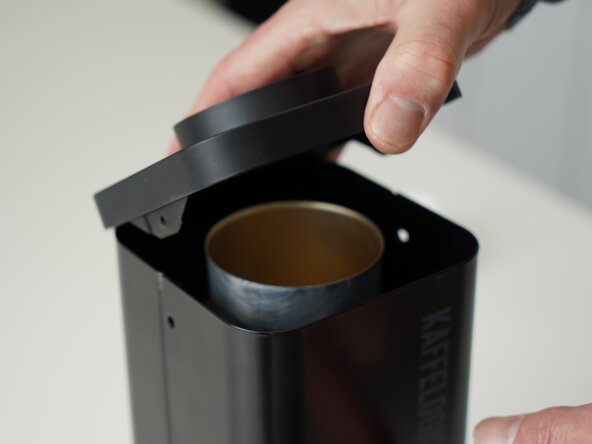
    • Hold the roaster steady while removing the plastic top/closure.

    • Panels may spring apart slightly once removed.

  3. Kaffelogic Nano 7/LINK (A/B/C-N Serial) Motor Replacement, Remove bottom panel screws: crwdns2935265:03crwdnd2935265:01crwdnd2935265:03crwdne2935265:0 Kaffelogic Nano 7/LINK (A/B/C-N Serial) Motor Replacement, Remove bottom panel screws: crwdns2935265:03crwdnd2935265:02crwdnd2935265:03crwdne2935265:0 Kaffelogic Nano 7/LINK (A/B/C-N Serial) Motor Replacement, Remove bottom panel screws: crwdns2935265:03crwdnd2935265:03crwdnd2935265:03crwdne2935265:0
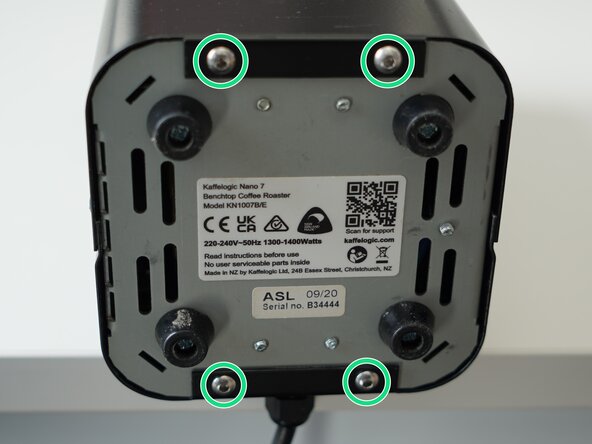
    • Remove the 4x 2.5mm Hex screws on the bottom of the roaster.

  4. Kaffelogic Nano 7/LINK (A/B/C-N Serial) Motor Replacement, Remove the front panel: crwdns2935265:04crwdnd2935265:01crwdnd2935265:03crwdne2935265:0 Kaffelogic Nano 7/LINK (A/B/C-N Serial) Motor Replacement, Remove the front panel: crwdns2935265:04crwdnd2935265:02crwdnd2935265:03crwdne2935265:0 Kaffelogic Nano 7/LINK (A/B/C-N Serial) Motor Replacement, Remove the front panel: crwdns2935265:04crwdnd2935265:03crwdnd2935265:03crwdne2935265:0
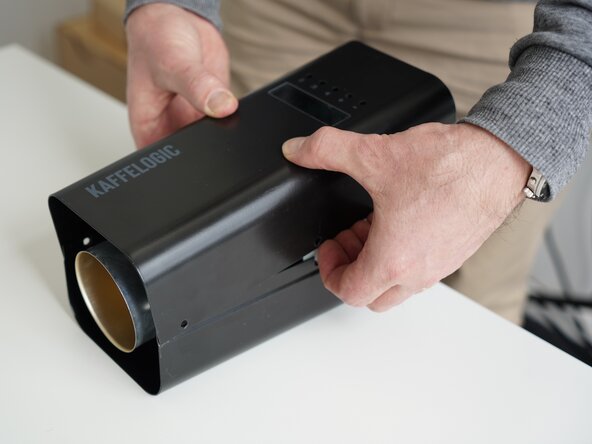
    • Pull away the front panel carefully.

    • Take care not to damage the buttons while maneuvering the front panel.

  5. Kaffelogic Nano 7/LINK (A/B/C-N Serial) Motor Replacement, Remove rear panel: crwdns2935265:05crwdnd2935265:01crwdnd2935265:03crwdne2935265:0 Kaffelogic Nano 7/LINK (A/B/C-N Serial) Motor Replacement, Remove rear panel: crwdns2935265:05crwdnd2935265:02crwdnd2935265:03crwdne2935265:0 Kaffelogic Nano 7/LINK (A/B/C-N Serial) Motor Replacement, Remove rear panel: crwdns2935265:05crwdnd2935265:03crwdnd2935265:03crwdne2935265:0
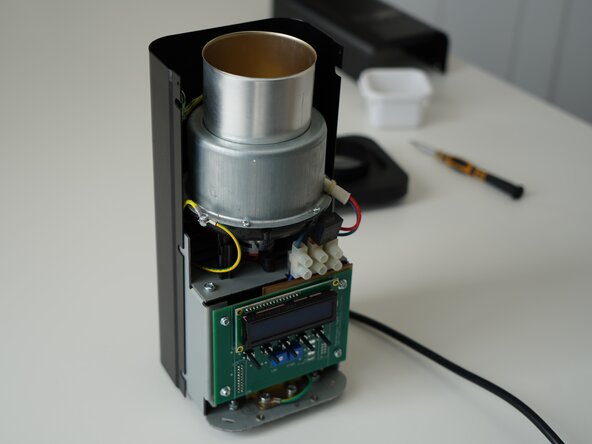
    • Stand the roaster up again and pull away the rear panel from the chassis to expose the remaining components.

    • The mains cable is routed through the panel and it will remain attached, place the panel in a soft bag if you wish to protect the paint throughout the rest of your repairs.

  6. Kaffelogic Nano 7/LINK (A/B/C-N Serial) Motor Replacement, Remove element chamber screws: crwdns2935265:06crwdnd2935265:01crwdnd2935265:02crwdne2935265:0 Kaffelogic Nano 7/LINK (A/B/C-N Serial) Motor Replacement, Remove element chamber screws: crwdns2935265:06crwdnd2935265:02crwdnd2935265:02crwdne2935265:0
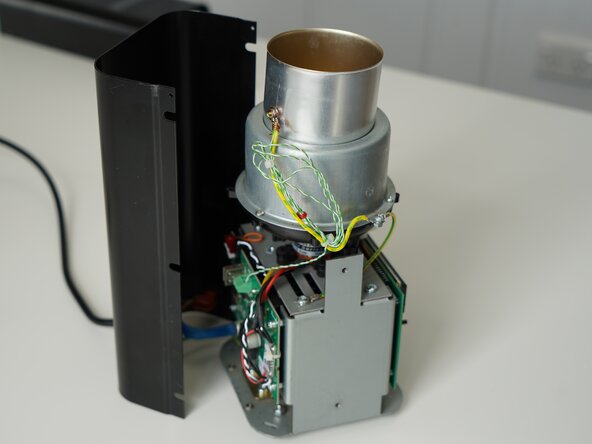
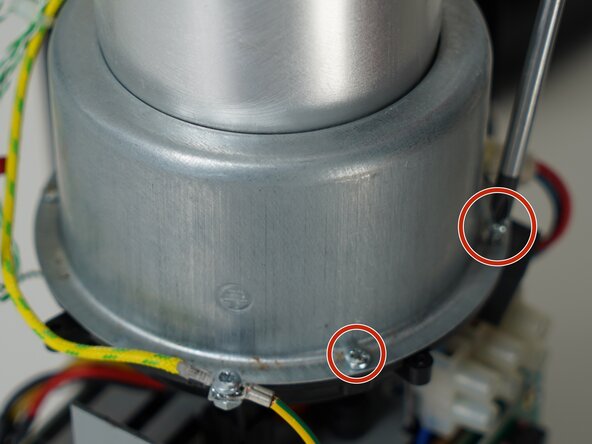
    • Remove the 4x PH1 element chamber screws from the plastic bowl. (One screw not pictured)

  7. Kaffelogic Nano 7/LINK (A/B/C-N Serial) Motor Replacement, Remove roast chamber: crwdns2935265:07crwdnd2935265:01crwdnd2935265:01crwdne2935265:0
    • Set the roast chamber aside but do not disconnect any wires.

  8. Kaffelogic Nano 7/LINK (A/B/C-N Serial) Motor Replacement, Remove the element chamber: crwdns2935265:08crwdnd2935265:01crwdnd2935265:02crwdne2935265:0 Kaffelogic Nano 7/LINK (A/B/C-N Serial) Motor Replacement, Remove the element chamber: crwdns2935265:08crwdnd2935265:02crwdnd2935265:02crwdne2935265:0
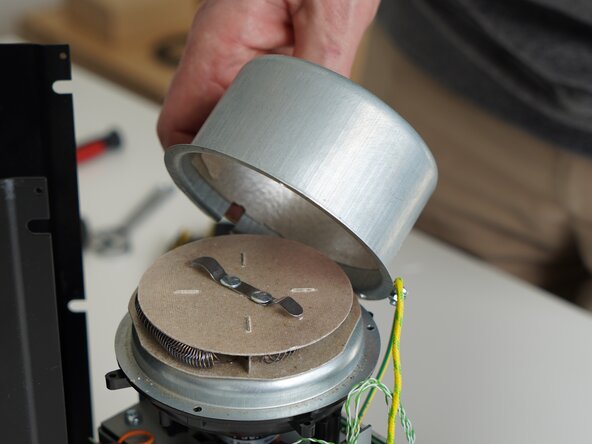
    • Lift the element chamber up carefully to expose the element. Set this aside.

  9. Kaffelogic Nano 7/LINK (A/B/C-N Serial) Motor Replacement, Remove support ring: crwdns2935265:09crwdnd2935265:01crwdnd2935265:03crwdne2935265:0 Kaffelogic Nano 7/LINK (A/B/C-N Serial) Motor Replacement, Remove support ring: crwdns2935265:09crwdnd2935265:02crwdnd2935265:03crwdne2935265:0 Kaffelogic Nano 7/LINK (A/B/C-N Serial) Motor Replacement, Remove support ring: crwdns2935265:09crwdnd2935265:03crwdnd2935265:03crwdne2935265:0
    • Lift up the element slightly and remove the support ring.

    • Do not touch the element coil directly. Skin oils can create hotspots on the wire.

  10. Kaffelogic Nano 7/LINK (A/B/C-N Serial) Motor Replacement, Remove element: crwdns2935265:010crwdnd2935265:01crwdnd2935265:01crwdne2935265:0
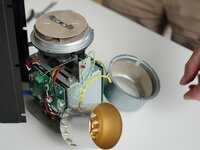
    • Move the element out of the way so you can continue working towards the motor.

    • You may cut the cable tie holding the element cable sheath in place, only if you have a suitable replacement handy.

  11. Kaffelogic Nano 7/LINK (A/B/C-N Serial) Motor Replacement, Remove impeller nut: crwdns2935265:011crwdnd2935265:01crwdnd2935265:03crwdne2935265:0 Kaffelogic Nano 7/LINK (A/B/C-N Serial) Motor Replacement, Remove impeller nut: crwdns2935265:011crwdnd2935265:02crwdnd2935265:03crwdne2935265:0 Kaffelogic Nano 7/LINK (A/B/C-N Serial) Motor Replacement, Remove impeller nut: crwdns2935265:011crwdnd2935265:03crwdnd2935265:03crwdne2935265:0
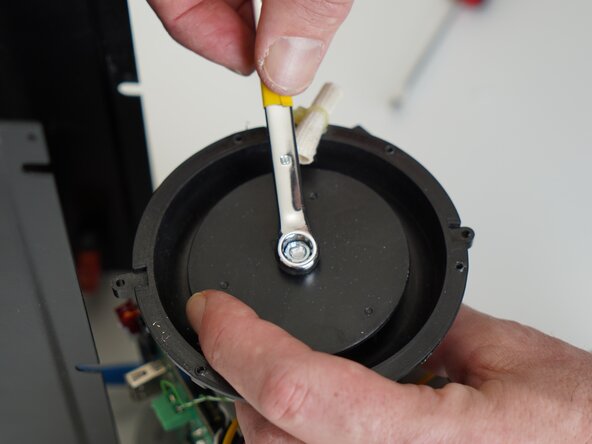
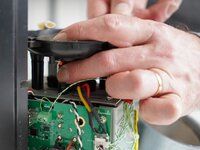
    • Use an 8mm wrench or socket to remove the nut securing the impeller to the motor.

  12. Kaffelogic Nano 7/LINK (A/B/C-N Serial) Motor Replacement, Remove impeller: crwdns2935265:012crwdnd2935265:01crwdnd2935265:02crwdne2935265:0 Kaffelogic Nano 7/LINK (A/B/C-N Serial) Motor Replacement, Remove impeller: crwdns2935265:012crwdnd2935265:02crwdnd2935265:02crwdne2935265:0
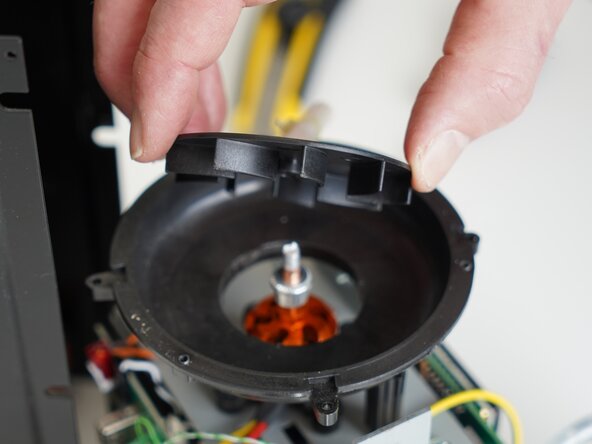
    • Lift up on the impeller to remove it from the motor shaft.

  13. Kaffelogic Nano 7/LINK (A/B/C-N Serial) Motor Replacement, Remove bowl top (Some models): crwdns2935265:013crwdnd2935265:01crwdnd2935265:02crwdne2935265:0 Kaffelogic Nano 7/LINK (A/B/C-N Serial) Motor Replacement, Remove bowl top (Some models): crwdns2935265:013crwdnd2935265:02crwdnd2935265:02crwdne2935265:0
    • Some roasters have split bowl legs, allowing better access to the motor by removal of the bowl. However, the motor and mount will fit through the hole in the center of the bowl if your roaster does not have split legs.

    • If your bowl is NOT the split leg design, do not attempt to remove the bowl.

  14. Kaffelogic Nano 7/LINK (A/B/C-N Serial) Motor Replacement, Remove the motor: crwdns2935265:014crwdnd2935265:01crwdnd2935265:03crwdne2935265:0 Kaffelogic Nano 7/LINK (A/B/C-N Serial) Motor Replacement, Remove the motor: crwdns2935265:014crwdnd2935265:02crwdnd2935265:03crwdne2935265:0 Kaffelogic Nano 7/LINK (A/B/C-N Serial) Motor Replacement, Remove the motor: crwdns2935265:014crwdnd2935265:03crwdnd2935265:03crwdne2935265:0
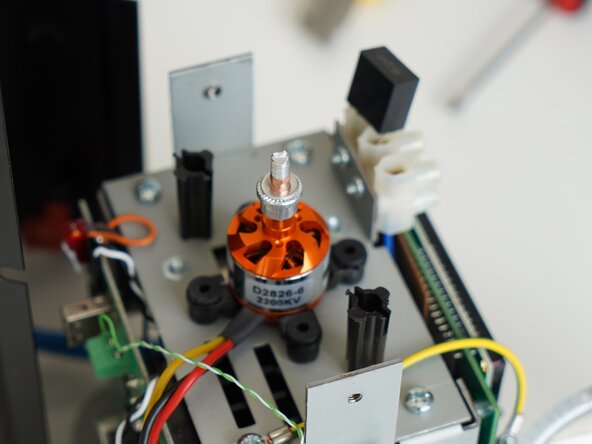
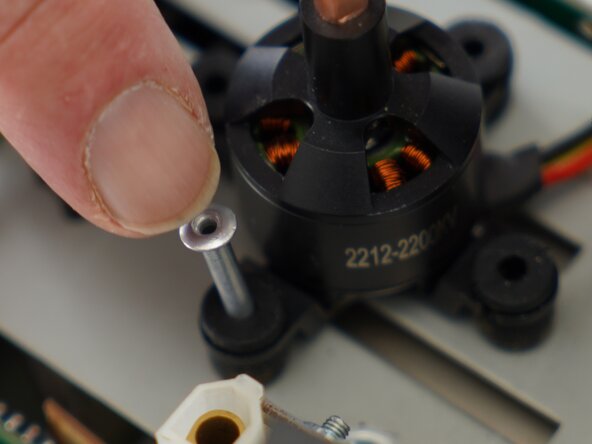
    • Remove any motor pins (if present)

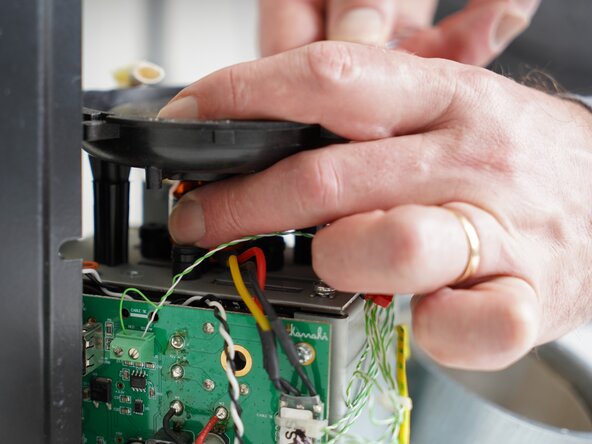
    • Pinch the 4x rubber mounts to pull them through the slots in the plastic motor mount.

    • Unplug your motor if your roaster is fitted with a connector, otherwise proceed to de-soldering steps below.

  15. Kaffelogic Nano 7/LINK (A/B/C-N Serial) Motor Replacement, Dismount the motor controller: crwdns2935265:015crwdnd2935265:01crwdnd2935265:02crwdne2935265:0 Kaffelogic Nano 7/LINK (A/B/C-N Serial) Motor Replacement, Dismount the motor controller: crwdns2935265:015crwdnd2935265:02crwdnd2935265:02crwdne2935265:0
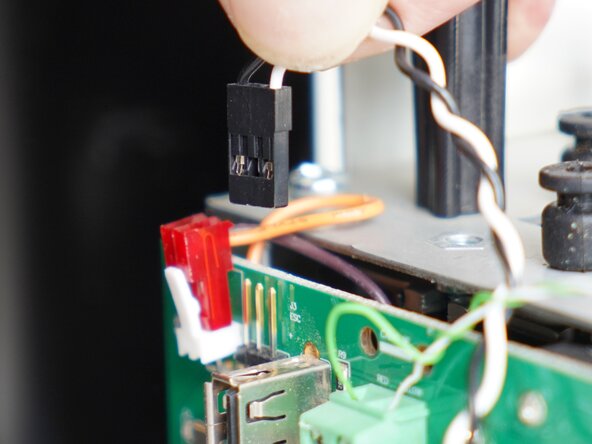
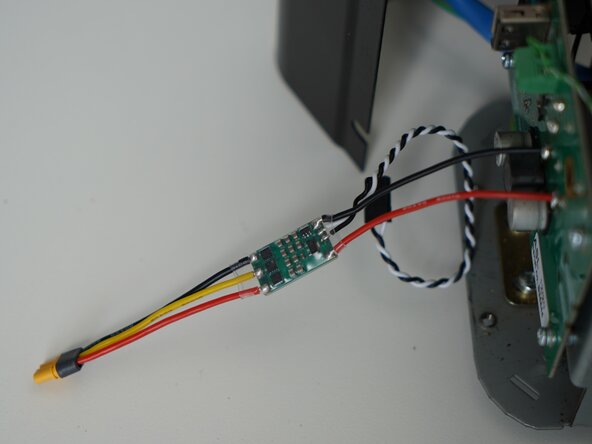
    • Cut the cable tie holding the motor controller in place.

    • Disconnect the motor controller cable from the 3-prong connector (This will be positioned differently depending on your board version)

  16. Kaffelogic Nano 7/LINK (A/B/C-N Serial) Motor Replacement, Desoldering: crwdns2935265:016crwdnd2935265:01crwdnd2935265:03crwdne2935265:0 Kaffelogic Nano 7/LINK (A/B/C-N Serial) Motor Replacement, Desoldering: crwdns2935265:016crwdnd2935265:02crwdnd2935265:03crwdne2935265:0 Kaffelogic Nano 7/LINK (A/B/C-N Serial) Motor Replacement, Desoldering: crwdns2935265:016crwdnd2935265:03crwdnd2935265:03crwdne2935265:0
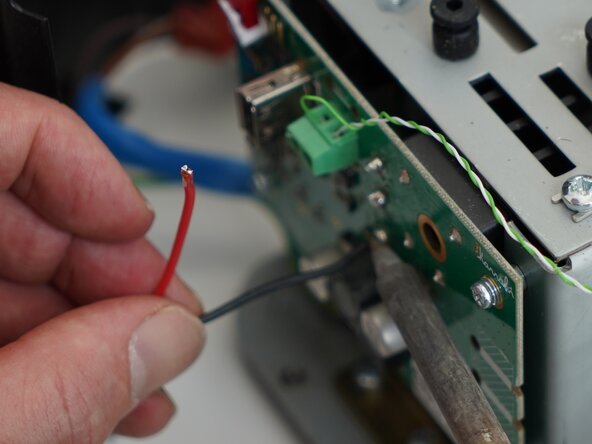
    • Prepare your soldering iron, and de-solder the red and black motor controller power wires.

    • Attach your new motor controller, and enjoy your new motor after reversing these steps.

  17. Kaffelogic Nano 7/LINK (A/B/C-N Serial) Motor Replacement, Motor kit extras: crwdns2935265:017crwdnd2935265:01crwdnd2935265:03crwdne2935265:0 Kaffelogic Nano 7/LINK (A/B/C-N Serial) Motor Replacement, Motor kit extras: crwdns2935265:017crwdnd2935265:02crwdnd2935265:03crwdne2935265:0 Kaffelogic Nano 7/LINK (A/B/C-N Serial) Motor Replacement, Motor kit extras: crwdns2935265:017crwdnd2935265:03crwdnd2935265:03crwdne2935265:0
    • Your new motor kit should include a set of anti-vibration pins, place these inside of the rubber mounts.

    • Steve has also shared a handy technique for fishing your motor connector cable tie through the gantry place.

    • Head through to our wiki for instructions on recalibrating your fan speed after replacing the motor. Nucleus Link anemometer instructions can be found here.

crwdns2915888:0crwdne2915888:0

To reassemble your device, follow these instructions in reverse order.

Kaffelogic

crwdns2935283:007/23/25crwdne2935283:0

46 crwdns2915208:0crwdne2915208:0

crwdns2935297:017crwdne2935297:0

crwdns2915084:0crwdne2915084:0

Kaffelogic Staff crwdns2935289:0Kaffelogic Staffcrwdne2935289:0

Community

crwdns2931471:02crwdne2931471:0

crwdns2935297:017crwdne2935297:0

crwdns2947412:00crwdne2947412:0

crwdns2917038:0crwdne2917038:0

crwdns2936625:0crwdne2936625:0:

crwdns2936751:024crwdne2936751:0 7

crwdns2936753:07crwdne2936753:0 21

crwdns2936753:030crwdne2936753:0 59

crwdns2942667:0crwdne2942667:0 59