crwdns2933423:0crwdne2933423:0

Jumper Angelsounds JPD-100S Indicator Light Replacement

crwdns2942213:0crwdne2942213:0

  1. Jumper Angelsounds JPD-100S Indicator Light Replacement, Motherboard: crwdns2935265:01crwdnd2935265:01crwdnd2935265:01crwdne2935265:0
    • Access the battery compartment

    • Remove the battery compartment lid and set it aside.

    • Disconnect the battery and set it aside.

  2. Jumper Angelsounds JPD-100S Indicator Light Replacement: crwdns2935265:02crwdnd2935265:01crwdnd2935265:02crwdne2935265:0 Jumper Angelsounds JPD-100S Indicator Light Replacement: crwdns2935265:02crwdnd2935265:02crwdnd2935265:02crwdne2935265:0
    • Puncture the sticker in the battery compartment with a spudger to access the screw beneath it.

  3. Jumper Angelsounds JPD-100S Indicator Light Replacement: crwdns2935265:03crwdnd2935265:01crwdnd2935265:01crwdne2935265:0
    • Remove the 7mm Phillips #1 screw from the battery compartment.

    • Place the screw in a secure place.

  4. Jumper Angelsounds JPD-100S Indicator Light Replacement: crwdns2935265:04crwdnd2935265:01crwdnd2935265:02crwdne2935265:0 Jumper Angelsounds JPD-100S Indicator Light Replacement: crwdns2935265:04crwdnd2935265:02crwdnd2935265:02crwdne2935265:0
    • Begin prying open the device.

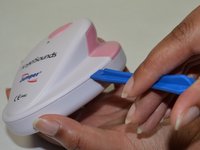
    • Insert a plastic opening tool into the side groove about 2cm from the pink plastic component and pry open one side of the device.

    • Once the side is separated, leave the opening tool inside to prevent the two sides from closing.

  5. Jumper Angelsounds JPD-100S Indicator Light Replacement: crwdns2935265:05crwdnd2935265:01crwdnd2935265:02crwdne2935265:0 Jumper Angelsounds JPD-100S Indicator Light Replacement: crwdns2935265:05crwdnd2935265:02crwdnd2935265:02crwdne2935265:0
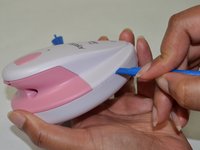
    • Insert another plastic opening tool into the groove opposite to the side of the tool already inserted.

    • Create separation on that side until the white plastic component comes off entirely.

    • Place the white plastic component in a secure place.

  6. Jumper Angelsounds JPD-100S Indicator Light Replacement: crwdns2935265:06crwdnd2935265:01crwdnd2935265:01crwdne2935265:0
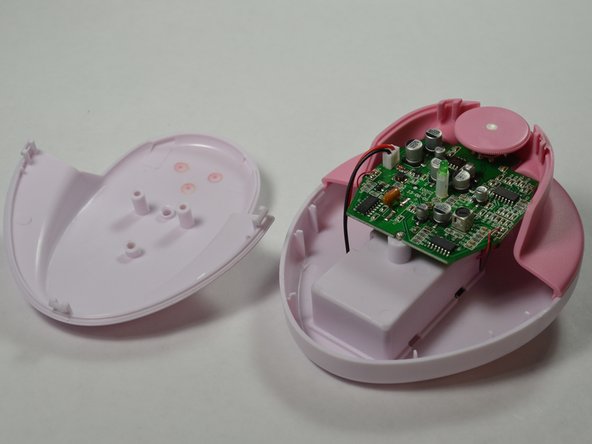
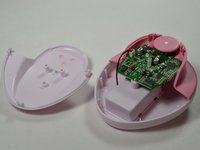
    • With your hand, remove the pink component.

  7. Jumper Angelsounds JPD-100S Indicator Light Replacement: crwdns2935265:07crwdnd2935265:01crwdnd2935265:01crwdne2935265:0
    • Remove the 7mm Phillips #1 screw in the middle of the motherboard.

  8. Jumper Angelsounds JPD-100S Indicator Light Replacement, Indicator Light: crwdns2935265:08crwdnd2935265:01crwdnd2935265:01crwdne2935265:0
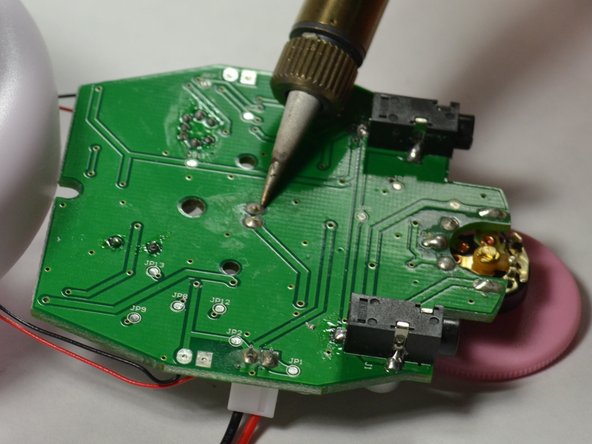
    • Place the motherboard in a position that allows access it's underside.

    • Pre-heat the soldering iron.

  9. Jumper Angelsounds JPD-100S Indicator Light Replacement: crwdns2935265:09crwdnd2935265:01crwdnd2935265:03crwdne2935265:0 Jumper Angelsounds JPD-100S Indicator Light Replacement: crwdns2935265:09crwdnd2935265:02crwdnd2935265:03crwdne2935265:0 Jumper Angelsounds JPD-100S Indicator Light Replacement: crwdns2935265:09crwdnd2935265:03crwdnd2935265:03crwdne2935265:0
    • Desoldering

    • If steam is created when the soldering iron is touched to a wet sponge then the soldering iron is hot enough.

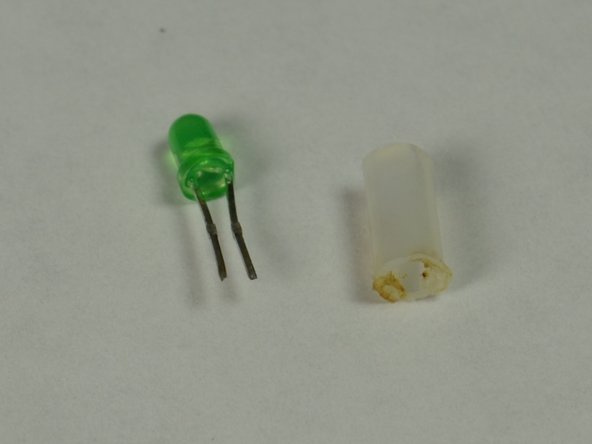
    • Use the soldering iron and soldering vacuum to unsolder the indicator light leads.

    • Plastic spacer holding indicator light may burn.

crwdns2915888:0crwdne2915888:0

To reassemble your device, follow these instructions in reverse order.

Deron Rogers

crwdns2935283:008/31/15crwdne2935283:0

271 crwdns2915208:0crwdne2915208:0

crwdns2935297:02crwdne2935297:0

crwdns2915084:0crwdne2915084:0

USF Tampa, Team 6-1, Remmell Fall 2015 crwdns2935289:0USF Tampa, Team 6-1, Remmell Fall 2015crwdne2935289:0

USFT-REMMELL-F15S6G1

crwdns2931471:06crwdne2931471:0

crwdns2935297:06crwdne2935297:0

crwdns2944067:00crwdne2944067:0

crwdns2917038:0crwdne2917038:0

crwdns2936625:0crwdne2936625:0:

crwdns2936751:024crwdne2936751:0 0

crwdns2936753:07crwdne2936753:0 4

crwdns2936753:030crwdne2936753:0 12

crwdns2942667:0crwdne2942667:0 187