crwdns2915892:0crwdne2915892:0
Without a functioning status display, which powers the LED interface, control of the device is limited. This guide will tell you step-by-step how to replace the status display.
crwdns2942213:0crwdne2942213:0
-
-
Use the iOpener tool to unglue the adhesive of the device. The link to the iOpener instructions are listed below.
-
-
-
Place the flat head of the bigger plastic opening tool in between the front plate and back plate.
-
Pull the tool toward the back of the device to pry it open.
-
Repeat this process over all edges of the device.
-
-
-
Open up the device by pulling the front plate straight up from the back plate.
-
-
-
-
Carefully detach the wire running from the speaker to the motherboard by unplugging it from the white socket.
-
-
-
Using the PH000, unscrew the three 4.55 mm screws in the motherboard.
-
The names of the screwdriver heads are listed on the sides of each head.
-
-
-
Remove the motherboard from the device by lifting it up from the back plate.
-
-
-
Using the PH000, unscrew the three 4.6mm screws in the status display.
-
-
-
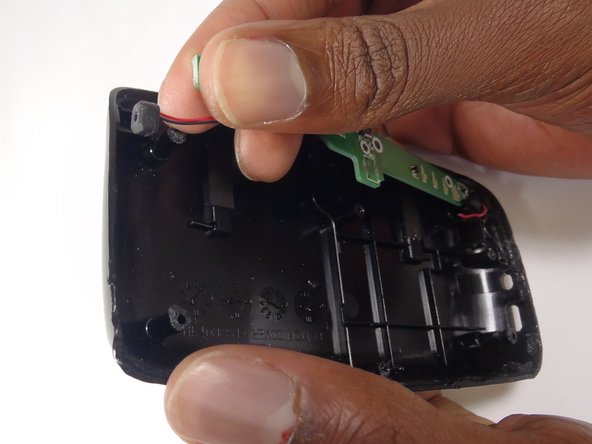
Disconnect the wires connecting the status display to the back plate. Do this by pulling the wire from the black socket.
-
Do this with the wires on both sides of the status board.
-
-
-
Remove the status display by lifting it off of the back plate.
-


To reassemble your device, follow these instructions in reverse order.
crwdns2935221:0crwdne2935221:0
crwdns2935227:0crwdne2935227:0
crwdns2935287:0crwdne2935287:0

Baylor, Team 8-13, Williams Fall 2014 crwdns2935289:0Baylor, Team 8-13, Williams Fall 2014crwdne2935289:0
BU-WILLIAMS-F14S8G13
crwdns2931471:03crwdne2931471:0
crwdns2935297:05crwdne2935297:0