crwdns2915892:0crwdne2915892:0
This guide will walk you through the process of partially removing the motherboard in your JBL Tune 760NC headphones. If you're troubleshooting internal issues or preparing for a mock repair or inspection, lifting the motherboard slightly can help you view the internal connections without fully disconnecting any wires.
Before You Begin:
Make sure the headphones are completely powered off and unplugged. This process involves opening the right ear cup and removing internal screws to gently lift the motherboard for viewing or instructional purposes
Note:
You will not be desoldering or disconnecting any wires in this guide. Because the wires remain attached, be extra careful not to apply stress or tension when lifting the board. This is a moderate-level repair that may cause minor cosmetic wear to the device. Work slowly on a clean, flat surface with proper lighting, and avoid forcing components back into place
Tools Required:
- iFixit Toolkit
- Phillips #0 screwdriver
- Soldering iron (recommended)
- Tweezers (optional)
crwdns2942213:0crwdne2942213:0
-
-
Power off the device and unplug any cables.
-
Place the headphones on a stable, flat surface.
-
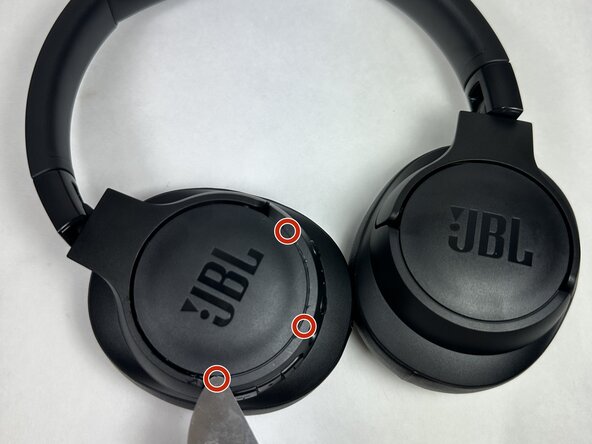
Insert the Jimmy pry tool at a 30° angle into the seam between the ear cup and the plastic cap.
-
Pry gently but firmly to release the internal clips. You may need to try different spots around the seam for easier access.
-
Once the cap is removed, set it aside.
-
-
-
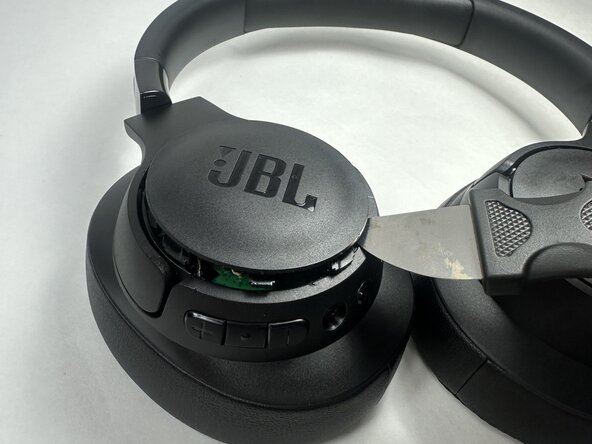
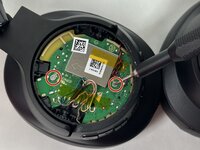
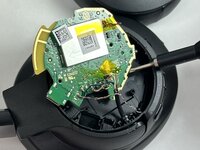
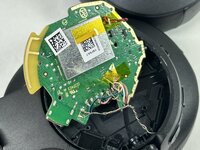
Identify the green circuit board this is the motherboard.
-
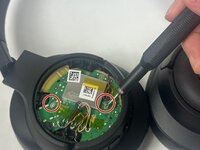
Remove the two 5.1 mm Phillips #0 screws securing the motherboard.
-
Set the screws aside in a labeled tray for easy reassembly.
-
-
-
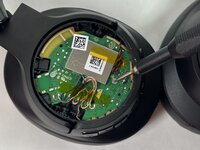
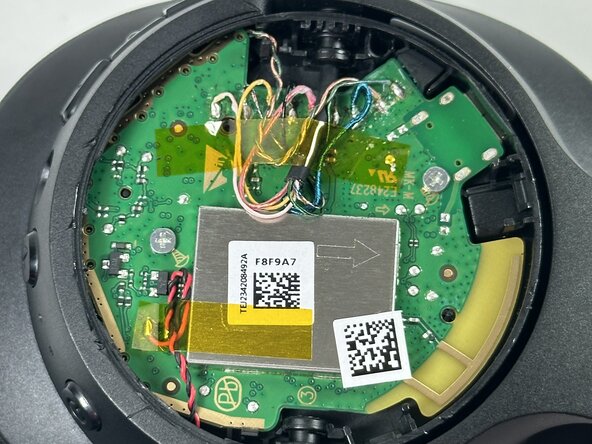
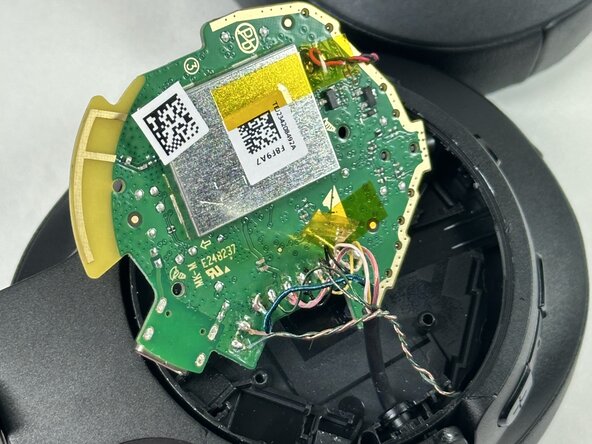
Once the screws are removed, carefully lift the motherboard from one edge.
-
Do not pull or tug the board, the wires are still attached.
-
Tilt or slightly raise the board to show the connection points beneath. This step simulates how a full removal would proceed.
-
Once inspected or photographed, gently lower the motherboard back into place.
-
-
-
Gently lower the motherboard back into its original position inside the casing.
-
Align the screw holes and ensure the board sits flat without bending the attached wires.
-
Reinsert the two 5.1 mm Phillips #0 screws to secure the motherboard in place.
-
Snap the outer plastic cap back onto the ear cup, pressing evenly around the edges until you hear it click securely into place.
-
This step may require some pressure take your time and make sure all clips are properly aligned to avoid damaging the cap.
-


To reassemble your device, follow these instructions in reverse order.

crwdns2935287:0crwdne2935287:0

UMass Dartmouth, Team 4-3, Konn Spring 2025 crwdns2935289:0UMass Dartmouth, Team 4-3, Konn Spring 2025crwdne2935289:0
UMASSD-KONN-S25S4G3
crwdns2931471:04crwdne2931471:0
crwdns2935297:03crwdne2935297:0