crwdns2915892:0crwdne2915892:0
If your speaker is experiencing trouble charging or if the USB port seems loose, electrical connections for power may have been damaged. A USB port replacement may be necessary. This guide walks you through on removing the USB port.
crwdns2942213:0crwdne2942213:0
-
-
Insert the plastic opening tool in the crack in between the cover and the rubber spine with the power button.
-
Pry off the cover, beginning with the side without the volume and bluetooth buttons.
-
Pull the cover off with your thumbs.
-
-
-
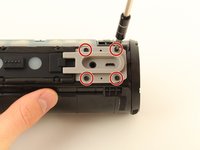
Remove four 13 mm JIS #0 screws attaching the rubber spine to the speaker, located on both sides of the inside of the speaker.
-
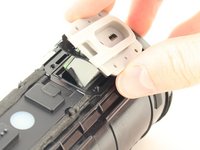
Use the plastic opening tool to release the clips holding the central part of the rubber spine.
-
Pry away one end of the rubber spine with your thumbs and it should come off.
-
-
-
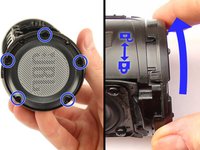
Remove the four 9mm Phillips #1 screws holding the gray USB port.
-
Loosen the USB cover's gray casing using your hands.
-
-
-
Twist or remove screws from the cap. (depends on your model-version: only older versions have 9mm Phillips #1 screws)
-
-
-
-
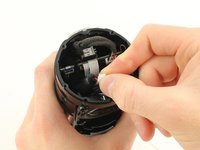
Pull the wire coated with dark gray foam out from the space where it is tucked and move it out of the way.
-
-
crwdns2935267:0crwdne2935267:0Tweezers$4.99
-
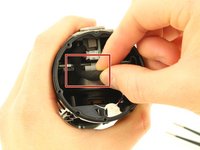
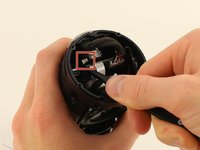
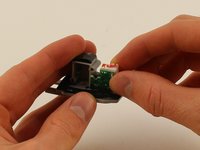
Unhook the white plug attached to the small circuit board hanging from the gray micro USB casing using the ESD Safe Blunt Nose Tweezers.
-
Move the plug out of the way by pulling it through the gap in the large circuit board to get to the next plug behind it.
-
-
-
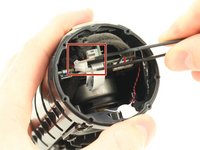
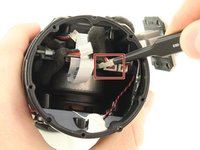
Unhook the other smaller white plug behind the previous plug from the same small hanging circuit board using the tweezers.
-
-
-
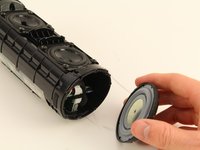
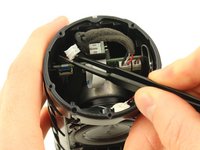
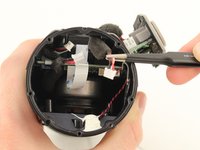
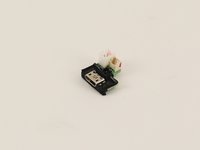
Pull the gray USB port out of the speaker.
-
-
-
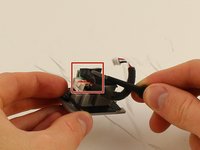
Unhook the small white plug attached to the main circuit board that is holding the USB port to the speaker.
-
Remove the USB port component from the speaker.
-
-
-
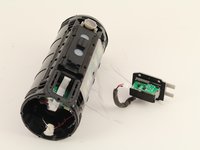
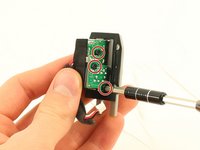
Remove three 9mm Phillips #1 screws holding the two small circuit boards to the USB port component.
-
Pry off the top small circuit board with the plastic opening tool.
-
-
-
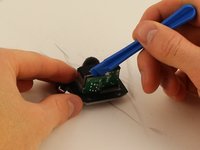
Peel back the black adhesive on the bottom side of the component with the tweezers and remove the wires underneath.
-
Remove the first small circuit board and attached wires.
-
-
-
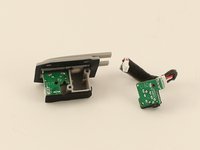
Remove the second circuit board by pulling on it with your hands.
-


To reassemble your device, follow these instructions in reverse order.
To reassemble your device, follow these instructions in reverse order.
crwdns2935221:0crwdne2935221:0
crwdns2935229:030crwdne2935229:0
crwdns2915084:0crwdne2915084:0

Cal Poly, Team S4-G3, White Fall 2018 crwdns2935289:0Cal Poly, Team S4-G3, White Fall 2018crwdne2935289:0
CPSU-WHITE-F18S4G3
crwdns2931471:04crwdne2931471:0
crwdns2935297:037crwdne2935297:0
crwdns2947412:012crwdne2947412:0
Hi, I need to replace this circuit board where the charging port mounts.
While trying to remove damaged micro usb port, I damaged the tiny wires from the circuit board.
I tried to find this online but no luck so far.
Do you know the code for this PCB?
Thank you,
hi, where can i buy new circuit board for micro usb charging port?
please i need 1… thank you.
I have a question on the small circuit board (charge port), one of the female port on it is for power (+5v), but what is another one? Is it D+, D- ?
P.S. I’ve measure that port with micro usb connected to power source, turns out there has no voltage measured, but the bigger one does has 5v measured.
Thanks!