crwdns2915892:0crwdne2915892:0
Has the battery life of your device become unusable? Does the battery seem to refuse to charge? A faulty battery is possibly the cause of these power issues. As the battery undergoes more cycles, it holds less charge.
crwdns2942213:0crwdne2942213:0
-
-
-
Insert the plastic opening tool in the crack in between the cover and the rubber spine with the power button.
-
Pry off the cover, beginning with the side without the volume and bluetooth buttons.
-
Pull the cover off with your thumbs.
 crwdns2952109:0crwdne2952109:0
-
-
-
Remove four 13 mm JIS #0 screws attaching the rubber spine to the speaker, located on both sides of the inside of the speaker.
-
Use the plastic opening tool to release the clips holding the central part of the rubber spine.
-
Pry away one end of the rubber spine with your thumbs and it should come off.
-
-
-
-
-
-
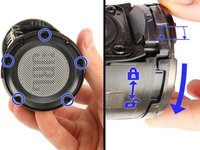
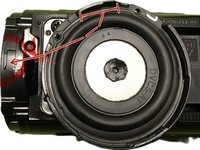
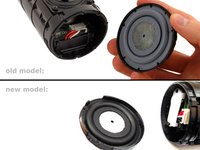
The end cap opposite to the USB port: Twist - or - remove screws from the cap. (depends on your model-version: only older version have 9mm Phillips #1 screws)
-
Pull the end cap off with your hands.
-
-
-
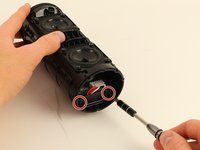
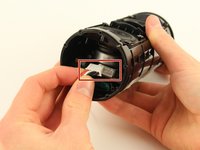
Remove two 11mm Phillips #1 screws on the battery cover.
-
Pull the battery cover off with your hands.
-
-
-
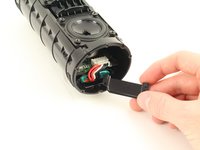
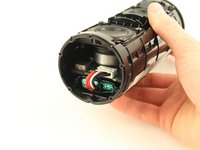
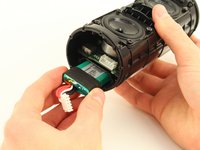
Remove the large white plug that connects the wires from the battery to the main board using your hands.
-
Pull the battery out with your hands.
-
In this case: You can pushing out the Battery, which we documented in an extra guide.
-
A short preview: You can remove the other radiator, unscrew the charging port and gently pull it out just a bit so a pencil (flat end) can fit in and push out the battery from this side.
-
More details and pictures in the separated extra guide.
-
-






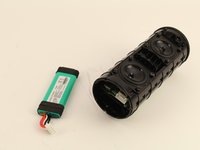
To reassemble your device, follow these instructions in reverse order.
crwdns2935221:0crwdne2935221:0
crwdns2935229:0199crwdne2935229:0

crwdns2935287:0crwdne2935287:0

Cal Poly, Team S4-G3, White Fall 2018 crwdns2935289:0Cal Poly, Team S4-G3, White Fall 2018crwdne2935289:0
CPSU-WHITE-F18S4G3
crwdns2931471:04crwdne2931471:0
crwdns2935297:042crwdne2935297:0
crwdns2947412:080crwdne2947412:0
Is the battery glued into the socket like the Flip 3?
Kenneth - crwdns2934203:0crwdne2934203:0 crwdns2950251:0crwdne2950251:0
No it isn’t. but the black rubber around it makes it really hard to get out. try to push it from the otherside by removing the charging-port.
Be careful not to pierce the battery
Richardo Otros - crwdns2934203:0crwdne2934203:0 crwdns2950251:0crwdne2950251:0
Yes with me the battery was glued
Diter Freeman - crwdns2934203:0crwdne2934203:0 crwdns2950251:0crwdne2950251:0
Be careful and don’t do like me: my old battery was bloated, so I had to push from the other side, but when doing so, I ripped the ribbon cable from the power button… now trying to find a replacement cable
jmbarroso - crwdns2934203:0crwdne2934203:0 crwdns2950251:0crwdne2950251:0
Did you find the cable of the power button?
mohamed da - crwdns2934203:0crwdne2934203:0 crwdns2950251:0crwdne2950251:0
