crwdns2943259:0crwdnd2943259:0crwdnd2943259:0crwdnd2943259:0crwdne2943259:0
crwdns2915892:0crwdne2915892:0
由于Micro USB / AUX端口连接器与白色外壳粘合牢固,因此几乎不可能在不更换整个外壳的情况下进行更换。 按照本指南分离并更换包含Micro USB / AUX端口的白色外壳。
crwdns2942213:0crwdne2942213:0
-
-
在开始之前,请确保设备已断开电源。
-
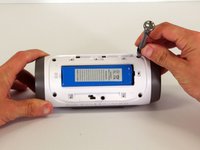
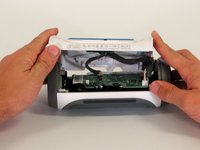
在每个角落使用Jimmy或金属撬棒将外壳与设备分开。
-
-
-
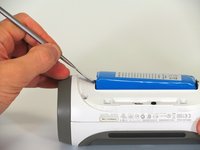
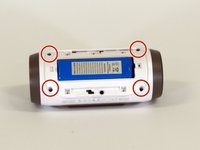
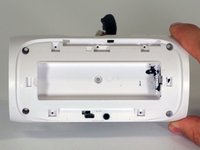
使用PH1螺丝刀从电池盖上取下五颗6毫米十字螺丝。
-
取出电池盖并将其放在一边。
-
-
-
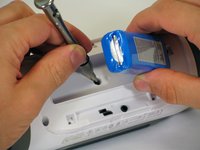
使用金属撬棒将电池从设备边缘翘出。
-
将电池提起足够的电池,以将其下方的16mm PH2螺丝卸下。
-
-
-
-
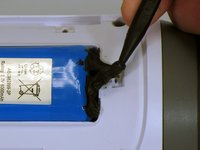
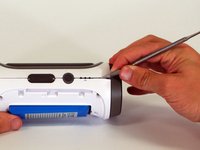
从一个角落开始,套管和侧面相遇。 用尖头的金属撬棒将这些接缝的胶水分开在一起。
-
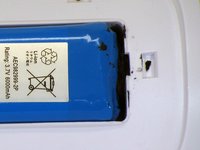
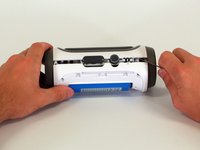
沿着这些接缝滑动金属撬棒,将后盖与扬声器的其余部分分开。
-
-
-
从孔中穿过以移除线缆,然后移除电池。
-
这整个白色的部分需要被更换。(如果需要更换 AUX/USB 接口).
-
-
-
打开设备,并在新的白色外壳里装入电池。
-
组装设备
-


按相反的步骤组装设备
按相反的步骤组装设备
crwdns2935221:0crwdne2935221:0
crwdns2935229:014crwdne2935229:0
crwdns2934873:0crwdne2934873:0
80%
crwdns2934883:0天下有狗狗crwdne2934883:0 crwdns2934875:0crwdne2934875:0
crwdns2934877:0crwdne2934877:0 ›
crwdns2915084:0crwdne2915084:0

Cal Poly, Team 12-4, Lancaster Spring 2015 crwdns2935289:0Cal Poly, Team 12-4, Lancaster Spring 2015crwdne2935289:0
CPSU-LANCASTER-S15S12G4
crwdns2931471:02crwdne2931471:0
crwdns2935297:020crwdne2935297:0
crwdns2947412:021crwdne2947412:0
Hi. This is the problem my speaker is having, but all I need to know is where to buy the replacement back. That's certainly something you should have included in your guide.
The purpose of a guide is to show how to fix the device, not obtain parts. I suggest eBay.
Joe Durand. Thank you for taking time out of your busy day to share such an enlightening comment.
Yeah what was the point of this if people can't actually do it. BS
The point is to guide people on the replacement of parts, not obtaining parts. I suggest eBay.