crwdns2915892:0crwdne2915892:0
In this guide, we will install OpenCore onto your Mac's internal Hard Drive or Solid State drive.
crwdns2942213:0crwdne2942213:0
-
-
Now we get to install OpenCore on your Mac's Hard Drive or Solid State Drive!
-
-
-
First, we need to download the latest version of OpenCore.
-
Go to OpenCore's website: https://github.com/dortania/OpenCore-Leg...
-
Scroll past the information until you get to "Assets"
-
Click the link "OpenCore-Patcher.pkg"
-
-
-
Download the package.
-
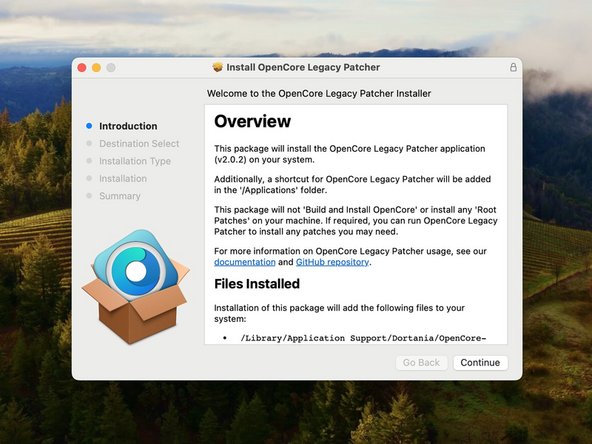
Install the application using the installer.
-
The application will be inside of your Applications folder once the installation is complete.
-
-
-
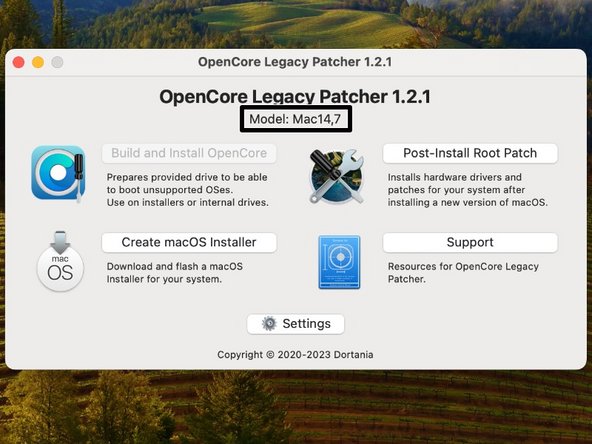
Here's what OpenCore's windows looks like when you first open the app.
-
-
-
First we have "Build and Install OpenCore"
-
"Build and Install OpenCore" is what we'll use when we install the custom EFI onto the Mac that we mentioned in Guide #1. You'll understand more in a minute.
-
-
-
Next we have "Post-Install Root Patch"
-
-
-
Next, we have "Create macOS Installer"
-
This is basically the same command for making a macOS installer on a USB drive. Créer une clé USB bootable
-
-
-
Last but not least, we have "Support."
-
-
-
-
And this little guy, "Settings"
-
We will be working here in "Settings" so go ahead and click this button.
-
-
-
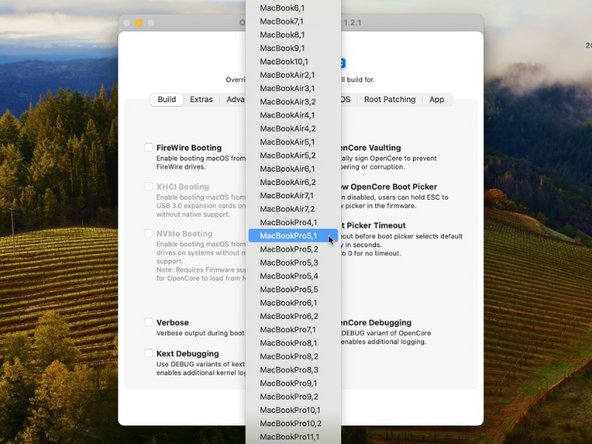
Before we get anywhere, select your Mac in the panel.
-
-
-
Okay, now let's get OpenCore ready. Before you install it on your Mac, you need to build the correct custom EFI, or else your Mac could crash at startup.
-
-
-
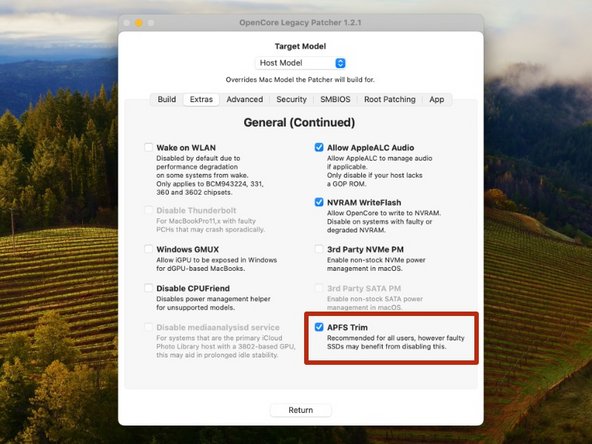
In extras, you'll see a bunch of NVRAM options. You'll probably leave most of this untouched.
-
Now, you will see "APFS Trim." If you are running a Mac that supports macOS High Sierra natively, your Mac will run APFS with or without this checked. If you are installing an older version of macOS (check out Guide #4 Continued), and you do not want to use APFS, uncheck this. If your Mac has a hard disk and NOT a Solid State drive, uncheck this.
-
-
-
Head over to "Advanced" on the panels.
-
The only thing you should change here is "FeatureUnlock." This fancy thing allows some of the newer things that old Macs can't do (Like AirPlay to Mac, Universal Control, Sidecar, etc.)
-
If it is set to "Partial" by default, that means you will get Night Shift, but nothing else. Your Mac must support Continuity in order for "Enabled" to actually give you these functions. If your Mac does support Continuity, but you have RAM issues later on, set this back to partial.
-
-
-
Now head to "Security" in the panel.
-
-
-
SMBIOS is the serial number and Board ID information about your Mac's Logic Board. If something terrible happens, OpenCore has a way to overwrite the Serial Number and Board ID. This does not change the Serial Number or Board ID on the logic board, but it makes macOS look at the custom EFI and force it to take that custom Serial Number.
-
-
-
Just completely skip "Root Patching" for now. We will use this after we get OpenCore installed.
-
-
-
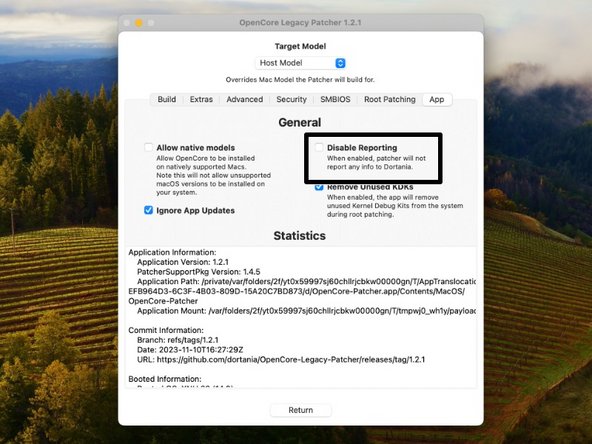
And we are at "App."
-
This simply changes how OpenCore works as an app, and not the custom EFI.
-
-
-
We're almost done, click "Return" on the bottom of the window.
-
-
-
Now, let's get this custom EFI on the Mac.
-
Click "Build and Install OpenCore" in the main window.
-
Choose "Install to disk"
-
Choose your Mac's Hard Drive or Solid State Drive in the list.
-
-
-
Four quick troubleshooting tips:
-
If you get a window that looks like this, there is a good chance that Apple still supports your Mac. Double check to make sure of this.
-
Try giving OpenCore special permissions: go to System Preferences > Security > Full Disk Access > and allow OpenCore to have full disk access.
-
You may have to upgrade macOS before you can install OpenCore on the Hard Drive itself. In this case, install OpenCore (using the same settings) on an external USB drive.
-
-
-
Choose the EFI option in the list.
-
Enter your password.
-
All done! Click "OK" in the window that appears.
-
-
-
Real quick, let's take a look at how to use OpenCore.
-
Reboot your Mac, and hold the Option (alt) key while starting up.
-
Your startup manager may look something like this:
-
Choose the "EFI Boot" option. Click the arrow pointing up to continue.
-
When OpenCore boots, you will be greeted to a new boot manager looking thing. Here, choose the drive you wish to start your Mac.
-
-
-
Mac will continue to boot normally, and you'll be able to log in again, and everything will feel quite normal.
-
As for now, you have installed OpenCore, and you are ready to update macOS.
-
All done! You have successfully installed OpenCore! Now you can move to Guide #4 to update macOS.
All done! You have successfully installed OpenCore! Now you can move to Guide #4 to update macOS.
crwdns2935221:0crwdne2935221:0
crwdns2935229:017crwdne2935229:0
crwdns2947412:05crwdne2947412:0
Diese Anleitung ist sehr schlecht und ungenau
@ralf41182 iFixit ist ein Wiki: Du kannst einfach Verbesserungen eintragen, am Besten gleich im englischen Original. Was würdest du ändern?
VauWeh -
Hello guys we installed a Monterrey version on a1278 - mid 2012. And the app Photos doesnt show on big screen or videos correctly
Hey there. These models should run Big Sur just fine without Root Patching. Monterey may have some issues. Try running root patching again. If issue persists, ask a new question in the iFixit forum, and post a screenshot of the issue.
Hallo.
Ich habe das System Sonoma via OpenCore Patcher installiert.
Leider ist danach die Anmeldung am AppStore nicht. möglich.
Gibt es dazu einen Lösung/Hinweise?
VG Chris


