crwdns2915892:0crwdne2915892:0
There are many benefits to adding a second drive (either HDD or SSD) to your laptop, such as improved speeds, greater storage space, and less heartache when installing new software. Use this guide to install one using our optical bay hard drive enclosure.
Warning! If you have an older 3.0 Gb/s (SATA II) based system you need to make sure the drive you use is able to run at this slower speed. Review your drives spec sheet, make sure it clearly lists compatibility with 3.0 Gb/s (SATA II) systems. Most drives sold today are fixed speed 6.0 Gb/s (SATA III) which won’t work in 3.0 Gb/s (SATA II) systems properly.
crwdns2942213:0crwdne2942213:0
-
-
Remove the following ten screws securing the lower case to the upper case:
-
Three 13.5 mm Phillips screws.
-
Seven 3 mm Phillips screws.
 crwdns2952109:0crwdne2952109:0
-
-
-
Wedge your fingers between the lower case and the vent, and lift upward to release the two clips holding the lower case to the upper case.
-
Remove the lower case.
-
-
-
If present, grab the plastic tab attached to the battery connector and pull it toward the front edge of the device. For Late-2011 models the battery connector will not have a tab and is simply a plug that inserts straight down into the motherboard--to remove pry the plug straight up.
-
-
-
Use the tip of a spudger to push the small plastic cable retainer away from the camera cable socket for enough clearance to remove the camera cable.
-
-
-
Pull the camera cable toward the optical drive opening to disconnect it from the logic board.
-
-
-
Carefully pull the Bluetooth cable toward the fans to disconnect it from the Bluetooth board.
-
-
-
Use the flat end of a spudger to peel the thin plastic cover off the top and sides of the Bluetooth board housing.
-
-
-
-
Use the flat end of a spudger to pry the Bluetooth antenna connector up and off its socket on the Bluetooth board.
-
-
-
If present, remove the small piece of EMI foam near the Bluetooth board.
-
De-route the camera cable from the slot molded into the Bluetooth board housing.
-
-
-
Use the flat end of a spudger to pry the optical drive connector up and out of its socket on the logic board.
-
-
-
Remove the three 3.5 mm Phillips screws securing the optical drive to the upper case.
-
-
-
Remove the optical drive from the upper case, minding any cables that may get caught.
-
-
-
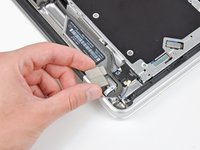
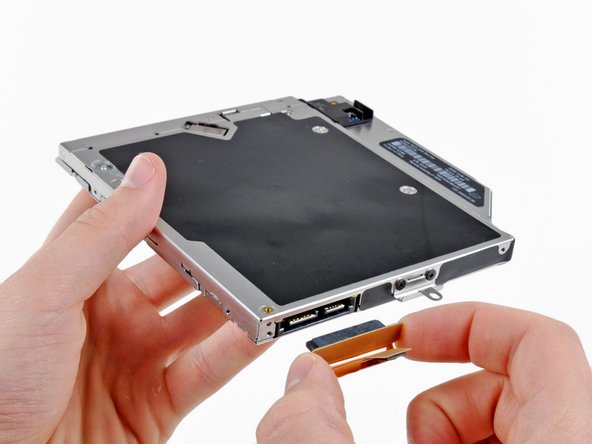
Grab the optical drive cable by its connector and pull it away from the body of the hard drive.
-
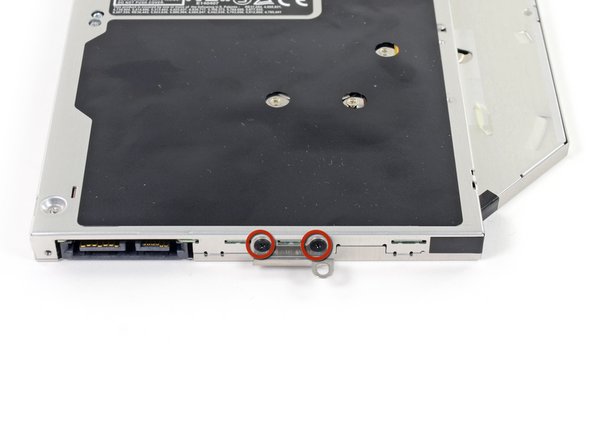
Remove the two black Phillips #0 screws securing the small metal mounting bracket. Transfer this bracket to your new optical drive or hard drive enclosure.
-
-
-
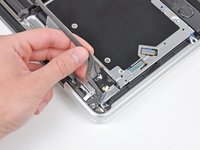
Remove the two 2.2 mm Phillips screws securing the Bluetooth board to the side of the optical drive.
-
-
-
Remove the Bluetooth board from the optical drive.
-
Optical drive remains.
-
-
-
Remove the plastic spacer from the optical bay hard drive enclosure by pressing in on one of the clips on either side and lifting it up and out of the enclosure.
-
-
-
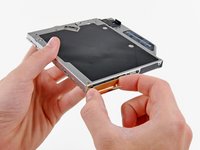
Make sure that the hard drive connectors are facing down before placing it into the enclosure.
-
Gently place the hard drive into the enclosure's hard drive slot.
-
While firmly holding the enclosure in place with one hand, use your other hand to press the hard drive into the enclosure connectors.
-
-
-
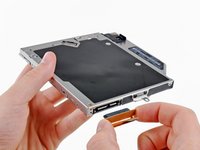
Once the hard drive is snug, reinsert the plastic spacer while holding the hard drive against the bottom of the enclosure.
-
-
-
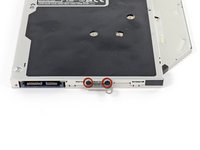
Use two Phillips #1 screws to secure the drive to its enclosure.
-
-
-
Attach the optical drive bracket to the new enclosure with two Phillips #0 screws.
-
Reconnect any cables you have removed from the original optical drive onto the optical bay enclosure.
-
-
-
Align the cable's SATA connector with the drive's port and plug in securely.
-
Plug the USB connector into your laptop and your optical drive is ready for use.
-


To reassemble your device, follow these instructions in reverse order.
crwdns2935221:0crwdne2935221:0
crwdns2935229:068crwdne2935229:0


crwdns2947412:08crwdne2947412:0
I went through these steps. I dint really have any trouble but now my computer won't turn back on. I have a fair bit of experience opening macbook pros, but I can't figure out what happened. I retrace the steps and look through everything but I can't see why it won't turn on. Any thing I can test? Any help?
signupjordanmathis - crwdns2934203:0crwdne2934203:0 crwdns2950251:0crwdne2950251:0
I was able to use the original HDD for Time Machine backups and put a SSD in the original HDD spot, which is a great setup. Of course, I have backups going to a Time Capsule too. The only thing with my model MBP (mid-2011) is that I only get 3 Gigabit speeds, which isn't a huge deal since I'm mainly using the extra space for backups. I really like that I don't have to hear the DVD drive winding up and making spinning noises when I boot up anymore.
mtlangr - crwdns2934203:0crwdne2934203:0 crwdns2950251:0crwdne2950251:0
When these steps are completed, I should be able to turn the machine on and it just work? No formatting or configuration needed?
David - crwdns2934203:0crwdne2934203:0 crwdns2950251:0crwdne2950251:0
I just installed a SATA III SSD (Samsung EVO 850 1 TB) into my MBP late 2011 17” with the Highfine data doubler. It works like a clock so far - it’s been a week of booting from the optical drive at SATA III speeds. All discussions say this is impossible. It’s not and I’m getting 450 MB/s write and 500 MB/s read. It’s a miracle!
The caddy was $8.99 on Amazon
Erick McWayne - crwdns2934203:0crwdne2934203:0 crwdns2950251:0crwdne2950251:0
Fantástico!!! I followed The Steps …. Very easy. Thank you
vilamoura2016 - crwdns2934203:0crwdne2934203:0 crwdns2950251:0crwdne2950251:0