crwdns2933423:0crwdne2933423:0

Insignia 24" LED Roku TV Screen Replacement

crwdns2942213:0crwdne2942213:0

  1. Insignia 24" LED Roku TV Screen Replacement, Remove the base: crwdns2935265:01crwdnd2935265:01crwdnd2935265:03crwdne2935265:0 Insignia 24" LED Roku TV Screen Replacement, Remove the base: crwdns2935265:01crwdnd2935265:02crwdnd2935265:03crwdne2935265:0 Insignia 24" LED Roku TV Screen Replacement, Remove the base: crwdns2935265:01crwdnd2935265:03crwdnd2935265:03crwdne2935265:0
    • Rest the TV on its top edge so you have access to the base.

    • Use a Phillips #2 screwdriver to take out the four screws on the bottom of the base.

    • Remove the base from the frame.

  2. Insignia 24" LED Roku TV Screen Replacement: crwdns2935265:02crwdnd2935265:01crwdnd2935265:03crwdne2935265:0 Insignia 24" LED Roku TV Screen Replacement: crwdns2935265:02crwdnd2935265:02crwdnd2935265:03crwdne2935265:0 Insignia 24" LED Roku TV Screen Replacement: crwdns2935265:02crwdnd2935265:03crwdnd2935265:03crwdne2935265:0
    • Lay the TV face down.

    • Use the Phillips #00 screwdriver to remove all of the Phillips Head Screws from the the back of the TV.

  3. Insignia 24" LED Roku TV Screen Replacement, Pry the TV open: crwdns2935265:03crwdnd2935265:01crwdnd2935265:01crwdne2935265:0
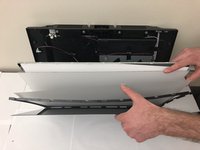
    • Stand the TV on its top edge.

    • Gently pry apart the front and back of the TV.

    • The two halves should pull apart easily since there are no longer any screws holding it together.

    • The two halves will still be connected by wires and cables that are taped to each side. Do not pull on these. We will remove them in the next step.

  4. Insignia 24" LED Roku TV Screen Replacement, Disconnect wires: crwdns2935265:04crwdnd2935265:01crwdnd2935265:03crwdne2935265:0 Insignia 24" LED Roku TV Screen Replacement, Disconnect wires: crwdns2935265:04crwdnd2935265:02crwdnd2935265:03crwdne2935265:0 Insignia 24" LED Roku TV Screen Replacement, Disconnect wires: crwdns2935265:04crwdnd2935265:03crwdnd2935265:03crwdne2935265:0
    • As mentioned in the previous step, there are wires still connecting the two halves.

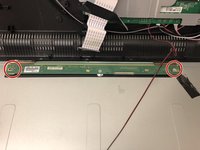
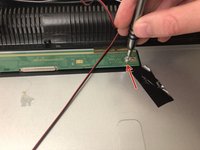
    • Remove all the pieces of tape to detach the wires from both sides.

    • You want to gently peel the tape off, without pulling on the wires.

  5. Insignia 24" LED Roku TV Screen Replacement: crwdns2935265:05crwdnd2935265:01crwdnd2935265:01crwdne2935265:0
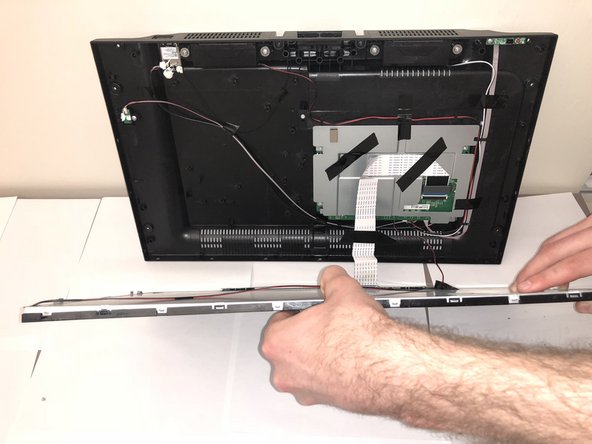
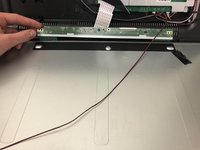
    • Spread apart your TV the rest of the way, but do not disconnect any of the wires.

    • You should have a clear view of the inside on both sides.

  6. Insignia 24" LED Roku TV Screen Replacement, Screen: crwdns2935265:06crwdnd2935265:01crwdnd2935265:01crwdne2935265:0
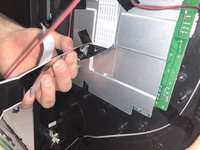
    • Remove the tape that is holding the silver rectangular piece from the house.

  7. Insignia 24" LED Roku TV Screen Replacement: crwdns2935265:07crwdnd2935265:01crwdnd2935265:02crwdne2935265:0 Insignia 24" LED Roku TV Screen Replacement: crwdns2935265:07crwdnd2935265:02crwdnd2935265:02crwdne2935265:0
    • Using the Phillips 00 Screwdriver, remove the screws that are also holding the silver rectangular piece to the house.

  8. Insignia 24" LED Roku TV Screen Replacement: crwdns2935265:08crwdnd2935265:01crwdnd2935265:03crwdne2935265:0 Insignia 24" LED Roku TV Screen Replacement: crwdns2935265:08crwdnd2935265:02crwdnd2935265:03crwdne2935265:0 Insignia 24" LED Roku TV Screen Replacement: crwdns2935265:08crwdnd2935265:03crwdnd2935265:03crwdne2935265:0
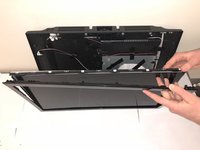
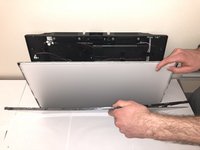
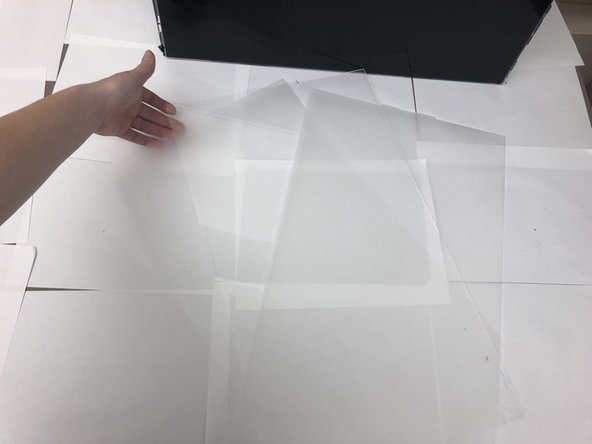
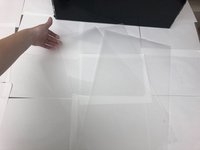
    • Remove the plastic casing from the glass screen.

    • Then carefully remove metal backing from glass screen and separate the layer of plastic from the glass screen.

  9. Insignia 24" LED Roku TV Screen Replacement: crwdns2935265:09crwdnd2935265:01crwdnd2935265:02crwdne2935265:0 Insignia 24" LED Roku TV Screen Replacement: crwdns2935265:09crwdnd2935265:02crwdnd2935265:02crwdne2935265:0
    • Separate plastic screen protector layers from both the backing and glass screen.

    • The second picture provides image of what the plastic screen protectors look like.

  10. Insignia 24" LED Roku TV Screen Replacement: crwdns2935265:010crwdnd2935265:01crwdnd2935265:03crwdne2935265:0 Insignia 24" LED Roku TV Screen Replacement: crwdns2935265:010crwdnd2935265:02crwdnd2935265:03crwdne2935265:0 Insignia 24" LED Roku TV Screen Replacement: crwdns2935265:010crwdnd2935265:03crwdnd2935265:03crwdne2935265:0
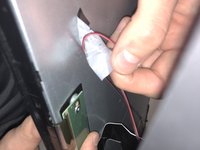
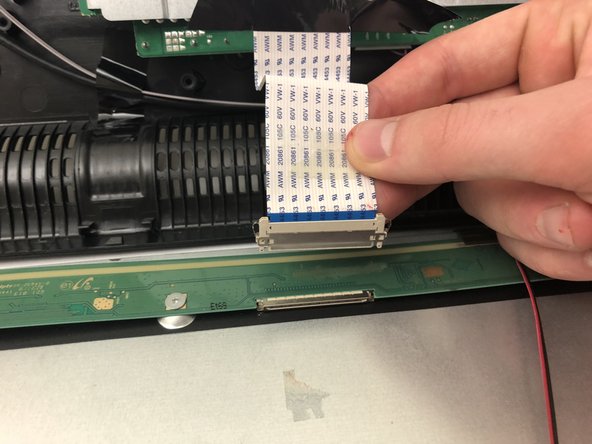
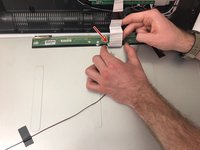
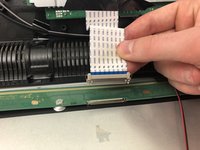
    • Find the display board and unplug the white ribbon cord from the board.

    • Squeeze both sides of the plug to release the cord.

  11. Insignia 24" LED Roku TV Screen Replacement: crwdns2935265:011crwdnd2935265:01crwdnd2935265:03crwdne2935265:0 Insignia 24" LED Roku TV Screen Replacement: crwdns2935265:011crwdnd2935265:02crwdnd2935265:03crwdne2935265:0 Insignia 24" LED Roku TV Screen Replacement: crwdns2935265:011crwdnd2935265:03crwdnd2935265:03crwdne2935265:0
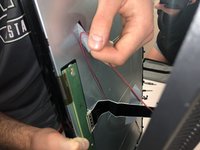
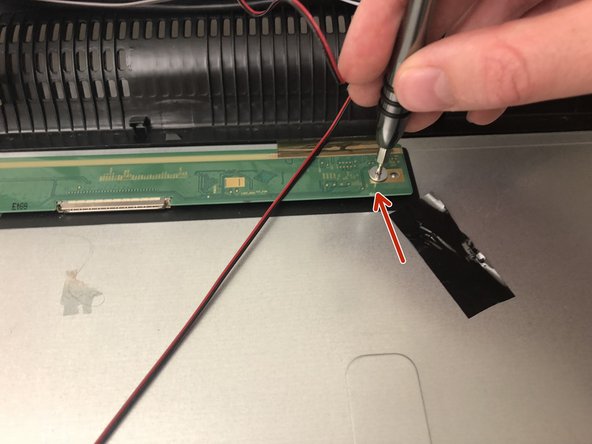
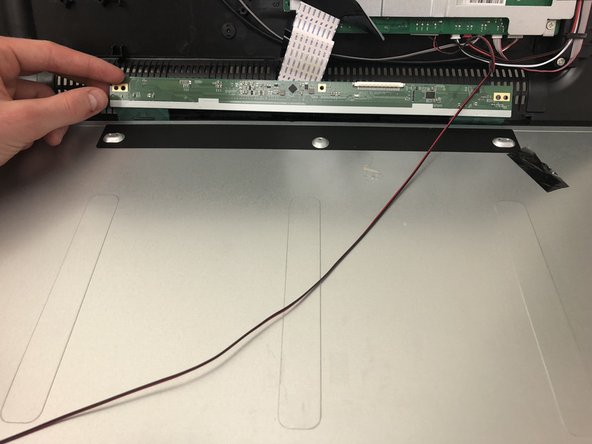
    • Using same screwdriver, unscrew the screws that are on the green display board.

    • Separate the green display board from its metal backing.

  12. Insignia 24" LED Roku TV Screen Replacement: crwdns2935265:012crwdnd2935265:01crwdnd2935265:01crwdne2935265:0
    • All cables connecting screen to frame are now detached.

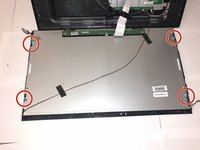
    • Now pull apart and separate the screen.

crwdns2915888:0crwdne2915888:0

To reassemble your TV, follow these instructions in reverse order.

crwdns2935229:03crwdne2935229:0

Hannah Berenjfoorosh

crwdns2935283:001/22/18crwdne2935283:0

533 crwdns2915208:0crwdne2915208:0

crwdns2935297:03crwdne2935297:0

crwdns2915084:0crwdne2915084:0

Cal Poly, Team S16-G2, Banghart Winter 2018 crwdns2935289:0Cal Poly, Team S16-G2, Banghart Winter 2018crwdne2935289:0

CPSU-BANGHART-W18S16G2

crwdns2931471:04crwdne2931471:0

crwdns2935297:06crwdne2935297:0

crwdns2917034:0crwdne2917034:0

How do I find a replacement screen? NS-32DF310NA19

Lakeisha - crwdns2934203:0crwdne2934203:0

crwdns2917038:0crwdne2917038:0

crwdns2936625:0crwdne2936625:0:

crwdns2936751:024crwdne2936751:0 2

crwdns2936753:07crwdne2936753:0 7

crwdns2936753:030crwdne2936753:0 44

crwdns2942667:0crwdne2942667:0 5,246