crwdns2933423:0crwdne2933423:0

Insignia Flex 10.1 NS-P10W8100 Motherboard Replacement

crwdns2942213:0crwdne2942213:0

  1. Insignia Flex 10.1 NS-P10W8100 Motherboard Replacement, Motherboard: crwdns2935265:01crwdnd2935265:01crwdnd2935265:02crwdne2935265:0 Insignia Flex 10.1 NS-P10W8100 Motherboard Replacement, Motherboard: crwdns2935265:01crwdnd2935265:02crwdnd2935265:02crwdne2935265:0
    • Carefully open the laptop and remove the keyboard by disconnecting it.

    • Place keyboard to the side as you will not need it.

    • Beware of plastic clips on the side of the device.

  2. Insignia Flex 10.1 NS-P10W8100 Motherboard Replacement: crwdns2935265:02crwdnd2935265:01crwdnd2935265:02crwdne2935265:0 Insignia Flex 10.1 NS-P10W8100 Motherboard Replacement: crwdns2935265:02crwdnd2935265:02crwdnd2935265:02crwdne2935265:0
    • Lay the screen flat on its surface and use the iFixit opening tool to remove the cover by gently prying the back cover from the screen.

    • Apply the opening tool to the edge closest to the screen.

    • Apply the opening tool to each side which will help pry the back cover evenly.

    • Do not pry on the bottom side of the device. This is the side across from the camera.

  3. Insignia Flex 10.1 NS-P10W8100 Motherboard Replacement: crwdns2935265:03crwdnd2935265:01crwdnd2935265:01crwdne2935265:0
    • Use your fingers and pry the back cover from the screen. You may need to wiggle the cover a bit to separate the pieces.

    • If the back cover does not come off, work your fingers around the corners and slowly pry the cover off using your fingers.

    • Be careful with potential sharp edges and any exposed electrical components.

  4. Insignia Flex 10.1 NS-P10W8100 Motherboard Replacement: crwdns2935265:04crwdnd2935265:01crwdnd2935265:03crwdne2935265:0 Insignia Flex 10.1 NS-P10W8100 Motherboard Replacement: crwdns2935265:04crwdnd2935265:02crwdnd2935265:03crwdne2935265:0 Insignia Flex 10.1 NS-P10W8100 Motherboard Replacement: crwdns2935265:04crwdnd2935265:03crwdnd2935265:03crwdne2935265:0
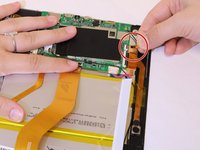
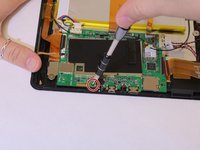
    • Gently remove the black tape from each of the three connectors.

    • It may help to move around the motherboard in a clockwise direction to remove each piece of tape.

  5. Insignia Flex 10.1 NS-P10W8100 Motherboard Replacement: crwdns2935265:05crwdnd2935265:01crwdnd2935265:01crwdne2935265:0
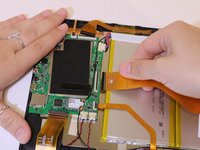
    • With a fingernail, gently remove the yellow tape from across the speaker wires.

  6. Insignia Flex 10.1 NS-P10W8100 Motherboard Replacement: crwdns2935265:06crwdnd2935265:01crwdnd2935265:01crwdne2935265:0
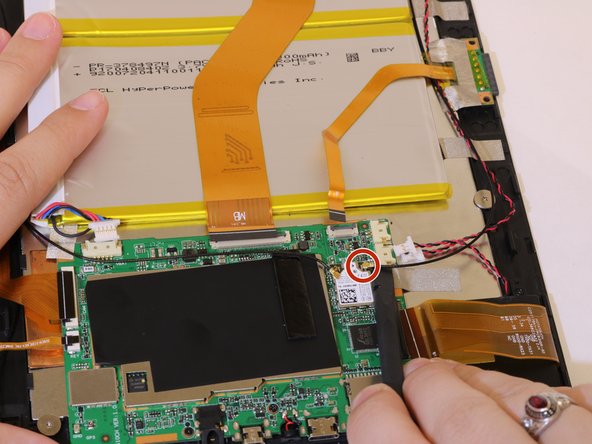
    • Once the pieces of tape are removed the resulting motherboard should look like this picture.

    • The ZIF connectors will be removed in a clockwise motion.

    • Secondly, the ribbon cable connectors will be unplugged to isolate the motherboard.

  7. Insignia Flex 10.1 NS-P10W8100 Motherboard Replacement: crwdns2935265:07crwdnd2935265:01crwdnd2935265:02crwdne2935265:0 Insignia Flex 10.1 NS-P10W8100 Motherboard Replacement: crwdns2935265:07crwdnd2935265:02crwdnd2935265:02crwdne2935265:0
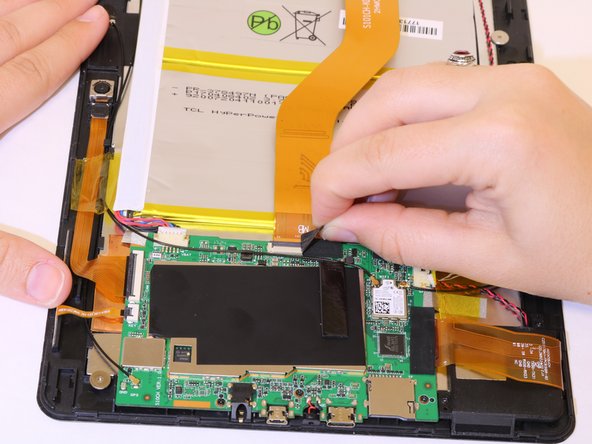
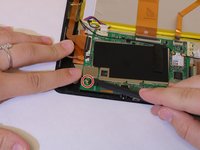
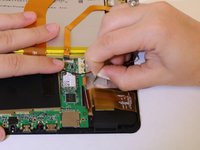
    • Unplug the smallest ZIF Connector by using you fingernail to flip up the small locking flap. Then safely pull the cable out.

    • Be careful not too pull too hard as the ZIF Connector is fragile and can be damaged easily.

  8. Insignia Flex 10.1 NS-P10W8100 Motherboard Replacement: crwdns2935265:08crwdnd2935265:01crwdnd2935265:02crwdne2935265:0 Insignia Flex 10.1 NS-P10W8100 Motherboard Replacement: crwdns2935265:08crwdnd2935265:02crwdnd2935265:02crwdne2935265:0
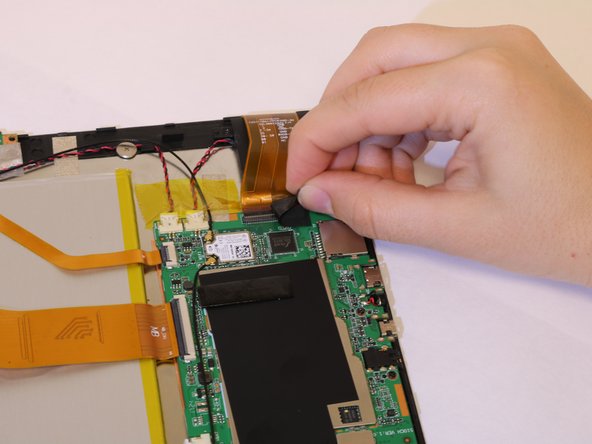
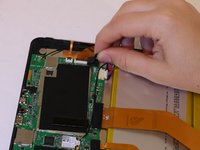
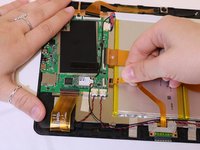
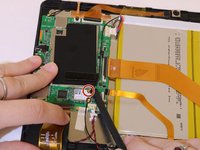
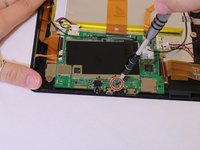
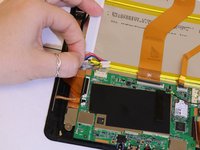
    • Following a clockwise direction, continue unplugging the ZIF connectors by safely puling the cable out.

  9. Insignia Flex 10.1 NS-P10W8100 Motherboard Replacement: crwdns2935265:09crwdnd2935265:01crwdnd2935265:01crwdne2935265:0
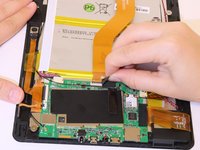
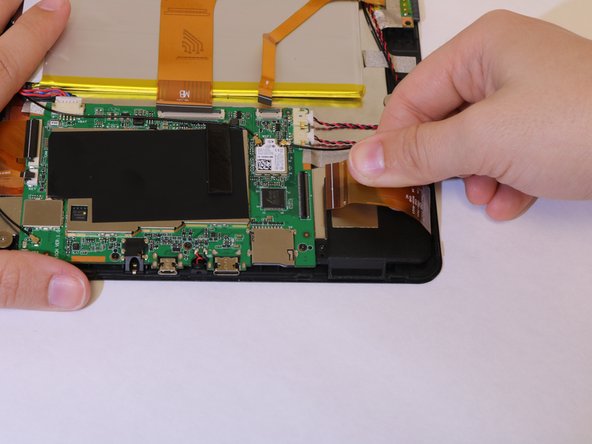
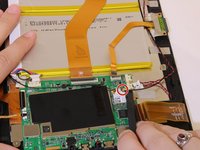
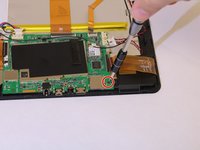
    • Remove the ribbon cables by firstly disconnecting the cable located on the top right of the motherboard,

    • Be careful not to forcefully yank the cable as it could cause a wire to disconnect.

  10. Insignia Flex 10.1 NS-P10W8100 Motherboard Replacement: crwdns2935265:010crwdnd2935265:01crwdnd2935265:01crwdne2935265:0
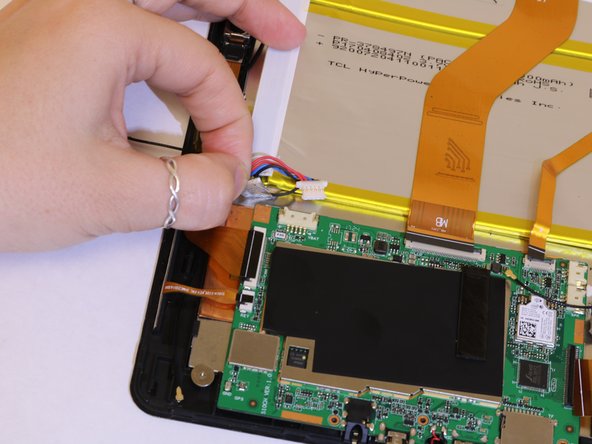
    • Remove the remaining two bottom ribbon cables.

  11. Insignia Flex 10.1 NS-P10W8100 Motherboard Replacement: crwdns2935265:011crwdnd2935265:01crwdnd2935265:03crwdne2935265:0 Insignia Flex 10.1 NS-P10W8100 Motherboard Replacement: crwdns2935265:011crwdnd2935265:02crwdnd2935265:03crwdne2935265:0 Insignia Flex 10.1 NS-P10W8100 Motherboard Replacement: crwdns2935265:011crwdnd2935265:03crwdnd2935265:03crwdne2935265:0
    • Disconnect the three low profile connectors by using a spudger to prop up both sides. Then, lift the connectors straight up from their sockets.

  12. Insignia Flex 10.1 NS-P10W8100 Motherboard Replacement: crwdns2935265:012crwdnd2935265:01crwdnd2935265:03crwdne2935265:0 Insignia Flex 10.1 NS-P10W8100 Motherboard Replacement: crwdns2935265:012crwdnd2935265:02crwdnd2935265:03crwdne2935265:0 Insignia Flex 10.1 NS-P10W8100 Motherboard Replacement: crwdns2935265:012crwdnd2935265:03crwdnd2935265:03crwdne2935265:0
    • Using a Phillips #2 screwdriver, remove the three 4 mm screws to free the motherboard.

  13. Insignia Flex 10.1 NS-P10W8100 Motherboard Replacement: crwdns2935265:013crwdnd2935265:01crwdnd2935265:02crwdne2935265:0 Insignia Flex 10.1 NS-P10W8100 Motherboard Replacement: crwdns2935265:013crwdnd2935265:02crwdnd2935265:02crwdne2935265:0
    • Pull the two pieces of grey tape off the motherboard.

  14. Insignia Flex 10.1 NS-P10W8100 Motherboard Replacement: crwdns2935265:014crwdnd2935265:01crwdnd2935265:02crwdne2935265:0 Insignia Flex 10.1 NS-P10W8100 Motherboard Replacement: crwdns2935265:014crwdnd2935265:02crwdnd2935265:02crwdne2935265:0
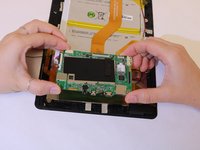
    • Remove the motherboard by lifting it upward.

crwdns2915888:0crwdne2915888:0

To reassemble your device, follow these instructions in reverse order.

crwdns2935227:0crwdne2935227:0

Edgar Rodriguez

crwdns2935283:002/12/19crwdne2935283:0

1.013 crwdns2915208:0crwdne2915208:0

crwdns2935297:05crwdne2935297:0

crwdns2915084:0crwdne2915084:0

Western Carolina University, Team S1-G2, Virtue Spring 2019 crwdns2935289:0Western Carolina University, Team S1-G2, Virtue Spring 2019crwdne2935289:0

WCU-VIRTUE-S19S1G2

crwdns2931471:04crwdne2931471:0

crwdns2935297:05crwdne2935297:0

crwdns2947410:01crwdne2947410:0

I have this tablet. Can the RAM and SSD be unsoldered, upgraded and resoldered?

José Porras - crwdns2934203:0crwdne2934203:0

crwdns2917038:0crwdne2917038:0

crwdns2936625:0crwdne2936625:0:

crwdns2936751:024crwdne2936751:0 0

crwdns2936753:07crwdne2936753:0 0

crwdns2936753:030crwdne2936753:0 8

crwdns2942667:0crwdne2942667:0 718