crwdns2915892:0crwdne2915892:0
This guide shows how to replace the projector's bulb if you are experiencing no image being betrayed by the projector. You will need a replacement bulb and an iFixit tool kit.
crwdns2942213:0crwdne2942213:0
-
-
To remove the lamp door, use a metal or plastic pry tool and unclip the lamp door from the projector. Set this aside for reassembly.
-
-
-
Remove the two gold 1 cm screws and washers on the side of lens housing using the 4.0 flat-head bit
-
Pinch the white wire tab to gently detach the side that connects with the lens housing.
-
-
-
-
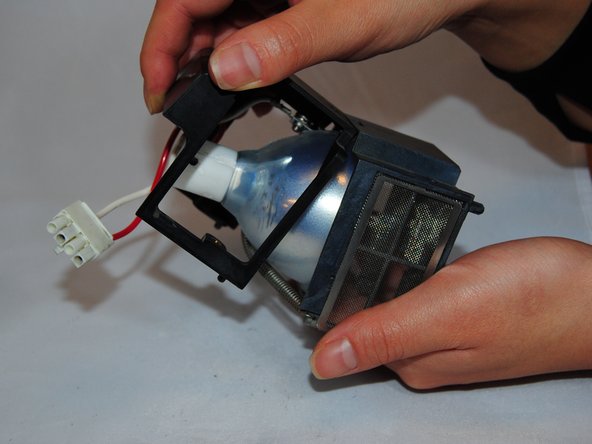
Slide the bulb housing out of the projector.
-
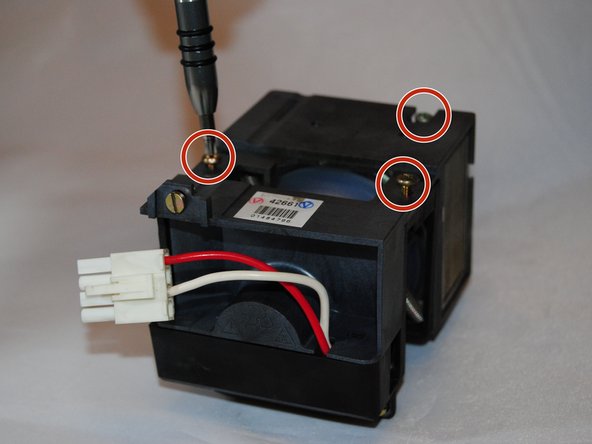
Use the Phillips #1 screwdriver to remove the three 1 cm gold screws on the bulb housing.
-
-
-
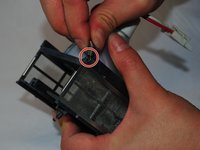
Gently pull the top of the bulb housing off.
-
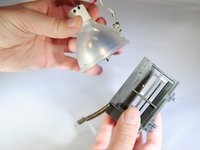
Lift up the middle of the bulb housing to remove it.
-
-
-
Unhook the spring from the bulb housing.
-
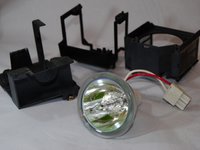
Gently remove the bulb.
-


To reassemble the device, follow these instructions in reverse order.
To reassemble the device, follow these instructions in reverse order.
crwdns2935221:0crwdne2935221:0
crwdns2935227:0crwdne2935227:0

crwdns2915084:0crwdne2915084:0

Eastern Washington University, Team S2-G3, Crane Fall 2017 crwdns2935289:0Eastern Washington University, Team S2-G3, Crane Fall 2017crwdne2935289:0
EWU-CRANE-F17S2G3
crwdns2931471:05crwdne2931471:0
crwdns2935297:07crwdne2935297:0
crwdns2947412:03crwdne2947412:0
To remove and later disassemble the lamp, you don’t need to remove whole cover. Just open the lamp bay door and follow the steps starting from 6!
madyogi, exactly. You are absolutely right!
I was able to fix an old projector I got for $40. Thank you so much for the tutorial.