crwdns2933423:0crwdne2933423:0

IBM ThinkPad 365XD CD Drive Replacement

crwdns2942213:0crwdne2942213:0

  1. IBM ThinkPad 365XD CD Drive Replacement, Getting Inside the Thinkpad: crwdns2935265:01crwdnd2935265:01crwdnd2935265:03crwdne2935265:0 IBM ThinkPad 365XD CD Drive Replacement, Getting Inside the Thinkpad: crwdns2935265:01crwdnd2935265:02crwdnd2935265:03crwdne2935265:0 IBM ThinkPad 365XD CD Drive Replacement, Getting Inside the Thinkpad: crwdns2935265:01crwdnd2935265:03crwdnd2935265:03crwdne2935265:0
    • Using both latches on the left and right side of the Thinkpad, lift up the screen.

    • Again using both latches, push them back while pushing the keyboard up till it pops up, then lift the keyboard up. You may need to use a little force.

  2. IBM ThinkPad 365XD CD Drive Replacement, Removing the Battery: crwdns2935265:02crwdnd2935265:01crwdnd2935265:02crwdne2935265:0 IBM ThinkPad 365XD CD Drive Replacement, Removing the Battery: crwdns2935265:02crwdnd2935265:02crwdnd2935265:02crwdne2935265:0
    • Lift the battery using it's cloth pull tab and lift it out of the ThinkPad. Set it aside.

  3. IBM ThinkPad 365XD CD Drive Replacement, Removing Screws/Lifting Cover: crwdns2935265:03crwdnd2935265:01crwdnd2935265:02crwdne2935265:0 IBM ThinkPad 365XD CD Drive Replacement, Removing Screws/Lifting Cover: crwdns2935265:03crwdnd2935265:02crwdnd2935265:02crwdne2935265:0
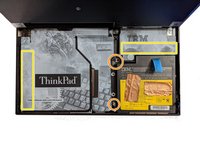
    • Remove the following screws, there should be 3. Two of the screw spots may be slightly different on yours.

    • The cover has adhesive on it at these spots, pull it slowly till the adhesive releases. Then lift the cover up, you may need to hold it.

    • Keep track of the screws, the one that holds the drive to the board and cover is small, so don't loose it!

  4. IBM ThinkPad 365XD CD Drive Replacement, Removing CD Drive Screws/Cable: crwdns2935265:04crwdnd2935265:01crwdnd2935265:02crwdne2935265:0 IBM ThinkPad 365XD CD Drive Replacement, Removing CD Drive Screws/Cable: crwdns2935265:04crwdnd2935265:02crwdnd2935265:02crwdne2935265:0
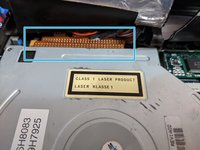
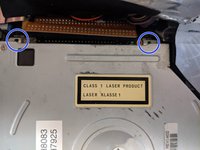
    • Disconnect or remove the cable located above the drive, be careful as the cable is fragile.

    • You may use a flat head screwdriver or plier to remove the cable easier. Lightly push/lift up both sides of cable then pull it off.

    • Your drive should have 2 screws holding it down, remove them. They are small so keep track of them!

  5. IBM ThinkPad 365XD CD Drive Replacement, Removing  The CD-Drive: crwdns2935265:05crwdnd2935265:01crwdnd2935265:02crwdne2935265:0 IBM ThinkPad 365XD CD Drive Replacement, Removing  The CD-Drive: crwdns2935265:05crwdnd2935265:02crwdnd2935265:02crwdne2935265:0
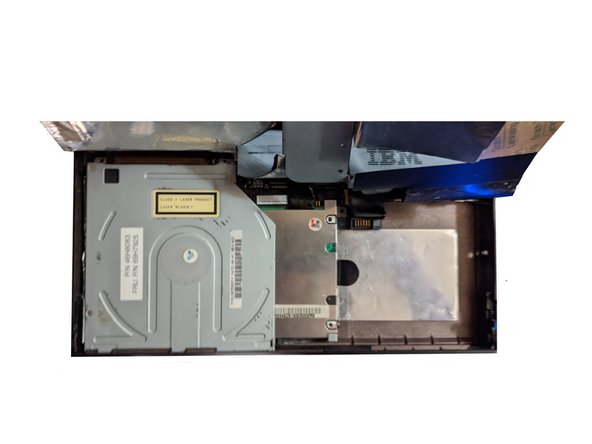
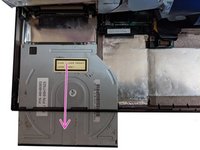
    • Slide the drive down till it is out of the ThinkPad.

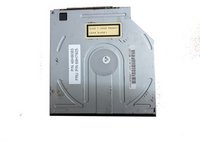
    • The ThinkPad uses a proprietary IDE connector, so not just any CD-Drive will work. Models that will work: Teac CD-44E, CD-46E, CD-48E.

crwdns2915888:0crwdne2915888:0

To reassemble your device, follow these instructions in reverse order.

Olda1120

crwdns2935283:007/04/18crwdne2935283:0

399 crwdns2915208:0crwdne2915208:0

crwdns2935297:03crwdne2935297:0

crwdns2944067:00crwdne2944067:0

crwdns2917038:0crwdne2917038:0

crwdns2936625:0crwdne2936625:0:

crwdns2936751:024crwdne2936751:0 0

crwdns2936753:07crwdne2936753:0 4

crwdns2936753:030crwdne2936753:0 9

crwdns2942667:0crwdne2942667:0 408