crwdns2933423:0crwdne2933423:0

HyperX CloudX Stinger Core 4P5J9AA Speakers Replacement

crwdns2942213:0crwdne2942213:0

  1. HyperX CloudX Stinger Core 4P5J9AA Speakers Replacement, Ear Pads: crwdns2935265:01crwdnd2935265:01crwdnd2935265:02crwdne2935265:0 HyperX CloudX Stinger Core 4P5J9AA Speakers Replacement, Ear Pads: crwdns2935265:01crwdnd2935265:02crwdnd2935265:02crwdne2935265:0
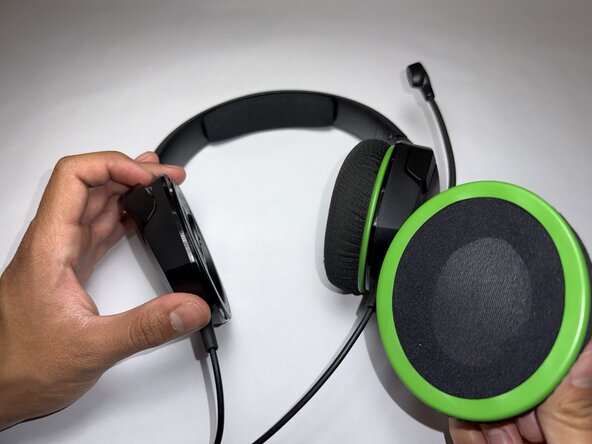
    • Starting with the right ear pad, place one finger on the outside of the ear pad and another finger on the inside.

    • Still gripping the ear pad, gently pull the ear pad away from the headset.

    • You will start to see the green flap leaving the groove of the headset.

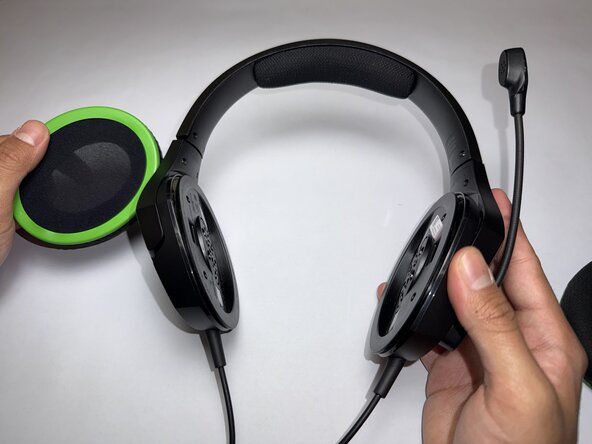
    • Pull until the ear pad is fully detached.

  2. HyperX CloudX Stinger Core 4P5J9AA Speakers Replacement: crwdns2935265:02crwdnd2935265:01crwdnd2935265:02crwdne2935265:0 HyperX CloudX Stinger Core 4P5J9AA Speakers Replacement: crwdns2935265:02crwdnd2935265:02crwdnd2935265:02crwdne2935265:0
    • Repeat Step 1 on the left side.

  3. HyperX CloudX Stinger Core 4P5J9AA Speakers Replacement, Speakers: crwdns2935265:03crwdnd2935265:01crwdnd2935265:01crwdne2935265:0
    • Use a Phillips #00 screwdriver to remove the four 8.0 mm screws securing the speaker plate to the ear cup.

  4. HyperX CloudX Stinger Core 4P5J9AA Speakers Replacement: crwdns2935265:04crwdnd2935265:01crwdnd2935265:01crwdne2935265:0
    • Open the cap of the speaker plate to see where the wires are connected.

  5. HyperX CloudX Stinger Core 4P5J9AA Speakers Replacement: crwdns2935265:05crwdnd2935265:01crwdnd2935265:01crwdne2935265:0
    • Gently remove the speaker with a spudger.

    • You may need to use a heat gun to loosen the glue.

  6. HyperX CloudX Stinger Core 4P5J9AA Speakers Replacement: crwdns2935265:06crwdnd2935265:01crwdnd2935265:01crwdne2935265:0
    • Lift the speaker out of the headphones.

  7. HyperX CloudX Stinger Core 4P5J9AA Speakers Replacement: crwdns2935265:07crwdnd2935265:01crwdnd2935265:01crwdne2935265:0
    • Use a soldering iron to desolder the wires from the speaker.

    • Reconnect the wires to the new speaker by soldering them into place. Ensure that the polarity is correct (red=positive, black=ground).

crwdns2915888:0crwdne2915888:0

To reassemble your device, follow these instructions in reverse order.

Andy Guerra

crwdns2935283:002/20/25crwdne2935283:0

171 crwdns2915208:0crwdne2915208:0

crwdns2935295:0crwdne2935295:0

crwdns2915084:0crwdne2915084:0

CSU Los Angeles, Team 7-5, Kershman Spring 2025 crwdns2935289:0CSU Los Angeles, Team 7-5, Kershman Spring 2025crwdne2935289:0

CSULA-KERSHMAN-S25S7G5

crwdns2931471:05crwdne2931471:0

crwdns2935297:04crwdne2935297:0

crwdns2947412:00crwdne2947412:0

crwdns2917038:0crwdne2917038:0

crwdns2936625:0crwdne2936625:0:

crwdns2936751:024crwdne2936751:0 4

crwdns2936753:07crwdne2936753:0 15

crwdns2936753:030crwdne2936753:0 15

crwdns2942667:0crwdne2942667:0 41