crwdns2933423:0crwdne2933423:0
crwdns2947577:0crwdnd2947577:0crwdne2947577:0

Hubsan X4 107L Flight Controller Replacement

crwdns2942213:0crwdne2942213:0

    1. Hubsan X4 107L Flight Controller Replacement, Disconnect and Remove Battery: crwdns2935265:01crwdnd2935265:01crwdnd2935265:03crwdne2935265:0 Hubsan X4 107L Flight Controller Replacement, Disconnect and Remove Battery: crwdns2935265:01crwdnd2935265:02crwdnd2935265:03crwdne2935265:0 Hubsan X4 107L Flight Controller Replacement, Disconnect and Remove Battery: crwdns2935265:01crwdnd2935265:03crwdnd2935265:03crwdne2935265:0
      • Firmly grasp both sides of the battery connector and pull them apart.

      • Grip the battery and slide it out of the quadcopter body.

      • Do not pull on the wires. This could damage the battery or flight controller.

      crwdns2952109:0crwdne2952109:0

      crwdns2917038:0crwdne2917038:0

    2. Hubsan X4 107L Flight Controller Replacement, Remove Shock Absorbers: crwdns2935265:02crwdnd2935265:01crwdnd2935265:03crwdne2935265:0 Hubsan X4 107L Flight Controller Replacement, Remove Shock Absorbers: crwdns2935265:02crwdnd2935265:02crwdnd2935265:03crwdne2935265:0 Hubsan X4 107L Flight Controller Replacement, Remove Shock Absorbers: crwdns2935265:02crwdnd2935265:03crwdnd2935265:03crwdne2935265:0
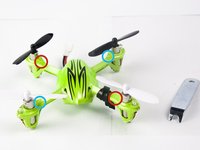
      • Orient the quadcopter so the propellers are on the bottom.

      • Remove the rubber shock absorbers from the motor mounts by hand.

      crwdns2952109:0crwdne2952109:0

      crwdns2917038:0crwdne2917038:0

    3. Hubsan X4 107L Flight Controller Replacement, Remove Propellers: crwdns2935265:03crwdnd2935265:01crwdnd2935265:03crwdne2935265:0 Hubsan X4 107L Flight Controller Replacement, Remove Propellers: crwdns2935265:03crwdnd2935265:02crwdnd2935265:03crwdne2935265:0 Hubsan X4 107L Flight Controller Replacement, Remove Propellers: crwdns2935265:03crwdnd2935265:03crwdnd2935265:03crwdne2935265:0
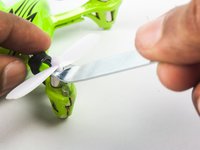
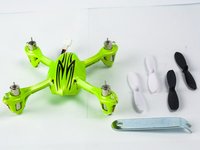
      • Use the prop removal tool to pry the propellers off the motors.

      • Each propeller and motor arm is labeled either "A" or "B" corresponding to whether the motor spins clockwise or counterclockwise. With the quad oriented with the front facing towards you:

      • "A" propellers are on the front left and back right motors.

      • "B" propellers are on the front right and back left motors.

      crwdns2952109:0crwdne2952109:0

      crwdns2917038:0crwdne2917038:0

    4. Hubsan X4 107L Flight Controller Replacement, Remove Aftermarket Fasteners: crwdns2935265:04crwdnd2935265:01crwdnd2935265:01crwdne2935265:0
      • Use the wire cutter to remove any customized or aftermarket modifications holding the body together.

      crwdns2952109:0crwdne2952109:0

      crwdns2917038:0crwdne2917038:0

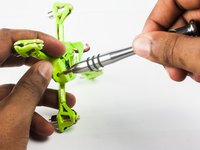
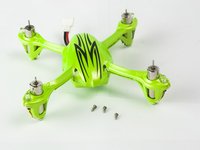
    5. Hubsan X4 107L Flight Controller Replacement, Remove PH000 Screws: crwdns2935265:05crwdnd2935265:01crwdnd2935265:03crwdne2935265:0 Hubsan X4 107L Flight Controller Replacement, Remove PH000 Screws: crwdns2935265:05crwdnd2935265:02crwdnd2935265:03crwdne2935265:0 Hubsan X4 107L Flight Controller Replacement, Remove PH000 Screws: crwdns2935265:05crwdnd2935265:03crwdnd2935265:03crwdne2935265:0
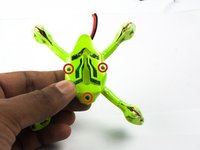
      • Use a Phillips #000 screwdriver to remove the three screws securing the lower body to the frame.

      crwdns2952109:0crwdne2952109:0

      crwdns2917038:0crwdne2917038:0

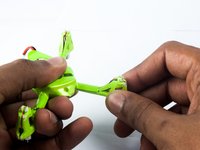
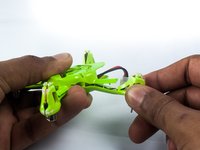
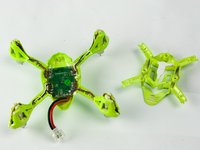
    6. Hubsan X4 107L Flight Controller Replacement, Snap Lower Body Out of Place: crwdns2935265:06crwdnd2935265:01crwdnd2935265:03crwdne2935265:0 Hubsan X4 107L Flight Controller Replacement, Snap Lower Body Out of Place: crwdns2935265:06crwdnd2935265:02crwdnd2935265:03crwdne2935265:0 Hubsan X4 107L Flight Controller Replacement, Snap Lower Body Out of Place: crwdns2935265:06crwdnd2935265:03crwdnd2935265:03crwdne2935265:0
      • Carefully apply upward pressure on one of the motor arms while bending the body downwards to snap the lower body armpice out of place.

      • Repeat this step for all four arms. The lower body will separate from the main frame after snapping the fourth arm out of place.

      • You may need to bend the arm quite a bit to snap it out. This is a durability feature that allows the X4 to "crumple" in a crash without breaking.

      crwdns2952109:0crwdne2952109:0

      crwdns2917038:0crwdne2917038:0

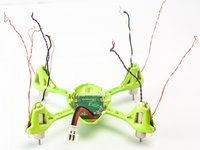
      • Use a soldering iron and solder wick to desolder the four motors from the control board.

      • If the connection holds even after removing the solder from the joint, gently pull up on the wire while applying heat to the joint until the wire separates from the PCB.

      • The motor wires are in either black-white or red-blue pairs.

      • CAUTION: Overheating the PCB can damage the traces, making it difficult or impossible to reconnect the components later on. Do not apply too much heat to the board; these traces are especially delicate due to their small size.

      crwdns2952109:0crwdne2952109:0

      crwdns2917038:0crwdne2917038:0

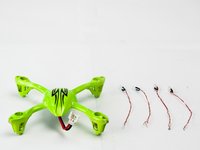
      • Using a technique similar to desoldering the motor wires, disconnect the LEDs from the control board.

      • The LED connections use less solder than the motor joints, so solder wick is optional but not required for this step.

      • When reassembling the quadcopter, remember the LED's have red positive leads and bronze negative leads.

      crwdns2952109:0crwdne2952109:0

      crwdns2917038:0crwdne2917038:0

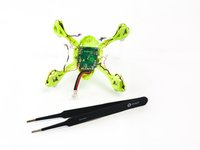
    7. Hubsan X4 107L Flight Controller Replacement, Unthread the Wires from the Frame: crwdns2935265:09crwdnd2935265:01crwdnd2935265:03crwdne2935265:0 Hubsan X4 107L Flight Controller Replacement, Unthread the Wires from the Frame: crwdns2935265:09crwdnd2935265:02crwdnd2935265:03crwdne2935265:0 Hubsan X4 107L Flight Controller Replacement, Unthread the Wires from the Frame: crwdns2935265:09crwdnd2935265:03crwdnd2935265:03crwdne2935265:0
      crwdns2935267:0crwdne2935267:0
      Tweezers
      $4.99
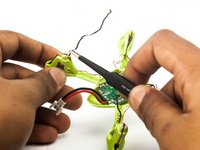
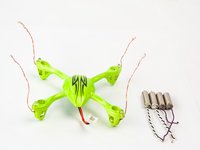
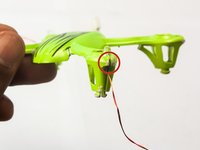
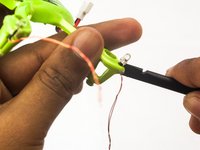
      • Use the tweezers to unthread the motor and LED wires from the quadcopter arms.

      • After unthreading all eight bundles of wires, the LEDs and motors are ready to remove.

      crwdns2952109:0crwdne2952109:0

      crwdns2917038:0crwdne2917038:0

    8. Hubsan X4 107L Flight Controller Replacement, Remove Motors: crwdns2935265:010crwdnd2935265:01crwdnd2935265:03crwdne2935265:0 Hubsan X4 107L Flight Controller Replacement, Remove Motors: crwdns2935265:010crwdnd2935265:02crwdnd2935265:03crwdne2935265:0 Hubsan X4 107L Flight Controller Replacement, Remove Motors: crwdns2935265:010crwdnd2935265:03crwdnd2935265:03crwdne2935265:0
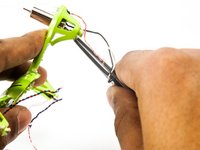
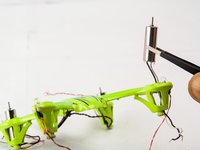
      • Use the tweezers to push the motors out of their housings.

      • Both the motor mounts and motors themselves have a small size variance. If it's difficult to push a motor out, ensure the wires are not caught on the frame and gently apply more force from the bottom until the motor begins to slide.

      • Once the motor is mostly out of the motor mount, grip it from the top and pull it straight out.

      crwdns2952109:0crwdne2952109:0

      crwdns2917038:0crwdne2917038:0

    9. Hubsan X4 107L Flight Controller Replacement, Remove LEDs: crwdns2935265:011crwdnd2935265:01crwdnd2935265:03crwdne2935265:0 Hubsan X4 107L Flight Controller Replacement, Remove LEDs: crwdns2935265:011crwdnd2935265:02crwdnd2935265:03crwdne2935265:0 Hubsan X4 107L Flight Controller Replacement, Remove LEDs: crwdns2935265:011crwdnd2935265:03crwdnd2935265:03crwdne2935265:0
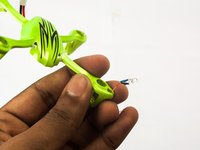
      • Remove the LEDs using the spudger to widen their housing and nudge them up.

      • To free an LED from its housing, insert the spudger into the top section of the gap in the plastic revealing the side of the LED.

      • Simultaneously twist the spudger to widen the housing while pushing the LED up and out of the frame.

      crwdns2952109:0crwdne2952109:0

      crwdns2917038:0crwdne2917038:0

    10. Hubsan X4 107L Flight Controller Replacement, Check out the LEDs: crwdns2935265:012crwdnd2935265:01crwdnd2935265:02crwdne2935265:0 Hubsan X4 107L Flight Controller Replacement, Check out the LEDs: crwdns2935265:012crwdnd2935265:02crwdnd2935265:02crwdne2935265:0
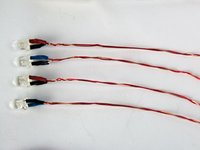
      • Unlike the motors which had colored wiring to differentiate between CW and CCW spin, both the blue and red LEDs have a red positive leads and a bronze negative lead. Upon closer inspection, it looks like the heat shrink on the postive lead matches the LED color.

      crwdns2952109:0crwdne2952109:0

      crwdns2917038:0crwdne2917038:0

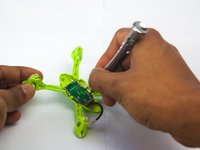
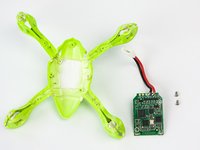
    11. Hubsan X4 107L Flight Controller Replacement, Remove Flight Controller: crwdns2935265:013crwdnd2935265:01crwdnd2935265:03crwdne2935265:0 Hubsan X4 107L Flight Controller Replacement, Remove Flight Controller: crwdns2935265:013crwdnd2935265:02crwdnd2935265:03crwdne2935265:0 Hubsan X4 107L Flight Controller Replacement, Remove Flight Controller: crwdns2935265:013crwdnd2935265:03crwdnd2935265:03crwdne2935265:0
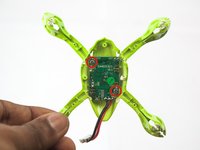
      • Use the PH000 driver to remove the two screws securing the flight controller to the frame.

      • After removing both screws, the flight controller drops freely out of the frame .

      crwdns2952109:0crwdne2952109:0

      crwdns2917038:0crwdne2917038:0

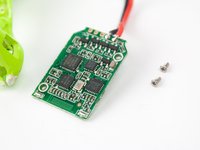
    12. Hubsan X4 107L Flight Controller Replacement, Check out the Flight Controller: crwdns2935265:014crwdnd2935265:01crwdnd2935265:02crwdne2935265:0 Hubsan X4 107L Flight Controller Replacement, Check out the Flight Controller: crwdns2935265:014crwdnd2935265:02crwdnd2935265:02crwdne2935265:0
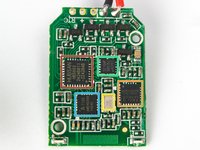
      • The Hubsan X4's Flight Controller (aka Control Board) has a handful of neat components that keep the quadcopter in the air:

      • Hubsan HBS002 Processor

      • Invensense ITG-3050 Integrated Triple-Axis Gyroscope

      • 16.000 MHz Quartz Crystal Oscillator

      • 3210AP 3-Axis Accelerometer

      • A7105 2.4GHz Wireless Module

      crwdns2952109:0crwdne2952109:0

      crwdns2917038:0crwdne2917038:0

    13. Hubsan X4 107L Flight Controller Replacement, Parts Overview: crwdns2935265:015crwdnd2935265:01crwdnd2935265:01crwdne2935265:0
      • All done! To reassemble your X4, follow these steps in the reverse order.

      • This is a good opportunity to test all your LEDs and motors and switch out any faulty components.

      crwdns2952109:0crwdne2952109:0

      crwdns2917038:0crwdne2917038:0

crwdns2915888:0crwdne2915888:0

To reassemble your device, follow these instructions in reverse order.

crwdns2935221:0crwdne2935221:0

crwdns2935229:016crwdne2935229:0

Evan Noronha

crwdns2935283:002/05/15crwdne2935283:0

229,758 crwdns2915208:0crwdne2915208:0

crwdns2935297:0166crwdne2935297:0

crwdns2947412:07crwdne2947412:0

Will I be able to conect the controller to the receiver with the new motherboard?

Jambopro - crwdns2934203:0crwdne2934203:0 crwdns2950251:0crwdne2950251:0
It's been my experience the transmitter will bind with what ever quad is ready to bind. I routinely steal my buddy's quad when he plugs it in before he turns his transmitter on.

bicyclewrench - crwdns2934203:0crwdne2934203:0 crwdns2950251:0crwdne2950251:0

Just a qiuck note. I burned 2 motherboards with those blue replacement batteries...

Benedek Vajas - crwdns2934203:0crwdne2934203:0 crwdns2950251:0crwdne2950251:0

hi, while connecting x4 h107c + with 2 wires from battery to the 3 pin on pcb..the motor only spins..no led lights..what can be wrong ?

Silas Paine - crwdns2934203:0crwdne2934203:0 crwdns2950251:0crwdne2950251:0

I have the same issue. The ground being in the center I do not know if the positive is on left or right. Maybe using a small wire to jumb the two to each other?

Ti Brock - crwdns2934203:0crwdne2934203:0 crwdns2950251:0crwdne2950251:0

crwdns2917038:0crwdne2917038:0

crwdns2936625:0crwdne2936625:0:

crwdns2936751:024crwdne2936751:0 3

crwdns2936753:07crwdne2936753:0 27

crwdns2936753:030crwdne2936753:0 91

crwdns2942667:0crwdne2942667:0 19,163