crwdns2915892:0crwdne2915892:0
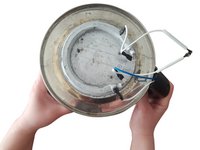
Looking to replace your damaged temperature controller? and don't know how? In this installation guide, we will teach you how to replace a new temperature controller. You can easily do it in just a few steps. This installation is based on the AUX-208P1 electric kettle, but the same concept is also applicable to the replacement of other electric kettle temperature controllers.
crwdns2942213:0crwdne2942213:0
-
-
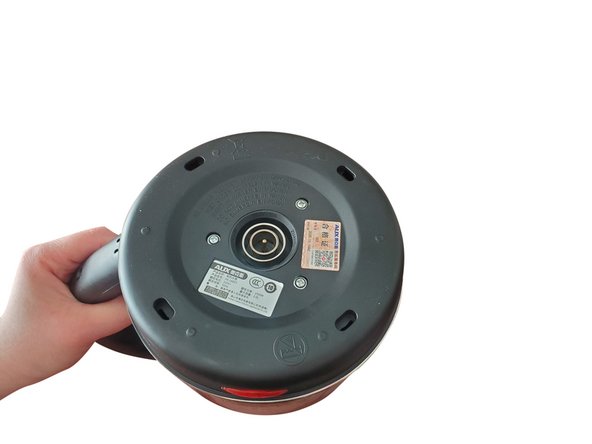
Clean all the dirt on the bottom of the electric kettle.
-
-
-
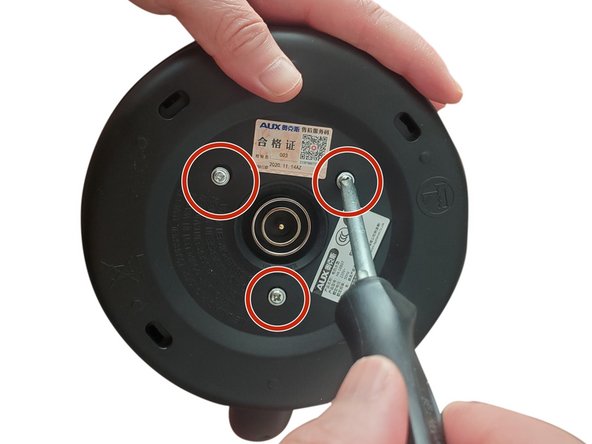
Use a Phillips screwdriver to unscrew the 3/4 in. Phillips Truss-Head Self-Drilling Screws at the bottom of the electric kettle counterclockwise.
-
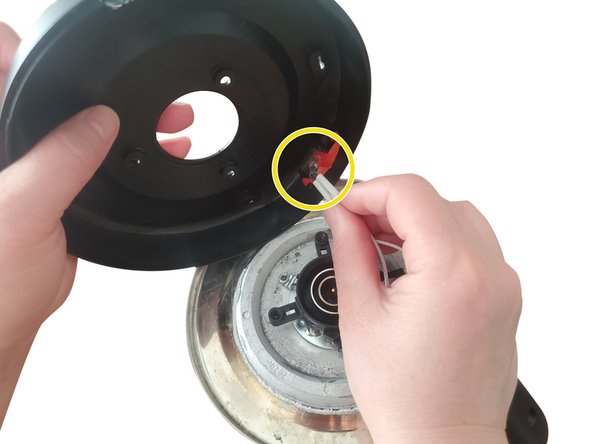
Remove the base of the electric kettle.
-
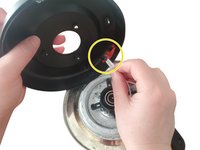
Remove the LED indicator buckled on the base.
-
-
-
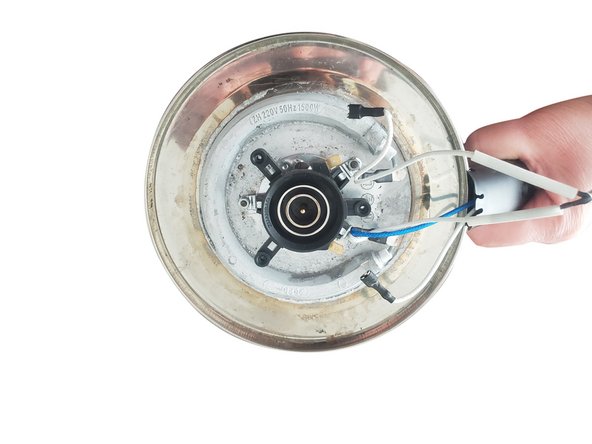
Use long-nose pliers to clamp the connection between the electric kettle line and the old temperature controller to create a gap, and pull it off.
-
-
-
-
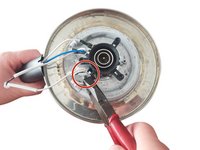
Use long-nose pliers to clamp the three nuts used to fix the old temperature controller, and twist them counterclockwise.
-
-
-
Remove the broken temperature controller.
-
-
-
Align the socket on the bottom of the new temperature controller with the protrusion on the bottom of the electric kettle to assemble.
-
-
-
Use long-nose pliers to tighten the nut clockwise to fix the temperature controller.
-
-
-
Fasten the electric kettle circuit to the interface of the new temperature controller.
-
-
-
Re-buckle the removed LED indicator back to the base.
-
Buckle the base back to the bottom of the electric kettle.
-
Use a Phillips screwdriver to tighten the bottom 3/4 in. Phillips Truss-Head Self-Drilling Screws in a clockwise direction.
-


When reassembling your device, please follow the reverse order of disassembly.
When reassembling your device, please follow the reverse order of disassembly.
crwdns2915084:0crwdne2915084:0

York University, Team S1-G30, O'Regan Winter 2021 crwdns2935289:0York University, Team S1-G30, O'Regan Winter 2021crwdne2935289:0
YORK-O'REGAN-W21S1G30
crwdns2934841:01crwdne2934841:0
crwdns2935297:04crwdne2935297:0