crwdns2933423:0crwdne2933423:0
crwdns2947577:0crwdnd2947577:0crwdne2947577:0
How to repair hem/cuff binding

How to repair hem/cuff binding

Ben Blischke

crwdns2944107:0crwdnd2944107:0Ben Blischkecrwdnd2944107:0crwdnd2944107:0crwdnd2944107:02crwdnd2944107:0crwdne2944107:0

crwdns2944111:0Dzi 12, 2025crwdne2944111:0

crwdns2931287:010crwdne2931287:0
crwdns2937799:0crwdne2937799:0
crwdns2944444:0crwdne2944444:0

crwdns2915892:0crwdne2915892:0

crwdns2942287:0crwdne2942287:0

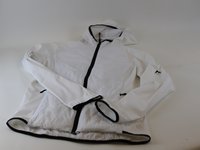
Binding hems can break if they get stretched too much, and can easily become more and more frayed. This simple fix can repair the hem quickly and easily.

➡️Before you get started, please check the safety disclaimer at the bottom of the page.

crwdns2942213:0crwdne2942213:0

crwdns2943215:0crwdne2943215:0

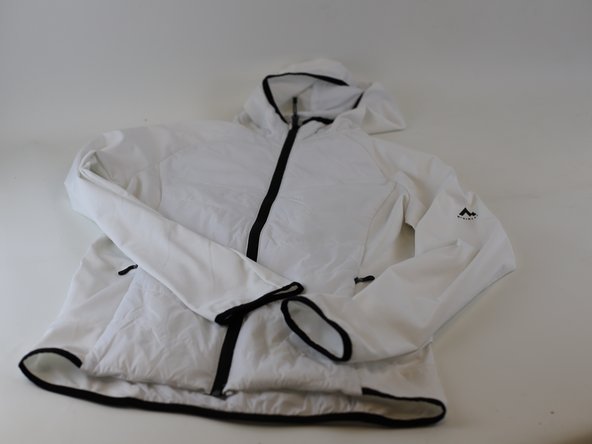
  1. How to repair hem/cuff binding, Identify the defect: crwdns2935265:01crwdnd2935265:01crwdnd2935265:03crwdne2935265:0 How to repair hem/cuff binding, Identify the defect: crwdns2935265:01crwdnd2935265:02crwdnd2935265:03crwdne2935265:0 How to repair hem/cuff binding, Identify the defect: crwdns2935265:01crwdnd2935265:03crwdnd2935265:03crwdne2935265:0
    • Here, you can see the hole in the binding hem, where the stitching has broken.

    • If the binding is undamaged, you can easily repair this defective hem.

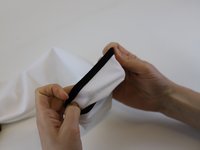
  2. How to repair hem/cuff binding, Tidy up the area: crwdns2935265:02crwdnd2935265:01crwdnd2935265:03crwdne2935265:0 How to repair hem/cuff binding, Tidy up the area: crwdns2935265:02crwdnd2935265:02crwdnd2935265:03crwdne2935265:0 How to repair hem/cuff binding, Tidy up the area: crwdns2935265:02crwdnd2935265:03crwdnd2935265:03crwdne2935265:0
    • Cut away any broken threads, to clean the binding area.

    • Then, position the binding properly again along the sleeve hem.

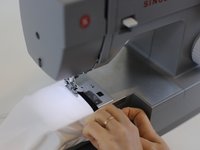
  3. How to repair hem/cuff binding, Position the hem on the sewing machine: crwdns2935265:03crwdnd2935265:01crwdnd2935265:03crwdne2935265:0 How to repair hem/cuff binding, Position the hem on the sewing machine: crwdns2935265:03crwdnd2935265:02crwdnd2935265:03crwdne2935265:0 How to repair hem/cuff binding, Position the hem on the sewing machine: crwdns2935265:03crwdnd2935265:03crwdnd2935265:03crwdne2935265:0
    • Remove the wide casing of the sewing machine, and slide the sleeve over the narrow part remaining.

    • Carefully line up the hem with the needle, and reposition the binding into the correct place.

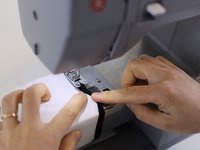
  4. How to repair hem/cuff binding, Sew carefully: crwdns2935265:04crwdnd2935265:01crwdnd2935265:03crwdne2935265:0 How to repair hem/cuff binding, Sew carefully: crwdns2935265:04crwdnd2935265:02crwdnd2935265:03crwdne2935265:0 How to repair hem/cuff binding, Sew carefully: crwdns2935265:04crwdnd2935265:03crwdnd2935265:03crwdne2935265:0
    • Start sewing with a smooth tension to ensure the elasticity remains afterwards. Avoid bunching or over stretching the fabric.

    • Continue carefully until the end of the defective zone, and finish with a locking stitch.

    • Remove the item and check if the repair is holding, and whether the elasticity still stretches correctly.

  5. How to repair hem/cuff binding, Finished and ready!: crwdns2935265:05crwdnd2935265:01crwdnd2935265:02crwdne2935265:0 How to repair hem/cuff binding, Finished and ready!: crwdns2935265:05crwdnd2935265:02crwdnd2935265:02crwdne2935265:0
    • 🛠️🏆👏 Congratulations! The repair is complete, and you're ready to go!

crwdns2915888:0crwdne2915888:0

In need of another repair? Don't worry! Check out our other guides to find quick solutions for your favourite clothing, footwear and equipment!

----------------------------------------

🚨🛠️🩹 IMPORTANT SAFETY NOTICE:

The repair guides provided on this site are intended to help you repair products on your own. While we have put a lot of care into them, all repair work carries some risk:

  1. Safety Precautions: When repairing your product, take all necessary precautions to ensure your safety. Use appropriate tools and follow the instructions carefully.
  2. Product Condition: Once your product has been repaired, it may not meet original compliance guidelines anymore and could potentially have issues.
  3. Liability: We are not responsible for any damage or injury that may occur during the repair process or as a result of using a repaired product. You, as the repairer, assume all risks and responsibilities associated with the repair.

By using these repair guides, you fully acknowledge and accept the potential risks and responsibilities involved.

Ben Blischke

crwdns2935283:007/19/23crwdne2935283:0

9 900 crwdns2915208:0crwdne2915208:0

crwdns2935297:064crwdne2935297:0

crwdns2915084:0crwdne2915084:0

INTERSPORT crwdns2935289:0INTERSPORTcrwdne2935289:0

Community

crwdns2931471:024crwdne2931471:0

crwdns2935297:0164crwdne2935297:0

crwdns2947412:00crwdne2947412:0

crwdns2917038:0crwdne2917038:0

crwdns2936625:0crwdne2936625:0:

crwdns2936751:024crwdne2936751:0 0

crwdns2936753:07crwdne2936753:0 3

crwdns2936753:030crwdne2936753:0 50

crwdns2942667:0crwdne2942667:0 570