crwdns2915892:0crwdne2915892:0
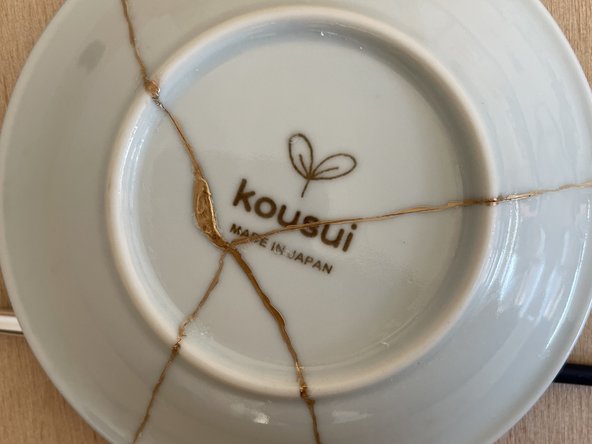
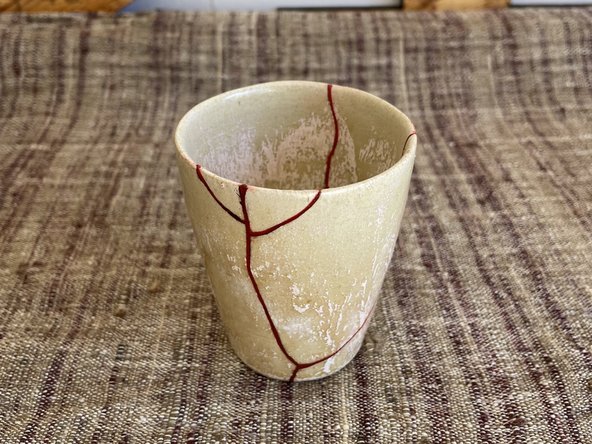
Kintsugi was developed alongside the tea ceremony by Sen no Rikyu (千利休). During the Sengoku Warring States period in Japan (15th and 16th centuries), tea utensils were given to warriors as spoils of war. Broken tea utensils that were repaired with gold or lacquer fillings were considered more valuable than in their original state. The development of the kintsugi technique gave birth to a culture that embraced the inevitability of things breaking.
Sometimes we accidentally break or chip our precious ceramic products. Rather than throwing them away, there is a better way: Kintsugi, a traditional Japanese technique, that can be used to successfully repair such products in a simple way.
Coffee you drink from a mug that you have repaired with your own hands will taste even better!
Please note that kintsugi ceramics are not dishwasher-safe.
-
-
Before starting Kintsugi:
-
Wash and dry each pieces of broken ceramic.
-
Like a puzzle, you arrange each piece so that they are close to their original form.
-
-
-
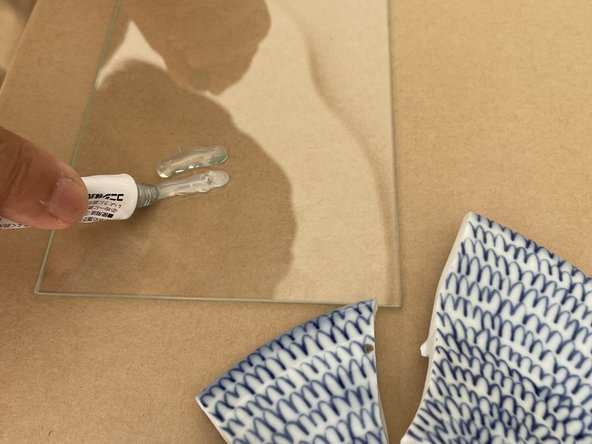
Mix the adhesives (two tubes on the left side: green caps) on the glass tray.
-
We recommend mixing the adhesive on the glass surface to prevent it from drying out. This makes cleaning easier.
-
Apply glue to all the cracking parts. The thinner and drier the glue is, the stronger the adhesive will be.
-
-
-
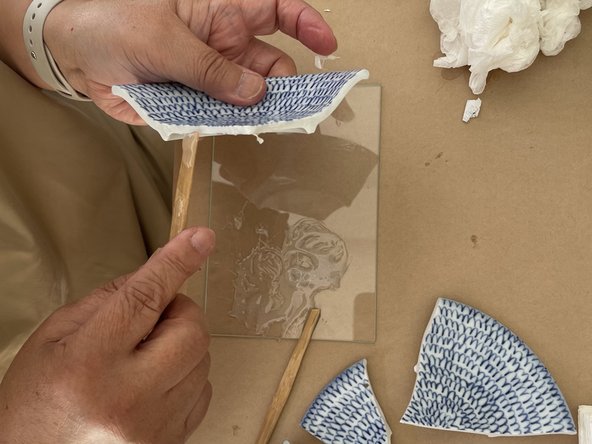
When the glue has dried to the point where it no longer sticks to your hands, join the pieces together. Press them firmly together so that they don't break.
-
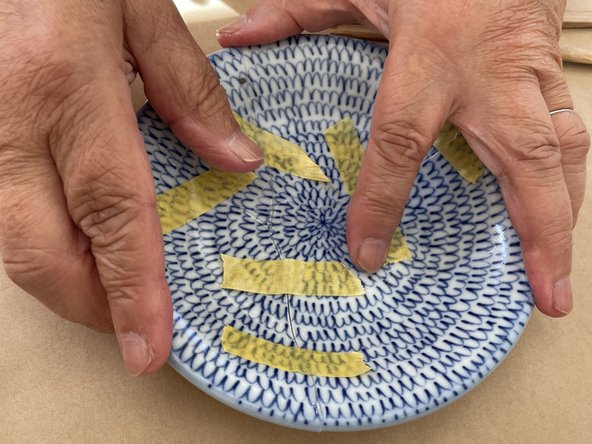
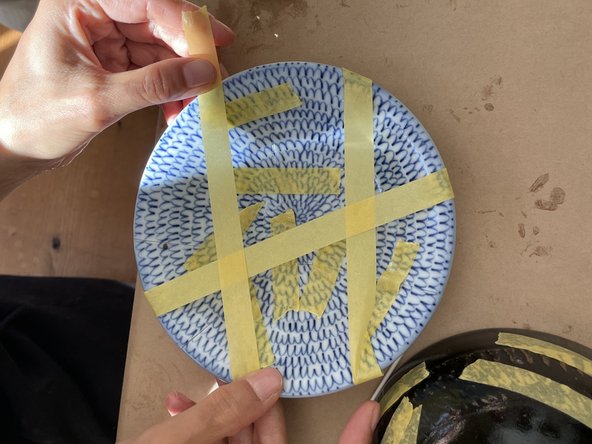
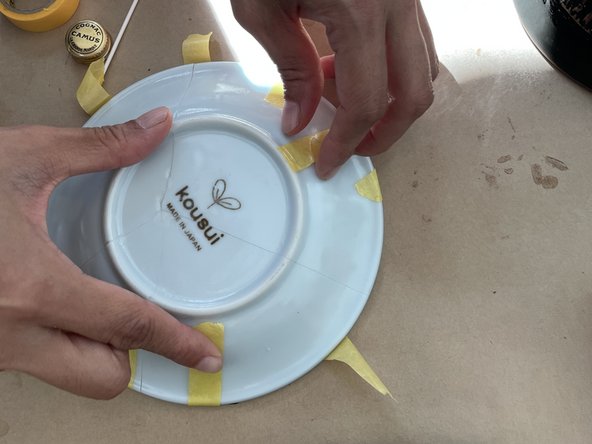
Once everything is in place, use the tape to secure it in place. For each part that tends to spread outwards, such as flat plates or bowls, secure the entire length from one end to the other with a single piece of tape in several places.
-
-
-
-
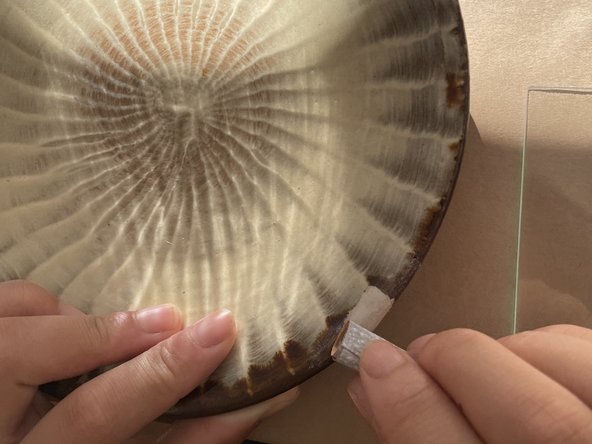
If there is a lump of glue, wipe it off with a cotton swab dipped in ethanol alcohol before it gets dry.
-
After you have wiped off the glue from both the front and back, peel off the masking tape.
-
-
-
Apply a mixture of epoxy resin A and B to all areas where the adhesive has hardened.
-
Fill all the gaps with putty. You can sand it down later, but push it in with your fingers so that it is as thin as possible.
-
As with cleaning the glue, after applying the putty, remove the putty that has come out with a cotton swab moistened with ethanol.
-
Allow to dry thoroughly for at least 30 minutes.
-
-
-
When the putty is completely dry, scrape it off with a coarse file. After that, polish with a fine file. The degree of sanding depends on your preference for the finish.
-
If you like the uneven look, just a coarse file will suffice. If you want a smooth and clean look, use a fine-grit file.
-
-
-
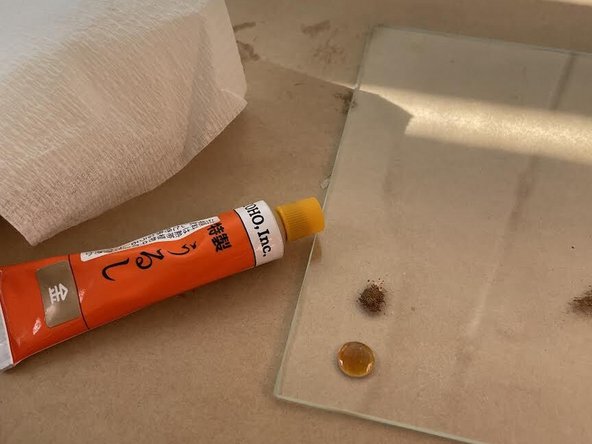
Here is a tube of gold lacquer (Orange Tube) and brass powder (Gold powder case between orange tubes). Prepare the amount shown in the image (the proper amount for the actual chipped area) on the glass sheet. Do not use more brass powder.
-
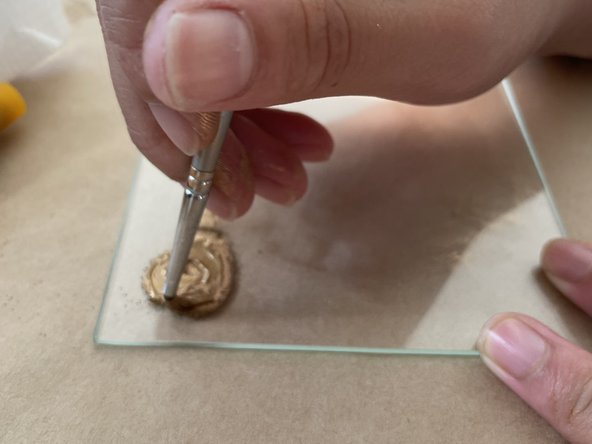
Mix the lacquer tube with the brass powder until there is no powdery residue. If the mixture dries out or needs to be thinned during the process, you can add a small amount of kerosene to the mixture.
-
-
-
Image 1 &2: Front and back of the plate. The front is a thin layer of epoxy resin. Do not apply a thick coat. When applying the kintsugi, the speed is one millimeter per second.
-
Image 3: A plate with chipped rim. In this case, put epoxy resin in the chipped area, file it after it dries, and apply a thin layer of lacquer over it.
-
-
-
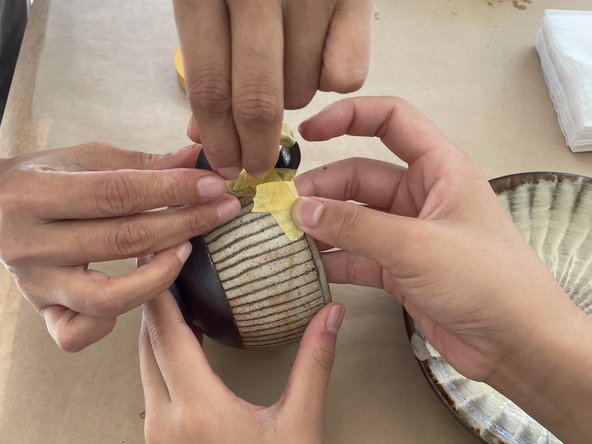
Arrange the broken cup handle correctly, like you were trying to fit a puzzle together. Apply a thin coat of epoxy resin to both sides of each piece.
-
When the epoxy resin is slightly dry, start to attach the broken handle together. It is recommended that you work with someone to do this for more stable work. Each time you do this, use washi (painters) tape to secure it tightly in place.
-
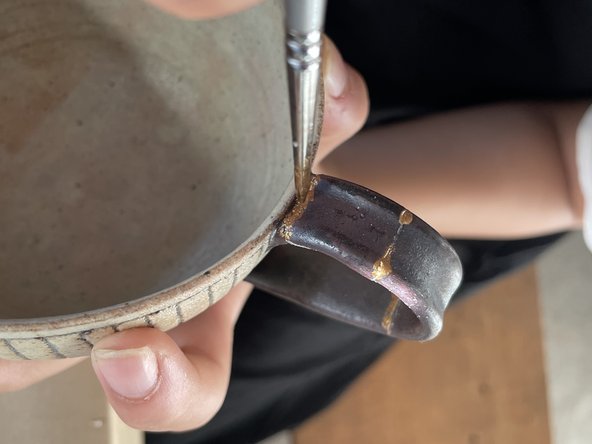
Once you are sure it is completely dry, carefully peel off the washi tape and gently sand it with a file.
-
As described in the previous step, carefully apply mixed lacquer and gold powder over the epoxy resin.
-
Now your broken coffee cup is reborn as a unique, one-of-a-kind entity!
-


Admire the unique patterns of your repaired piece, each crack telling a story of resilience and beauty.
Admire the unique patterns of your repaired piece, each crack telling a story of resilience and beauty.
crwdns2935221:0crwdne2935221:0
crwdns2935229:03crwdne2935229:0

crwdns2947410:01crwdne2947410:0
日本出身者として、いずれiFixitで金継ぎの技術を紹介したいとずっと思っておりましたので、本ガイドの執筆公開に深く感謝します。興味深く拝読いたしました。
細かいことですが、気になったことがあります。「伝統的な金継ぎでは接着にも(日本などで使われるウルシオールを主成分とした)漆を使う」点と「(少なくとも日本の法令上は)エポキシ接着剤による金継ぎをした食器を食事に使うのは安全上問題がある可能性が高い」点の記載がされていないことです。
伝統的な金継ぎでは接着にも漆が使われており、この場合は金継ぎ後に食事に使用しても問題はありませんし、保管条件次第ですが数十年数百年レベルの耐久性もあります。ただし、漆の硬化条件が厳しい(環境条件は諸説ありますが、金継ぎの接着に使う場合は「気温20〜30°C湿度60〜90%で2週間」が目安か)上、漆自体の扱いが難しくヒビや欠けの修理に別の材料や手順が必要になることから、接着に漆を使う金継ぎについては具体的な手順の紹介を避けて、「本来は接着にも漆を使う」旨の追記があれば十分かと思います。
食品衛生法規については国や地域によって異なるので、ここでは日本の場合について書いておきます。食器などに使って良いとされる材料は食品衛生法に基づいて決められており、食器用として使って良いとされる接着剤には「食品衛生法適合」などと謳われているはずです。ですので食品衛生法適合品のエポキシ接着剤であれば問題ないのですが、市販のエポキシ接着剤はほぼ不適合品だと思いますので注意が必要です。表面仕上げ用の金粉にもこの規制は適用されますので、安全に食事に使えるようにするには真鍮粉ではなく純金粉(など)を使う必要があり、その場合は使う材料と工程が変わってきます。(なお、食品衛生法はあくまで営業目的の場合が対象なので、個人使用する分には違法にはなりません(個人使用目的の食器を使って他の人が食事をして健康被害などが出た場合どうなるのかは分かりません))
細かい話をしましたが、食事に使わない鑑賞目的であれば本ガイドの手順で問題ないかと思います。執筆公開お疲れ様でした。