crwdns2933423:0crwdne2933423:0

How to overhaul the drain valve

crwdns2942213:0crwdne2942213:0

  1. How to overhaul the drain valve, Jura drainage valve: crwdns2935265:01crwdnd2935265:01crwdnd2935265:03crwdne2935265:0 How to overhaul the drain valve, Jura drainage valve: crwdns2935265:01crwdnd2935265:02crwdnd2935265:03crwdne2935265:0 How to overhaul the drain valve, Jura drainage valve: crwdns2935265:01crwdnd2935265:03crwdnd2935265:03crwdne2935265:0
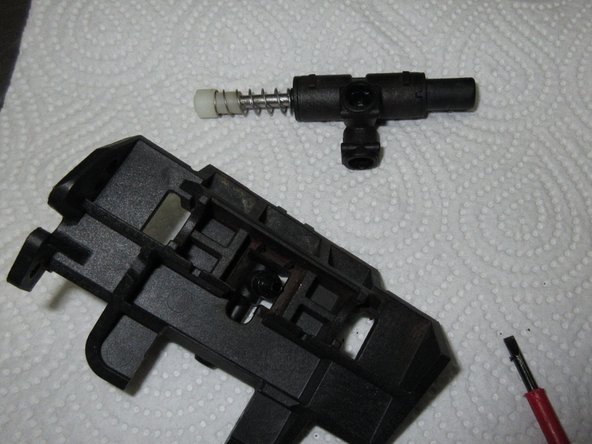
    • The brewing group has already been removed and disassembled. Now it's time for the drainage valve.

    • There will be many pictures

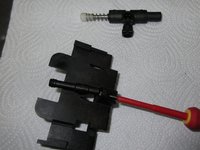
    • All you need a small flathead screwdriver.

  2. How to overhaul the drain valve: crwdns2935265:02crwdnd2935265:01crwdnd2935265:03crwdne2935265:0 How to overhaul the drain valve: crwdns2935265:02crwdnd2935265:02crwdnd2935265:03crwdne2935265:0 How to overhaul the drain valve: crwdns2935265:02crwdnd2935265:03crwdnd2935265:03crwdne2935265:0
    • Images front and back

  3. How to overhaul the drain valve: crwdns2935265:03crwdnd2935265:01crwdnd2935265:03crwdne2935265:0 How to overhaul the drain valve: crwdns2935265:03crwdnd2935265:02crwdnd2935265:03crwdne2935265:0 How to overhaul the drain valve: crwdns2935265:03crwdnd2935265:03crwdnd2935265:03crwdne2935265:0
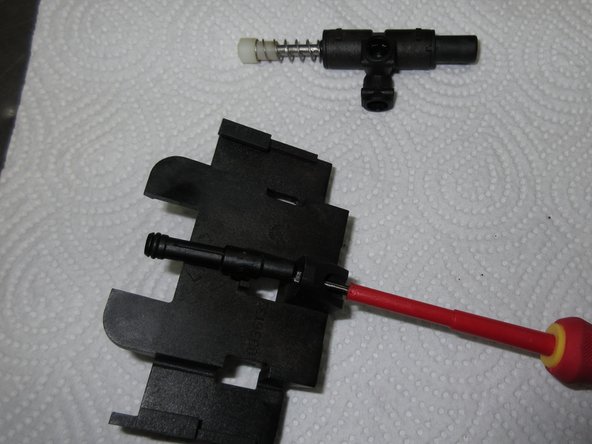
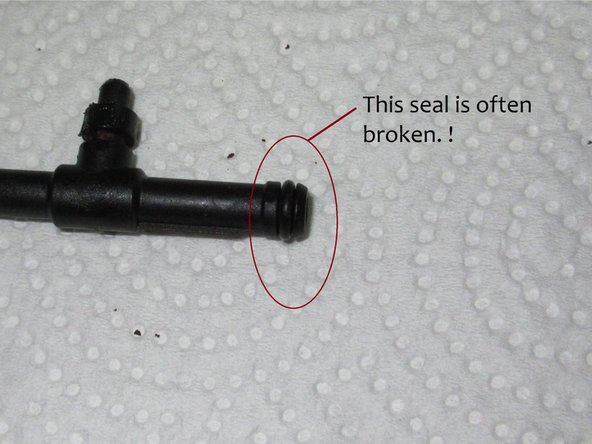
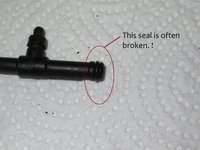
    • Pull off the clamp and pull out the inlet hose. At the end there is a seal, it often gets stuck in the drainage valve. Swap them out when reassembling.

    • The angled inlet is not installed on all models. The hose is then plugged in directly. As the installation is somewhat tedious, you can also install the part later.

  4. How to overhaul the drain valve: crwdns2935265:04crwdnd2935265:01crwdnd2935265:03crwdne2935265:0 How to overhaul the drain valve: crwdns2935265:04crwdnd2935265:02crwdnd2935265:03crwdne2935265:0 How to overhaul the drain valve: crwdns2935265:04crwdnd2935265:03crwdnd2935265:03crwdne2935265:0
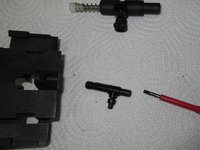
    • Pull out the clip on the docking tube

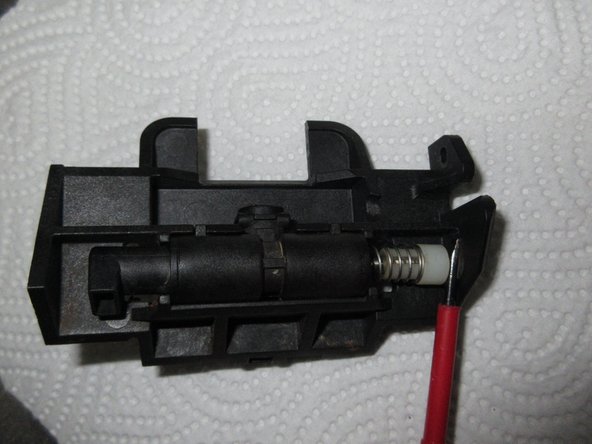
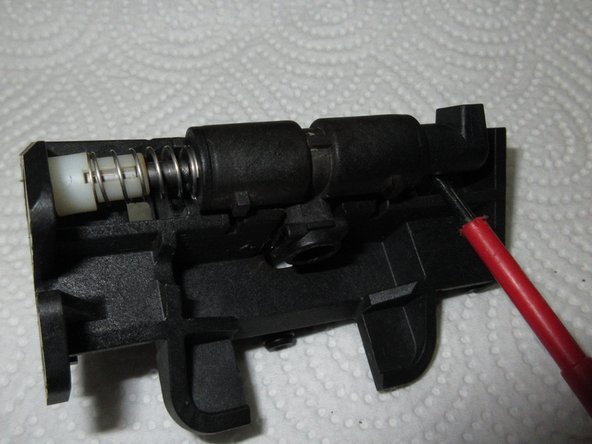
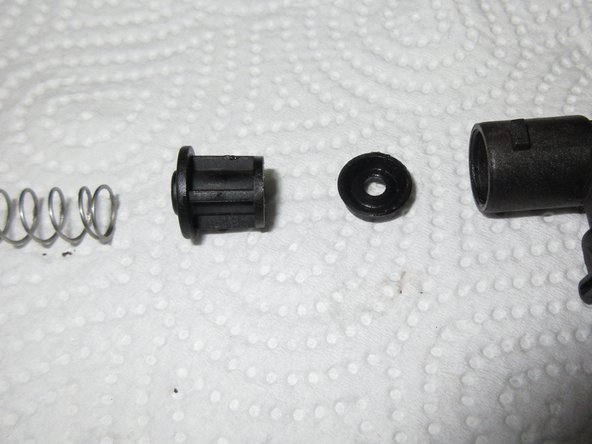
    • Pry out the valve body. Make sure the white cap slides out of its hole.

    • Detach the docking nozzle.

    • The seal of the docking connector is subject to heavy loads as it slides into the opening on the brewing piston with every brewing process. It is slightly thinner than all other hose seals. If you accidentally fit the wrong seal, the drain valve will no longer work.

  5. How to overhaul the drain valve: crwdns2935265:05crwdnd2935265:01crwdnd2935265:01crwdne2935265:0
    • The white cap holds the valve tappet and pulls it out. If it is cracked, it can no longer grip it properly. It therefore remains in the position that the cap holds open for it at the moment it happens to be in. The drainage valve no longer works.

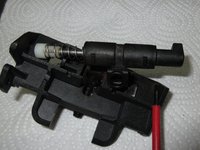
    • Check whether the cap is still firmly in place. If this is not the case, you will need to replace it with a new cap, preferably made of metal.
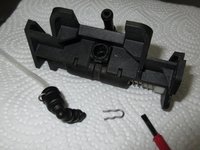
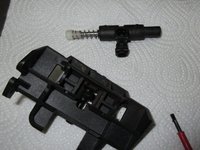
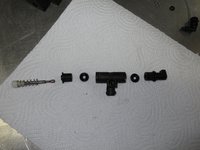
    • Of course, you can also get a new drainage valve.

  6. How to overhaul the drain valve: crwdns2935265:06crwdnd2935265:01crwdnd2935265:03crwdne2935265:0 How to overhaul the drain valve: crwdns2935265:06crwdnd2935265:02crwdnd2935265:03crwdne2935265:0 How to overhaul the drain valve: crwdns2935265:06crwdnd2935265:03crwdnd2935265:03crwdne2935265:0
    • Detailed photos.

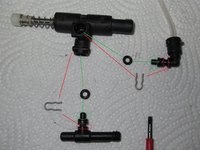
    • The position of the sealing rings are marked green in picture 3.

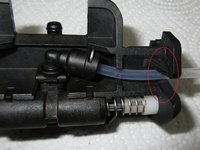
    • The sealing ring on the docking socket is marked in red in picture 2. It is especially important. It's a little thinner than the other two.

    • The brackets are marked in red.

  7. How to overhaul the drain valve: crwdns2935265:07crwdnd2935265:01crwdnd2935265:03crwdne2935265:0 How to overhaul the drain valve: crwdns2935265:07crwdnd2935265:02crwdnd2935265:03crwdne2935265:0 How to overhaul the drain valve: crwdns2935265:07crwdnd2935265:03crwdnd2935265:03crwdne2935265:0
    • Here all the parts of the valve.

  8. How to overhaul the drain valve: crwdns2935265:08crwdnd2935265:01crwdnd2935265:01crwdne2935265:0
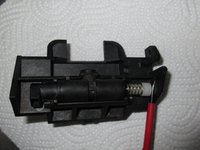
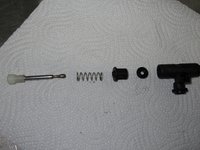
    • Here is the entire valve in one picture

  9. How to overhaul the drain valve: crwdns2935265:09crwdnd2935265:01crwdnd2935265:03crwdne2935265:0 How to overhaul the drain valve: crwdns2935265:09crwdnd2935265:02crwdnd2935265:03crwdne2935265:0 How to overhaul the drain valve: crwdns2935265:09crwdnd2935265:03crwdnd2935265:03crwdne2935265:0
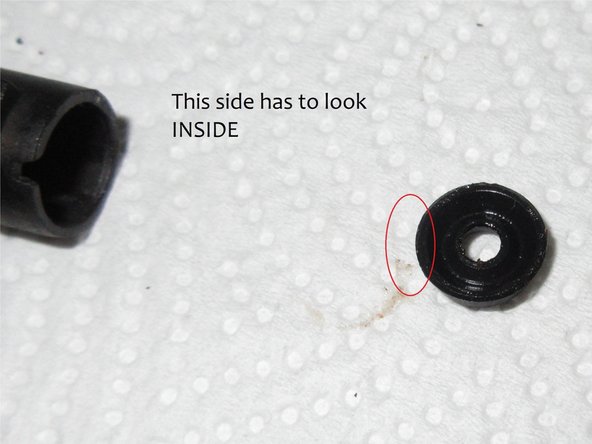
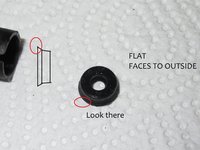
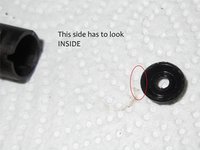
    • When assembling, make sure that the lips of the seals point to the pressure side, i.e. inward, and the flat side outward.

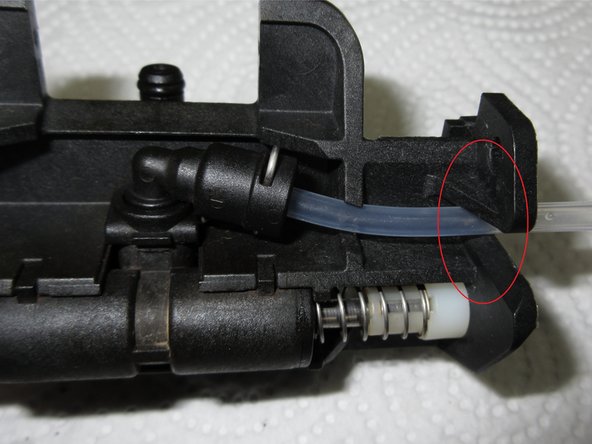
    • When installing, make sure that the pressure hose runs through the slot in the valve carrier.

    • Apply a thin layer of food-safe silicone grease to the seals before installation.

crwdns2915888:0crwdne2915888:0

Follow the steps in reverse order to reassemble your device.

crwdns2934873:0crwdne2934873:0

de en

100%

crwdns2934883:0oldturkey03crwdne2934883:0 crwdns2934875:0crwdne2934875:0
crwdns2934877:0crwdne2934877:0 ›

VauWeh

crwdns2935283:010/19/15crwdne2935283:0

264,075 crwdns2915208:0crwdne2915208:0

crwdns2935297:0297crwdne2935297:0

crwdns2915084:0crwdne2915084:0

Repair is War on Entropy crwdns2935289:0Repair is War on Entropycrwdne2935289:0

Community

crwdns2931471:030crwdne2931471:0

crwdns2935297:01,819crwdne2935297:0

crwdns2947412:00crwdne2947412:0

crwdns2917038:0crwdne2917038:0

crwdns2936625:0crwdne2936625:0:

crwdns2936751:024crwdne2936751:0 21

crwdns2936753:07crwdne2936753:0 36

crwdns2936753:030crwdne2936753:0 83

crwdns2942667:0crwdne2942667:0 332