crwdns2915892:0crwdne2915892:0
A simple guide to fix a jammed drive tray on the 360 S, please follow instructions on how to remove the drive from the 360 S first.
crwdns2942213:0crwdne2942213:0
-
-
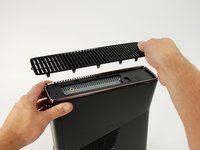
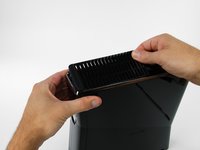
In the following steps, you will remove the top vent, secured to the top panel by the thirteen clips shown.
-
-
-
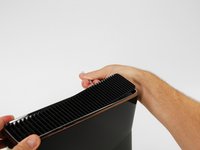
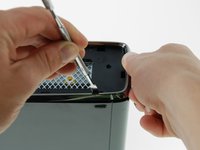
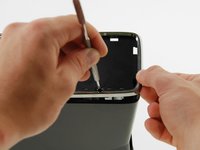
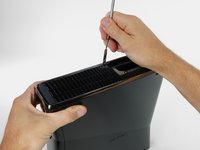
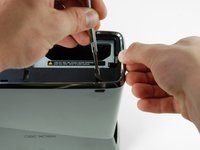
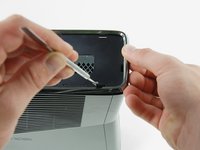
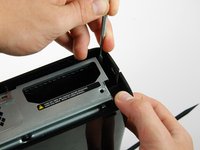
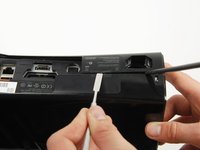
Orient the console so that the words "XBOX 360" on the sides are right-side up, and the faceplate is facing to the left.
-
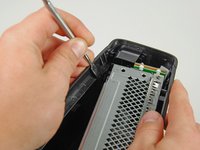
Insert a metal spudger between the top vent and the top bezel near the rear of the Xbox.
-
Rotate the spudger away from the console, prying the edge of the fan vent up until the two plastic clips come free.
Whoever gave that tool the name “spudger” needs to be shot in the face.
This step is and the others following are to rough and not needed, simply put smth in between the lamellar and push it up with littlebit pressure thats better for the plastic parts.
-
-
-
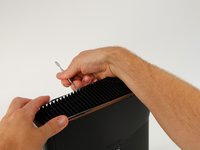
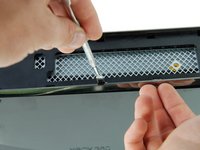
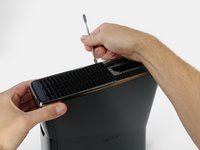
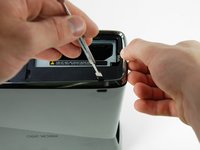
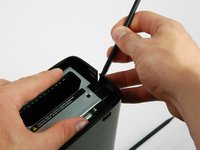
Insert a metal spudger between the fan vent and top bezel along the left side of the console.
-
In the same manner described above, begin prying the left side of the top vent away from the top bezel.
-
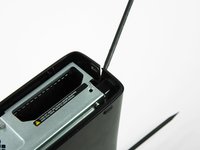
Continue prying along the left side of the device, freeing all the clips on that side.
-
-
-
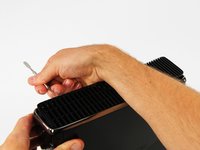
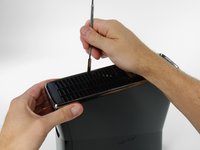
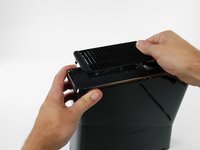
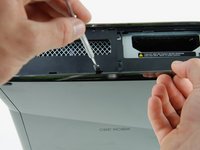
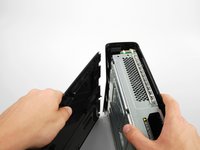
Lift the fan vent up from the freed left side to disengage the clips along the right side.
-
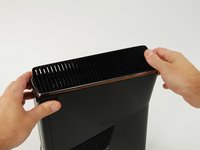
Remove the entire fan vent.
-
-
-
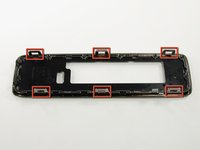
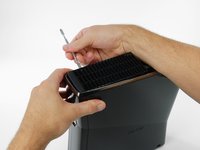
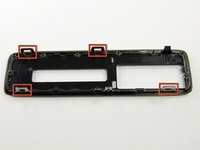
In the following steps, you will be releasing the six clips highlighted in red.
-
-
-
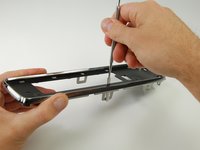
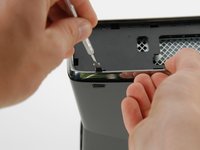
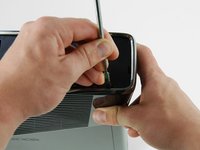
Insert a metal spudger through the front-most slit on the left edge of the top bezel and between the bottom edge of the clip and the left case, as described above.
-
Simultaneously rotate the spudger away from the console and pull up on the top bezel to free the clip.
So I got the fan filter thing off, but the black edge plate thing isn't coming off. All I did was warp my flathead screwdriver and scratch the console.
-
-
-
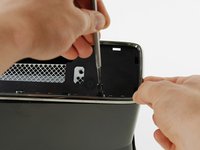
Using the same method described above, free the two remaining clips along the left edge of the top bezel.
-
-
-
Grab the entire top panel with your hands, lift up the entire left edge high enough to rest the separated clips on top of the left case.
-
-
-
Rotate the console so that the rear of the Xbox 360 S is facing to the right, and the right case is facing you.
-
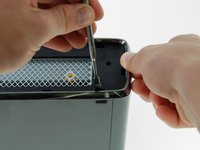
Insert a metal spudger through the rear-most slit on the right edge of the top bezel and between the bottom edge of the clip and the right case.
-
While lifting up on the top bezel with your fingers, rotate the spudger away from the console to free the clip.
-
-
-
In the same manner as described in the previous steps, release the middle and front clips along the right edge of the top panel.
-
-
-
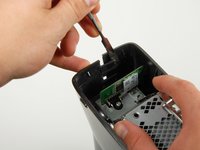
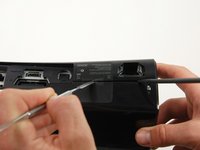
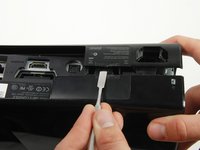
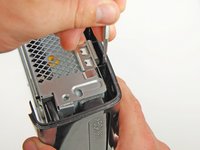
Push the latch holding down the hard drive cover to the left.
-
Pull the hard drive cover away from the console.
-
-
-
Firmly grasp the fabric tab labeled with the size of the hard drive (e.g. "250 GB") attached to the hard drive.
-
Pull the hard drive straight out of the console.
If i buy a new xbox 360 and replace the hardrive inside with my own, will i have my account and saves? or will i have to recover my account and start over?
You will still have your saves and account if you replace your hard drive in the new xbox
hola tengo un disco de laptop y quiero ponerle 100 juegos como puedo hacer la xbox me reconose el disco y todo lo configuro pero cuando conecto a mi pc para pasar los juejosel emulador no me deja
My fabric was accidentally ripped off years ago. What do I do?
Stick another bit on there
-
-
-
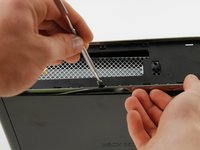
It is attached to the bottom panel by the seven clips shown.
-
-
-
Insert a metal spudger between the black bottom vent and the silver rim of the bottom bezel, in the rear right corner of the vent.
-
Rotate the spudger away from the console, prying the vent up from the bottom bezel.
-
-
-
-
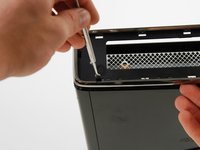
In the same manner as described above, pry the two remaining clips on the bottom right edge.
-
-
-
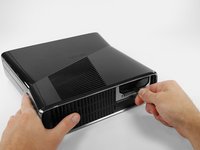
Remove the bottom vent by lifting it away from the bottom bezel.
-
-
-
The clips shown in red can be detached by inserting a metal spudger underneath the bottom edge of the clip. Once underneath the bottom edge, simply prying away from the console will free the clip.
-
-
-
Insert a metal spudger through the slit near the rear left corner of the bottom bezel.
-
Rotate the spudger away from the device while lifting the rear bezel up with the other hand.
These are pretty awkward to remove, but once you understand how they work its easy enough. The goal here is to slot the spudger THROUGH the gap of the silver tabs (visible in previous steps image, circled) and then pry. Put pressure against the wall of the Xbox case and push downwards, once you feel the spudger slot in, then apply force away from the Xbox and pull up a little with your free hand.
-
-
-
Insert a metal spudger through the left middle slit of the bottom bezel, and between the bottom edge of the clip and the left case.
-
Simultaneously pull the bottom bezel up and rotate the spudger away from the console to free the clip.
-
In a similar fashion, free the clip at the front of the bottom bezel's left edge.
-
-
-
Insert the spudger into the rear-most slit on the right edge of the bottom bezel, and wedge it behind the clip by pushing the spudger down while pushing the tip of the spudger against the right case.
-
Simultaneously release the clip and pull the bottom bezel up.
-
-
-
Insert a spudger between the silver rim and bottom bezel directly above the clip shown.
-
Release the clip while pulling up on the bottom bezel.
-
-
-
Lift the left edge of the bottom bezel up enough to gain clearance.
-
Insert a metal spudger behind the left edge of the last clip, and push the clip away from the right case.
-
-
Does not void the warranty in the United States according to the FTC that sent a cease and desist letter directly to Microsoft about this exact issue.
-
-
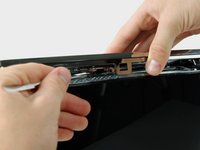
Locate the two clips connecting the right and left case along the top edge of the console, behind the Wi-Fi card.
-
While pushing the left and right case away from each other with one hand, pry the clips away from the case with a metal spudger.
Retiring the WiFi module, this task gets a lot easier
-
-
-
Insert a spudger between the right and left cases to hold them separate while you work elsewhere.
-
-
-
While pushing the left and right cases apart with one hand, free one clip located beside the hard drive slot.
-
-
-
Place another spudger between the left and right cases directly below the clip.
-
-
-
Insert the flat edge of a metal spudger between the left and right cases where the warranty sticker used to be.
-
Pry the left case upwards to form a gap between the two cases, and slide the spudger in toward the left case.
-
Rotate the spudger upward to release the last clip.
if you make a hole right here like the link`s picture you can boot the lock
As the user above me said, please avoid doing it like shown in the guide. It just didn’t work on my Xbox (unless your goal is to destroy the plastic case). Instead, pick some small needle like object (the spudger was too short for this, I used the SIM bit of my iFixit driver kit) and find the right spot on the big sticker which is on the left in the pictures shown in the guide. That spot is just between the text and the column of logos (Dolby Digital, etc.) (https://team-xecuter.com/slim/slim_secre..., picture not mine). Poke it (don’t be too gentle, you have to apply some force) and you will hear the clip release.
Both the above links are dead, i used this YouTube video which shows you the process of getting the hidden clip
I was able to open it by pushing on the sticker to unclamp the clip while another person helped me pull open the case.
Here is a Video that shows the small hole behind the sticker, ist in german but ist good to see how to open that hidden clip easiely.
None of the above options by the other commenters worked for me, but I found a video that points out there's a little hole right in the middle of the "SEE PRINTED MANUAL" and "UL" on the sticker under the Xbox 360 warranty sticker that I stuck a sewing needle into and it unlatches the latch: https://youtu.be/7mC8ckDvKqc?si=CVyCszpF...
-
-
-
Release one clip in the front left corner of the top edge securing the left case to the faceplate.
On earlier Xbox 360 S systems, the screws mentioned in step 40 need to be unfastened in order to complete this step
-
-
-
Flip the console over so the bottom is facing upward.
-
Release one clip in the front left corner of the bottom edge securing the left case to the faceplate.
-
Rotate the left case away from the device to release the last two inner clips.
-
Remove the left case.
-
-
-
Release the clip near the front right corner of the top edge securing the right case to the faceplate.
There are 4 black screw that has to be removed before you can detach the other cover. Please note
Sorry, there 5screws, one in the middle and 4 at the edges
-
-
-
Release the clip in the bottom right corner of the top edge securing the right case to the front case.
-
-
-
Lift the left edge of the faceplate upward to release the last two clips securing the faceplate to the right case.
-
Detach the faceplate from the rest of the device.
It is easier to perform step 40 before 34 (unscrew the long torx screws to make the right case flexible)
There isn’t 2 clips there is 4 clips
I tore this on reassembly and it was barely held together. Be careful!
-
-
-
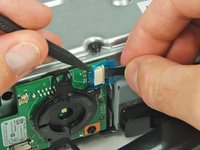
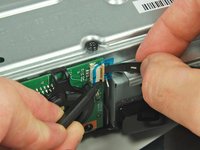
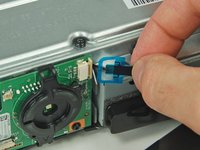
Using a spudger or fingernail, lift the clear blue tab away from the connector.
-
Slide the locking tab on the power switch board cable connector toward the top of the console.
-
Pull the power switch cable straight out of the connector.
-
The faceplate is now free of the rest of the console.
-
-
-
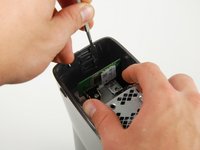
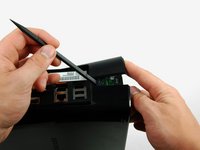
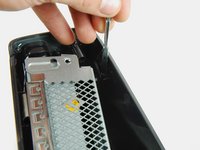
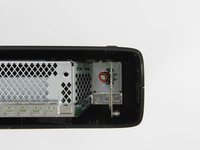
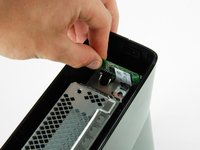
Remove the single T10 Torx screw holding in the wireless card.
-
Pull the Wi-Fi board out of the console.
-
-
-
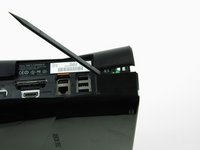
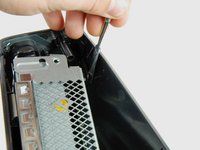
Remove the large white sticker from the metal frame to expose a screw.
-
-
-
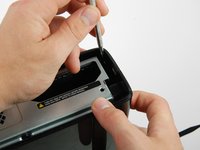
Remove the five 55.5 mm T10 Torx screws securing the right case to the metal frame.
I opened an Xbox 360 S manufactured in 2010. These 5 screws are needed to be undone in order to complete step 30. I didn't know about the one under the sticker so I ended up breaking the housing as a result. I'd appreciate it if you could make a note to step 30 pointing you to this step if you are having trouble taking the side off, as it is highly likely that these screws are the reason.
-
-
-
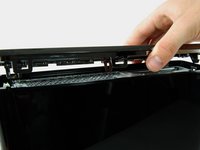
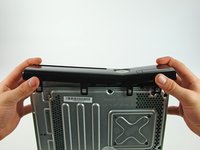
Lift the right case off by its metal framework.
-
-
-
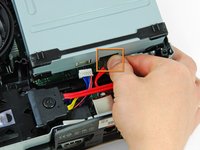
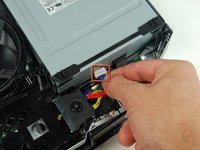
Disconnect the optical drive data cable from the back of the optical drive.
-
Disconnect the power cable from the back of the optical drive.
-
-
-
Lift the optical drive out of the Xbox.
Is there a specific Optical Drive that Microsoft uses in these or can I upgrade my drive?
i took my drive out but when installed my replacement it would not work
WAS thinking of possibly trying to repair my son's Xbox 360S, by replacing the optical drive, but after looking at all the spudger steps to get to the drive and then your comment that the replacement might not actually work... forget about it! I ain't going to all that work for possibly nothing... t'ain't worth it!
Anyone want a perfectly working Xbox 360S with a drive the spins game discs upon ejection? We've already bought a replacement, so this unit is for sale... name your price.
Luposian -
In regards to davidgardner301 comment there is a extra step they. Didn't show on this replacement guide in order for your new disk drive to work you will need to remove the origional board connected to thje origional drive that came with the system and soler that onto the new one its a tricky process however its a step most people over look
Without the origional board the xbox will not accept the replacement drive only because each disk drive is coded to work with tat soecific xbox only so your out of luck if you already. Tossed out your old disk drive
So I installed the drive but the thing keeps reading the games as dvds, hence; wont play them, why?
The DVD drives are coded to the Motherboard. If you buy the same exact drive to replace the broken one. You will still need to either 1) transfer the DVD circuit board OR 2) get the Firmware from the old DVD drive using a PC and then transfer it to the New DVD. There are website regarding this procedure if you want to look it up.
-
-
-
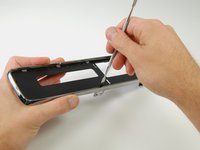
The Drive unit itself
-
For the lite-on phillips drive, you pretty much have to use brute force and a little prayer. Once you remove the rubber piece near the back (sound dampner and it keeps the drive from wiggling), remove the sponge foam strip at the front (allows the drive to close silently) and the 4 screws at the corners.
-
You then remove the top piece (some videos will actually have you remove the top spin plate, but that is not necessary). Slide the drive components towards the front, after lifting the front to clear the base pins from the other half of the case.
-
Then carefully remove the drive tray from the side lips holding it in place, starting from the back of the drive and using it's flexibility to free it one tab at a time towards the front.
-
-
-
Once free you'll notice a small guide pin on the right side (from the front view) near the gears, manually rotate the gears (lowering the lens assembly) until the pin lines up on the far right side (there should be a guide track for it on the bottom of the tray).
-
Slide the tray back into place making sure the guide pin is properly aligned into the guide track.
-
You can do a partial reassembly to test the fix, but be careful as the power cord "key" is a molded part of the case, so it can be inserted upside down.
-


To reassemble your device, follow these instructions in reverse order.
To reassemble your device, follow these instructions in reverse order.
crwdns2935221:0crwdne2935221:0
crwdns2935229:036crwdne2935229:0
crwdns2947412:06crwdne2947412:0
Was able to pop tray up on right side out of guide, then moved gears till the pin lined up with bottom of tray, popped tray back into guide. Worked perfectly.
step 35 is not necessary, just gently flip xbox and detach dvd-drive
why a repeat of step 41 pic on step 42 and 43? Pix of the internals of the drive could be useful.
Thanks for writing this! This guide was really helpful and my xbox is working perfectly again :) never done anything like this before but instructions were clear and I'm pretty happy with myself to be honest. Could do with relevant pictures on the last two steps but overall a really useful and well written guide.
STUCK DRIVE = Need go no further than Step 4. (Photos available)
After removing the top vent you will be able to see a hole in the mesh towards the front.
Beneath the mesh is the side of the DVD case with another hole lining up with hole in mesh. (May have yellow circle around it).
This will need a long thin probe (Nothing I have in my kit) like a perfectly straightened paper clip.
Push the probe through the hole which disengages the lifter inside the DVD player and allows the draw to open.
No need to go past step 4 unless the DVD needs to be opened to remove stuck objects.
you dont need to disassemble your xbox at all. you can poke that hole without removing any plastic, there's even a small cut-out for it
The motherboard and the disc drive's PCB (circuit board) are paired. If the drive's PCB is fine, which it most likely is, then all you need to do is swap out the PCB on the new drive with your old one before installing it. No motherboard replacement required.
Only in the unlikely case that the drive's PCB is fried will you require a full drive and motherboard replacement.
SirStephenH - crwdns2934203:0crwdne2934203:0