crwdns2915892:0crwdne2915892:0
How to open Razer Lycosa keyboard and remove its layers and keys, to enable you to clean it from the inside out.
You will need a clear workspace and several plastic containers or other storage tubs which can be used to save small items. Keycaps and screws can be very easily lost. Keep them together and ordered!
crwdns2942213:0crwdne2942213:0
-
-
Remove 10 screws (8mm) securing the back plate.
-
Remove 4 screws (7mm, ball head) securing the handrest plate.
-
-
-
Lift the handrest plate and pull it free, away from the rest of the unit.
-
-
-
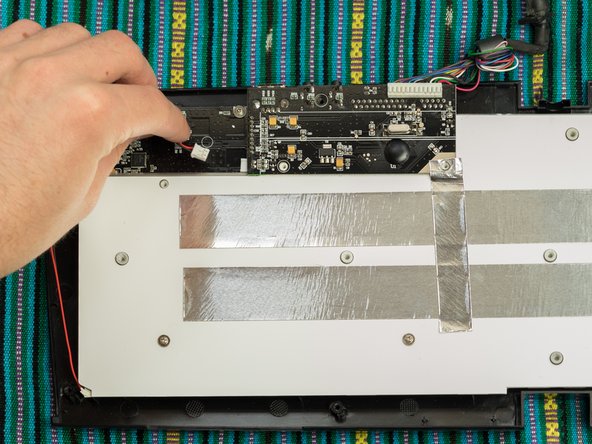
After unscrewing, the back plate is now loose, and can be lifted gently to separate it.
-
Lift up the primary cable to free it from the casing.
-
-
-
Remove 9 screws (5mm) that are securing the membrane layers.
-
Remove the plastic holder but retain it in a safe place, as it is used to restrict the data cable from moving freely and will need to be returned.
-
Gently pull the data cable (black/red) to disconnect it.
-
-
-
-
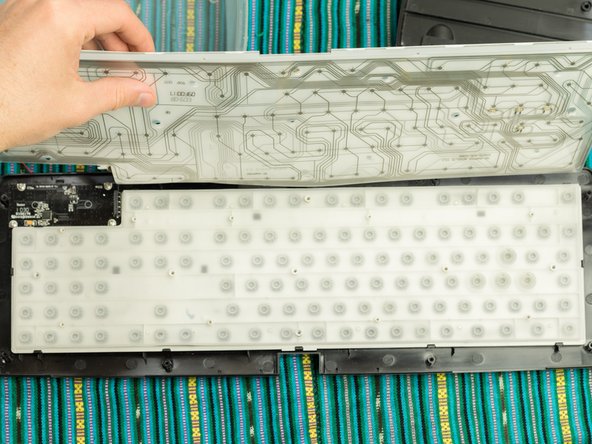
Start to gently remove the membrane cover, peeling off the layers beneath it as well.
-
Caution: take care not to damage the striped grey data cables, which connect all the layers.
-
-
-
Peel off the plastic membrane.
-
-
-
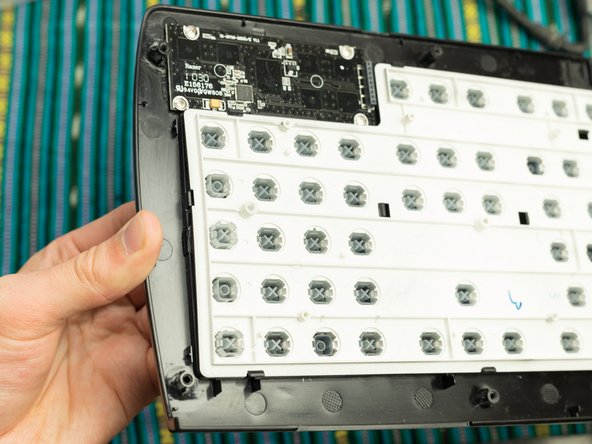
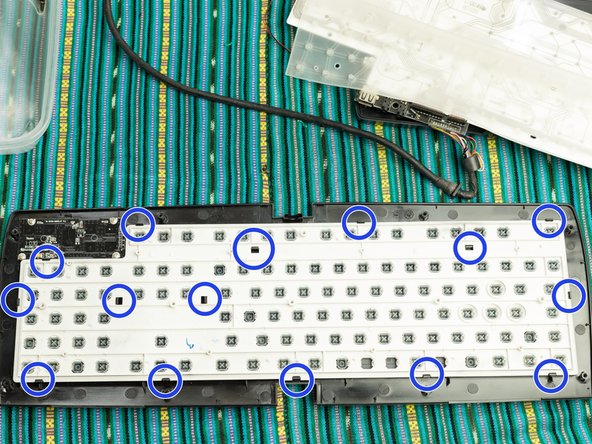
Push with moderate force to separate the keyframe (beige) from the front plate (black).
-
You should apply pressure at each hook (marked in blue).
-
Optional: prior to completing this step, remove all keycaps from the frame (Step 9). This may make it easier for you to apply pressure to the board, with less fear of breakage from undue force.
-
-
-
Push out each keycap using mild pressure from your finger.
-
You should push from the inside (beige frame) to the outside. Do not push the keys the other way around.
-
Optional: Using a blunt tool (like the end of a screwdriver) can help you push out the keycaps quicker than fingers.
-
Tip: Store the keycaps safely in a plastic container, in order of rows. It is very easy to lose keys.
-
-
-
To return the keycaps to the frame, push them in using your fingers from the front.
-
Call up your photo of the keyboard layout and review it to ensure you are placing each keycap in the right order and place.
-
You may need to consult a guide on the QWERTY (or other relevant layout) keyboard layout to ensure you are familiar with the correct key order when reassembling the keycaps.
-
-
-
The following keys have a long metal brace to support them. To remove: gently push with great care out of the frame.
-
SHIFT (2 keys)
-
Enter
-
Backspace
-
Keypad Plus (+)
-
Keypad Enter
-
Keypad Zero/Insert (0)
-
Space Bar
-
-
-
Observe the correct alignment for the metal brace. The brace must sit tight in its dedicated, raised rack.
-
Place the keycap over the top of the hole, and push it down gently. Unlike the other normal keycaps, you should feel some resistance when doing so.
-
Now, push the keycap with greater force until a click is heard.
-
Check that the key moves as one, by pressing with your finger on its left and right hand sides to confirm that the key moves effortlessly without obstruction. here is web > keyboardtestt.com
-


To reassemble, follow the instructions in reverse order.
You may need to consult a guide on the QWERTY (or other relevant layout) keyboard layout to ensure you are familiar with the correct key order when reassembling the keycaps.
Test your keyboard after reassembly by re-connecting its USB plug, opening up a word processor and typing content. You can also use http://keyboardtester.com or a similar tool to ensure the keyboard is reporting keystrokes accurately.
crwdns2935221:0crwdne2935221:0
crwdns2935229:03crwdne2935229:0
crwdns2947412:05crwdne2947412:0
help i did this and now my keyboard is not working anymore
Are you sure that both data cables are connected? Do any of the membrane layers look torn or ripped?
hey nice to meet you i have that keyboard and is broken , the plastic membrane ho detect the butons is not working because i drop a glass of water on it , so i have a cueston , do you know if i can buy that piece ? is the one whit the form like circuits in the pass 5
thank you very much for reading me
Hello, recently the A key of my anansi has become mushy, removing the key cap and comparing the membrane to the key next to it, shows that it broke in a way that it makes the upper part of the membrane go inside the lower, thus giving the key that mushy feeling. Is there any way to fix the plastic membrane from this keyboard? or do i have to buy another keyboard. Thanks
My impression is that you would be looking at buying another keyboard. The components are quite proprietary and that there is unlikely to be a replacement of the whole membrane readily available. I’d do a cursory search on eBay. I can’t see what kind of damage that little area has so couldn’t say if the spot could be repaired alone.