crwdns2915892:0crwdne2915892:0
If your LCD screen doesn't seem broken, you should check that it is properly connected to the motherboard. This is a much cheaper fix than buying a new LCD screen for the camera.
crwdns2942213:0crwdne2942213:0
-
-
Turn the camera upside down so you can access the battery chamber.
-
-
-
Push the battery chamber latch in the direction of the front of the camera. Keeping tension on the latch, slide the battery chamber cover toward the outside of the camera, opening the battery chamber.
-
-
-
With the battery chamber open, remove the old batteries.
-
-
-
-
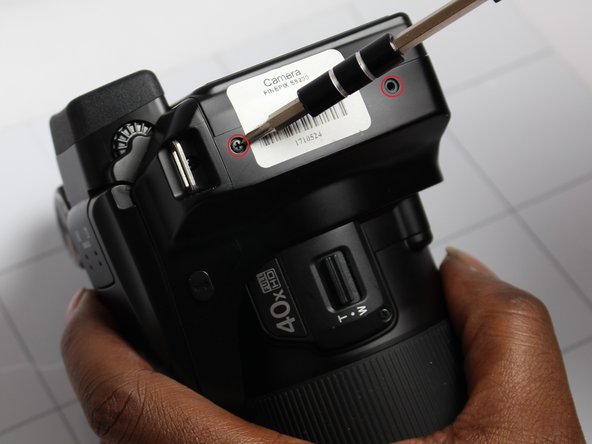
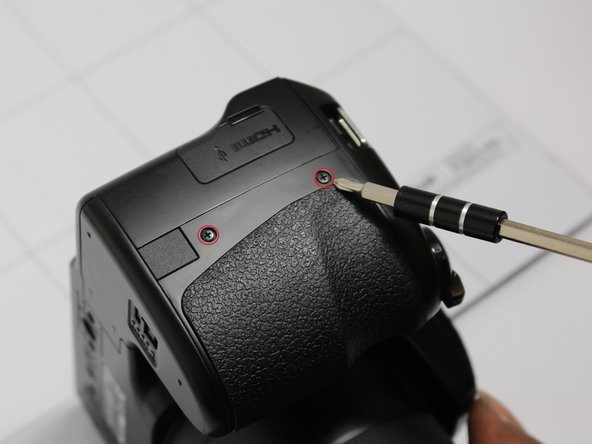
Remove the 4mm JIS #00 screws from the sides and bottom of the camera.
-
-
-
Carefully pry away the rear housing cover with the plastic opening tool.
-
-
-
Remove the rear housing cover by carefully pulling it away from the camera.
-
-
-
Fold back the LCD screen and check that the cable coming from the screen is securely fastened to the motherboard.
-
-
-
Fold the LCD screen back into the proper position.
-


To reassemble your device, follow these instructions in reverse order.
To reassemble your device, follow these instructions in reverse order.
crwdns2915084:0crwdne2915084:0

USF Tampa, Team 7-1, Remmell Winter 2015 crwdns2935289:0USF Tampa, Team 7-1, Remmell Winter 2015crwdne2935289:0
USFT-REMMELL-W15S7G1
crwdns2931471:04crwdne2931471:0
crwdns2935297:09crwdne2935297:0