crwdns2933423:0crwdne2933423:0

crwdns2931315:0crwdnd2931315:0crwdne2931315:0

crwdns2942213:0crwdne2942213:0

  1. crwdns2935201:0crwdne2935201:0 crwdns2935203:0crwdne2935203:0

    : crwdns2935265:01crwdnd2935265:01crwdnd2935265:02crwdne2935265:0 : crwdns2935265:01crwdnd2935265:02crwdnd2935265:02crwdne2935265:0
    • Test your bracelet by wearing it on your wrist.

    • If it is loose, sagging (as pictured), or fully snapped, this is a sign that you may need to replace the string.

  2. crwdns2935201:0crwdne2935201:0 crwdns2935203:0crwdne2935203:0

    : crwdns2935265:02crwdnd2935265:01crwdnd2935265:01crwdne2935265:0
    • Cut the old string using scissors.

  3. crwdns2935201:0crwdne2935201:0 crwdns2935203:0crwdne2935203:0

    : crwdns2935265:03crwdnd2935265:01crwdnd2935265:01crwdne2935265:0
    • Separate the beads from the old string.

  4. crwdns2935201:0crwdne2935201:0 crwdns2935203:0crwdne2935203:0

    : crwdns2935265:04crwdnd2935265:01crwdnd2935265:01crwdne2935265:0
    • Measure the new string by wrapping it 1.5 times around your wrist.

    • If you want a loose fit, add extra slack, otherwise pull it flush against skin.

    • Make sure to leave at least 2 in (5.1cm) of excess string for the knot.

  5. crwdns2935201:0crwdne2935201:0 crwdns2935203:0crwdne2935203:0

    : crwdns2935265:05crwdnd2935265:01crwdnd2935265:01crwdne2935265:0
    • Cut the new string at the desired length using scissors.

  6. crwdns2935201:0crwdne2935201:0 crwdns2935203:0crwdne2935203:0

    : crwdns2935265:06crwdnd2935265:01crwdnd2935265:01crwdne2935265:0
    • Thread the beads onto the new string one at a time.

    • You can use tweezers to hold the beads as you thread.

  7. crwdns2935201:0crwdne2935201:0 crwdns2935203:0crwdne2935203:0

    : crwdns2935265:07crwdnd2935265:01crwdnd2935265:02crwdne2935265:0 : crwdns2935265:07crwdnd2935265:02crwdnd2935265:02crwdne2935265:0
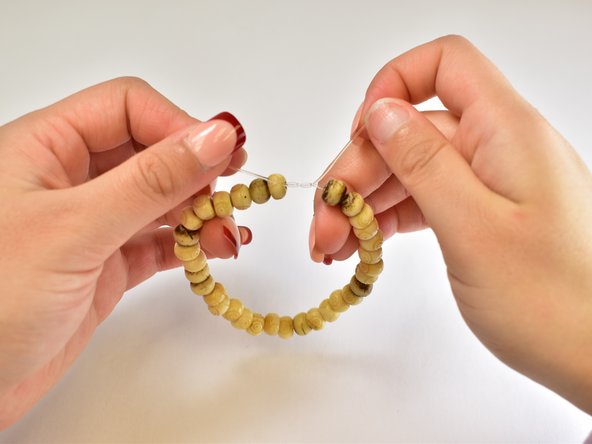
    • Tie a square knot to secure the bracelet.

    • Cross both ends to form an "X" shape.

    • Loop one end of the string over the other to form a simple knot.

    • Tie another simple knot, but this time, loop in the opposite direction. If you initially looped the right side over the left, loop the left side over the right, and vice versa.

    • Pull tight to form a square knot.

  8. crwdns2935201:0crwdne2935201:0 crwdns2935203:0crwdne2935203:0

    : crwdns2935265:08crwdnd2935265:01crwdnd2935265:01crwdne2935265:0
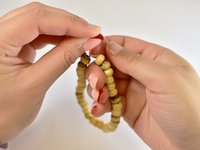
    • As an optional step, apply a dot of super glue to the knot.

    • Wait until the super glue fully dries before moving on, otherwise the knot may come undone.

  9. crwdns2935201:0crwdne2935201:0 crwdns2935203:0crwdne2935203:0

    : crwdns2935265:09crwdnd2935265:01crwdnd2935265:01crwdne2935265:0
    • Trim the excess string.

    • Make sure to leave at least 1/2 in (1.3cm) of excess string for the knot.

  10. crwdns2935201:0crwdne2935201:0 crwdns2935203:0crwdne2935203:0

    : crwdns2935265:010crwdnd2935265:01crwdnd2935265:02crwdne2935265:0 : crwdns2935265:010crwdnd2935265:02crwdnd2935265:02crwdne2935265:0
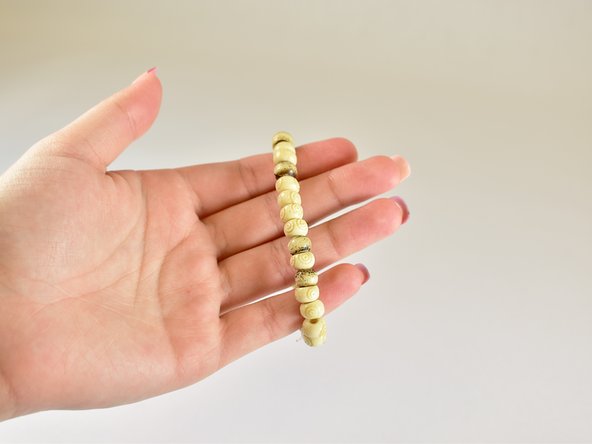
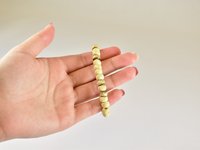
    • Test your bracelet by wearing it again. It should have a tighter fit.

  11. crwdns2935201:0crwdne2935201:0 crwdns2935203:0crwdne2935203:0

    • You heated it.

crwdns2935217:0crwdne2935217:0

crwdns2935227:0crwdne2935227:0

Lucas Wang

crwdns2935283:001/30/24crwdne2935283:0

193 crwdns2915208:0crwdne2915208:0

crwdns2935295:0crwdne2935295:0

crwdns2915084:0crwdne2915084:0

UC Davis, Team 2-5, Andersen Winter 2024 crwdns2935289:0UC Davis, Team 2-5, Andersen Winter 2024crwdne2935289:0

UCD-ANDERSEN-W24S2G5

crwdns2931471:03crwdne2931471:0

crwdns2935303:01crwdne2935303:0

crwdns2947412:00crwdne2947412:0

crwdns2917038:0crwdne2917038:0

crwdns2936625:0crwdne2936625:0:

crwdns2936751:024crwdne2936751:0 9

crwdns2936753:07crwdne2936753:0 21

crwdns2936753:030crwdne2936753:0 63

crwdns2942667:0crwdne2942667:0 420