crwdns2933423:0crwdne2933423:0

How to Replace Cracked Tile

crwdns2942213:0crwdne2942213:0

  1. How to Replace Cracked Tile, Cracked Tile: crwdns2935265:01crwdnd2935265:01crwdnd2935265:01crwdne2935265:0
    • Use a painter's tool or putty knife to remove the grout from around the cracked tile.

    • Using an edge or corner of your painter's tool or putty knife, scrape the grout along the perimeter of the broken tile.

    • Be careful not to crack or scratch surrounding tiles.

  2. How to Replace Cracked Tile: crwdns2935265:02crwdnd2935265:01crwdnd2935265:03crwdne2935265:0 How to Replace Cracked Tile: crwdns2935265:02crwdnd2935265:02crwdnd2935265:03crwdne2935265:0 How to Replace Cracked Tile: crwdns2935265:02crwdnd2935265:03crwdnd2935265:03crwdne2935265:0
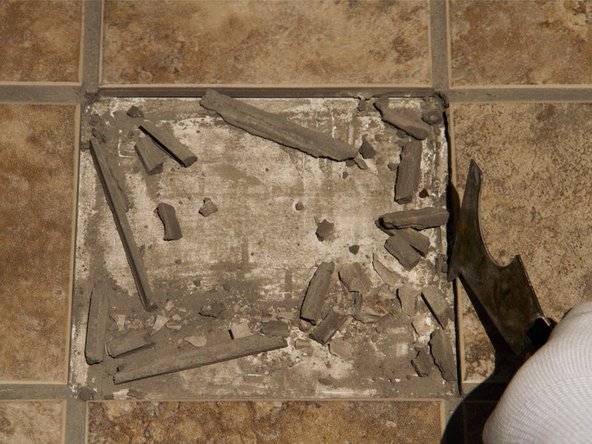
    • Use the painter's tool or putty knife to pry up the broken tile.

    • If the tile does not lift, place an old rag over the tile and use the hammer to break the tile into smaller pieces.

    • Avoid using surrounding tile as leverage and be precise and careful while using the hammer.

  3. How to Replace Cracked Tile: crwdns2935265:03crwdnd2935265:01crwdnd2935265:03crwdne2935265:0 How to Replace Cracked Tile: crwdns2935265:03crwdnd2935265:02crwdnd2935265:03crwdne2935265:0 How to Replace Cracked Tile: crwdns2935265:03crwdnd2935265:03crwdnd2935265:03crwdne2935265:0
    • Remove the broken pieces of tile, using gloved hands for large pieces or a broom for smaller shards.

    • Using the painter's tool or putty knife, scrape the grout from the edges of tile and any adhesive from under the tile.

    • Be careful of sharp shards of tile.

  4. How to Replace Cracked Tile: crwdns2935265:04crwdnd2935265:01crwdnd2935265:03crwdne2935265:0 How to Replace Cracked Tile: crwdns2935265:04crwdnd2935265:02crwdnd2935265:03crwdne2935265:0 How to Replace Cracked Tile: crwdns2935265:04crwdnd2935265:03crwdnd2935265:03crwdne2935265:0
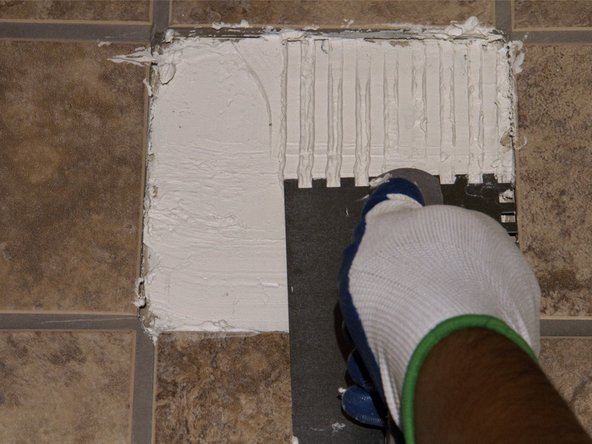
    • Apply new adhesive using the trowel, making sure the adhesive is spread evenly.

    • Drag the toothed end of the trowel across the adhesive to create even rows.

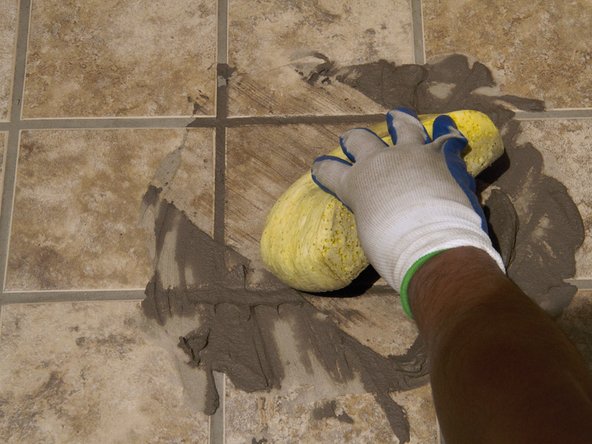
    • Quickly remove any adhesive from the surrounding tiles using a wet sponge or old rag, working quickly as the adhesive will begin to dry.

  5. How to Replace Cracked Tile: crwdns2935265:05crwdnd2935265:01crwdnd2935265:03crwdne2935265:0 How to Replace Cracked Tile: crwdns2935265:05crwdnd2935265:02crwdnd2935265:03crwdne2935265:0 How to Replace Cracked Tile: crwdns2935265:05crwdnd2935265:03crwdnd2935265:03crwdne2935265:0
    • Place the new tile down in the center of the empty space.

    • If available, use tile spacers to ensure proper placement.

    • Allow the adhesive to dry based on the instructions provided on the product.

    • During this time, prevent foot traffic on the new tile.

  6. How to Replace Cracked Tile: crwdns2935265:06crwdnd2935265:01crwdnd2935265:02crwdne2935265:0 How to Replace Cracked Tile: crwdns2935265:06crwdnd2935265:02crwdnd2935265:02crwdne2935265:0
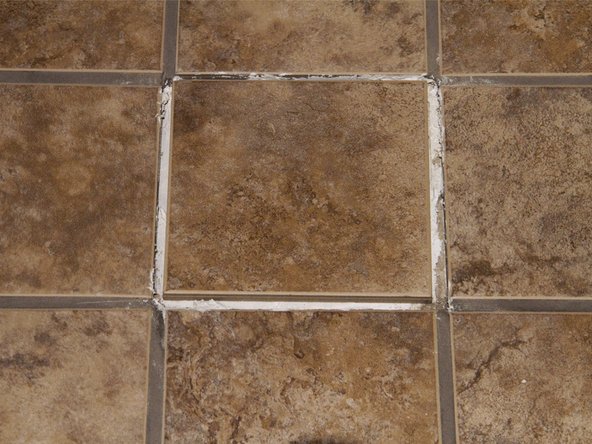
    • After the adhesive has dried, add water to a small amount of grout until it's the consistency of toothpaste.

    • Fill in the area around the new tile, making sure the new grout matches the height of the surrounding grout.

    • Use a moist sponge to wipe diagonally across the tile, cleaning off excess grout after each wipe.

  7. How to Replace Cracked Tile: crwdns2935265:07crwdnd2935265:01crwdnd2935265:02crwdne2935265:0 How to Replace Cracked Tile: crwdns2935265:07crwdnd2935265:02crwdnd2935265:02crwdne2935265:0
    • If any bubbles or gaps form in the grout while removing excess, add more grout and repeat the cleaning process.

    • Wait and allow grout to dry for several hours.

    • Keep foot traffic away from the new tile until the grout has had time to dry.

crwdns2915888:0crwdne2915888:0

Allow the grout to dry and then resume normal use.

crwdns2935229:08crwdne2935229:0

Allie Wallace

crwdns2935283:002/25/16crwdne2935283:0

342 crwdns2915208:0crwdne2915208:0

crwdns2935295:0crwdne2935295:0

crwdns2915084:0crwdne2915084:0

Texas Tech, Team 26-7, Rauch Spring 2016 crwdns2935289:0Texas Tech, Team 26-7, Rauch Spring 2016crwdne2935289:0

TTU-RAUCH-S16S26G7

crwdns2931471:03crwdne2931471:0

crwdns2935297:02crwdne2935297:0

crwdns2944067:00crwdne2944067:0

crwdns2917038:0crwdne2917038:0

crwdns2936625:0crwdne2936625:0:

crwdns2936751:024crwdne2936751:0 2

crwdns2936753:07crwdne2936753:0 24

crwdns2936753:030crwdne2936753:0 74

crwdns2942667:0crwdne2942667:0 3,894