crwdns2933423:0crwdne2933423:0

How to Repair a Hole in a Therm-a-Rest Sleeping Pad

crwdns2942213:0crwdne2942213:0

  1. How to Repair a Hole in a Therm-a-Rest Sleeping Pad, How to Repair a Hole in a Therm-a-Rest Sleeping Pad: crwdns2935265:01crwdnd2935265:01crwdnd2935265:03crwdne2935265:0 How to Repair a Hole in a Therm-a-Rest Sleeping Pad, How to Repair a Hole in a Therm-a-Rest Sleeping Pad: crwdns2935265:01crwdnd2935265:02crwdnd2935265:03crwdne2935265:0 How to Repair a Hole in a Therm-a-Rest Sleeping Pad, How to Repair a Hole in a Therm-a-Rest Sleeping Pad: crwdns2935265:01crwdnd2935265:03crwdnd2935265:03crwdne2935265:0
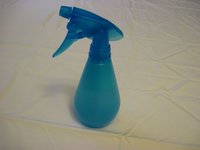
    • Blow up the sleeping pad full of air using the intake valve in the top left corner.

    • Open the valve by turning it counter-clock-wise.

    • Place your mouth over the valve, and blow air into the pad until is is inflated.

    • With your mouth over the valve, turn the valve clockwise to close it.

  2. How to Repair a Hole in a Therm-a-Rest Sleeping Pad: crwdns2935265:02crwdnd2935265:01crwdnd2935265:01crwdne2935265:0
    • Fold the pad in half to increase the air pressure.

  3. How to Repair a Hole in a Therm-a-Rest Sleeping Pad: crwdns2935265:03crwdnd2935265:01crwdnd2935265:02crwdne2935265:0 How to Repair a Hole in a Therm-a-Rest Sleeping Pad: crwdns2935265:03crwdnd2935265:02crwdnd2935265:02crwdne2935265:0
    • Spray soapy water on the section of the pad where you think the hole is located.

  4. How to Repair a Hole in a Therm-a-Rest Sleeping Pad: crwdns2935265:04crwdnd2935265:01crwdnd2935265:02crwdne2935265:0 How to Repair a Hole in a Therm-a-Rest Sleeping Pad: crwdns2935265:04crwdnd2935265:02crwdnd2935265:02crwdne2935265:0
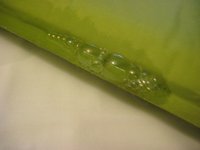
    • Look for small bubbles forming on the pad indicating the location of the hole.

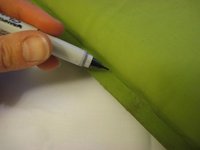
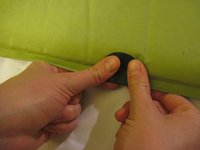
    • Mark the hole with a marker.

    • If you cannot locate the hole with the soapy water, fill a bathtub with water, and submerge your pad. Look for small air bubbles escaping from the pad into the water indicating the location of the hole.

  5. How to Repair a Hole in a Therm-a-Rest Sleeping Pad: crwdns2935265:05crwdnd2935265:01crwdnd2935265:01crwdne2935265:0
    • Obtain a Therm-a-Rest repair kit including a packet of HotBond Adhesive, patch, and wood stick or similar.

  6. How to Repair a Hole in a Therm-a-Rest Sleeping Pad: crwdns2935265:06crwdnd2935265:01crwdnd2935265:02crwdne2935265:0 How to Repair a Hole in a Therm-a-Rest Sleeping Pad: crwdns2935265:06crwdnd2935265:02crwdnd2935265:02crwdne2935265:0
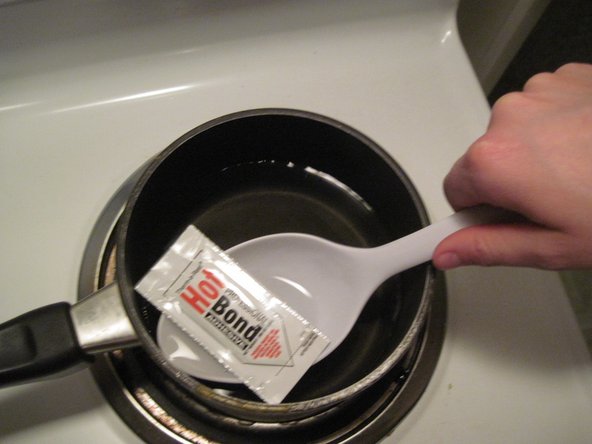
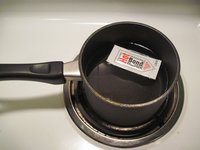
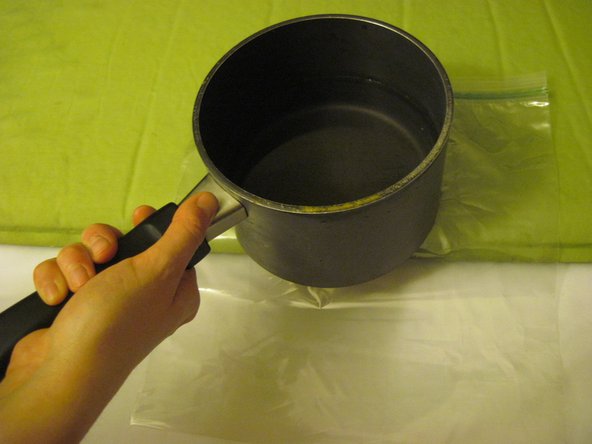
    • Boil water in a flat bottomed pan.

    • Heat the HotBond Adhesive packet in the boiling water for three minutes.

    • Carefully remove the HotBond Adhesive from the water with a spoon.

  7. How to Repair a Hole in a Therm-a-Rest Sleeping Pad: crwdns2935265:07crwdnd2935265:01crwdnd2935265:02crwdne2935265:0 How to Repair a Hole in a Therm-a-Rest Sleeping Pad: crwdns2935265:07crwdnd2935265:02crwdnd2935265:02crwdne2935265:0
    • Tear off the end of the HotBond Adhesive packet.

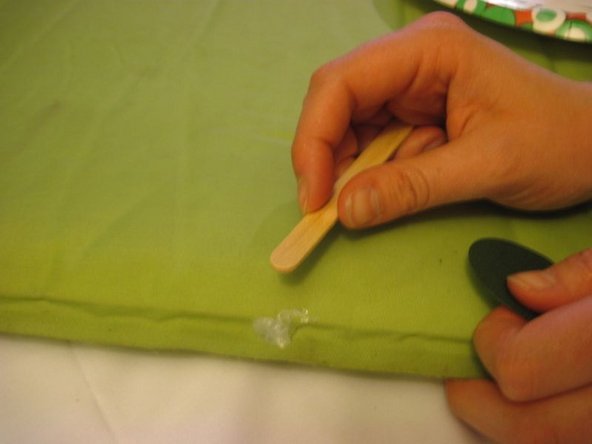
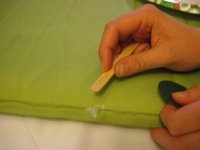
    • Squeeze the adhesive out of the packet onto the hole in the pad.

    • Spread the adhesive with the wood stick until the adhesive is spread in an even circular layer approximately the size of a dime.

  8. How to Repair a Hole in a Therm-a-Rest Sleeping Pad: crwdns2935265:08crwdnd2935265:01crwdnd2935265:03crwdne2935265:0 How to Repair a Hole in a Therm-a-Rest Sleeping Pad: crwdns2935265:08crwdnd2935265:02crwdnd2935265:03crwdne2935265:0 How to Repair a Hole in a Therm-a-Rest Sleeping Pad: crwdns2935265:08crwdnd2935265:03crwdnd2935265:03crwdne2935265:0
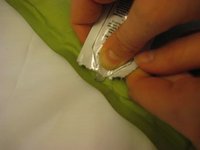
    • Firmly press the patch, shiny side down, onto the HotBond Adhesive on the mattress.

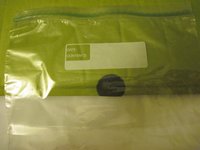
    • Place a layer of plastic, such as a plastic bag, over the patch.

    • Open the intake valve by turning the valve counter-clockwise.

    • Place the pan of hot water on top of the plastic layer and patch for one minute.

  9. How to Repair a Hole in a Therm-a-Rest Sleeping Pad: crwdns2935265:09crwdnd2935265:01crwdnd2935265:02crwdne2935265:0 How to Repair a Hole in a Therm-a-Rest Sleeping Pad: crwdns2935265:09crwdnd2935265:02crwdnd2935265:02crwdne2935265:0
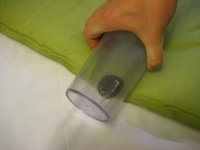
    • Remove the pan of water, and using a hard cylindrical object, such as a cup, roll over the patch a few times.

    • Allow the patch to set for 10 minutes before use.

crwdns2915888:0crwdne2915888:0

This guide can be used to fix similar types of sleeping pads. This patch will help you prolong the life of your camping gear!

crwdns2935229:02crwdne2935229:0

Kellie Cochran

crwdns2935283:002/24/15crwdne2935283:0

184 crwdns2915208:0crwdne2915208:0

crwdns2935295:0crwdne2935295:0

crwdns2915084:0crwdne2915084:0

Cal Poly, Team 24-3, Green Winter 2015 crwdns2935289:0Cal Poly, Team 24-3, Green Winter 2015crwdne2935289:0

CPSU-GREEN-W15S24G3

crwdns2931471:05crwdne2931471:0

crwdns2935297:05crwdne2935297:0

crwdns2944067:03crwdne2944067:0

Do I need to deflate the mat before applying the glue?

Kevin Smith - crwdns2934203:0crwdne2934203:0

How does one find a very slow leak? Somehow pressurize the pad to 15 or 20 pounds?

awalter - crwdns2934203:0crwdne2934203:0

You could try submerging the inflated sleeping pad in a bathtub. Keep an eye out for small bubbles and you should find your leak.

Austin Blakely -

crwdns2917038:0crwdne2917038:0

crwdns2936625:0crwdne2936625:0:

crwdns2936751:024crwdne2936751:0 2

crwdns2936753:07crwdne2936753:0 14

crwdns2936753:030crwdne2936753:0 109

crwdns2942667:0crwdne2942667:0 8,901