crwdns2915892:0crwdne2915892:0
Tired of replacing old headphone sets? Here’s a step-by-step guide on repairing frayed headphone cables in an environmentally efficient and affordable way. This guide will require soldering skills.
crwdns2942213:0crwdne2942213:0
-
-
Cut above the frayed portion of the cable using wire cutters.
-
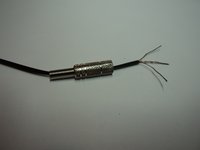
Using the wire cutters, strip away approximately one inch of wire coating.
-
-
-
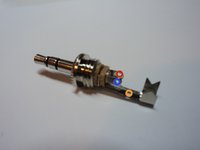
After stripping the wire, four wires should be exposed. The wires should be three different colors.
-
Red: Right channel
-
Gold/copper: Ground
-
Blue/green: Left channel
-
Twist the two ground wires together.
Wait, so which one is left? You said right twice
-
-
-
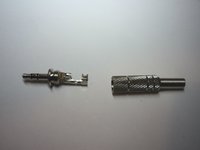
Unscrew the plug housing.
-
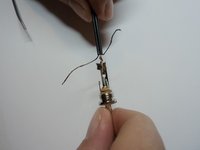
Thread the wire through the plug housing.
-
-
-
-
Remove the enamel from the red and blue wires with a wire stripper.
-
-
-
With a soldering iron, apply a small amount of solder to the end of each wire.
-
-
-
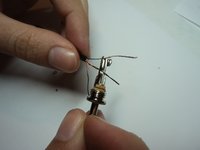
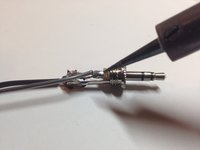
Thread the wires through each hole and wrap them back over.
-
Next, twist each wire with itself to secure it to the lead. This can be seen in the second picture.
-
-
-
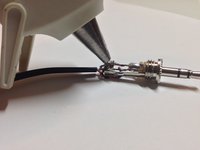
Solder over each lead's hole, connecting the wire to the lead.
-
After each wire is connected, use a drop of hot glue to secure the wires and prevent them from touching each other.
-
-
-
Screw the housing back onto the jack and test your work.
-
If the sound turns on and off this is a connection error. To fix it, look at your solder joints and make sure the wires are fully connected to the leads. If not, apply more solder to the joints, covering the wire.
-


crwdns2935221:0crwdne2935221:0
crwdns2935229:037crwdne2935229:0
crwdns2915084:0crwdne2915084:0

Cal Poly, Team 23-2, Green Winter 2015 crwdns2935289:0Cal Poly, Team 23-2, Green Winter 2015crwdne2935289:0
CPSU-GREEN-W15S23G2
crwdns2931471:04crwdne2931471:0
crwdns2935297:018crwdne2935297:0
crwdns2947412:02crwdne2947412:0
To me, the more difficult part in this job, is solder.... Now, If you are not sure, with where solder each wire, try with a tester in the continuity mode, and test between the each part of the tip and the three holes. Greetings!
great instruction - any for repair of cable with microphone ? and even a flat cable ?