crwdns2933423:0crwdne2933423:0

How to Repair a Broken Cabinet

crwdns2942213:0crwdne2942213:0

  1. How to Repair a Broken Cabinet, How to Repair a Broken Cabinet: crwdns2935265:01crwdnd2935265:01crwdnd2935265:01crwdne2935265:0
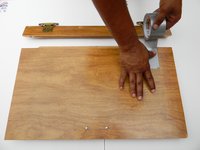
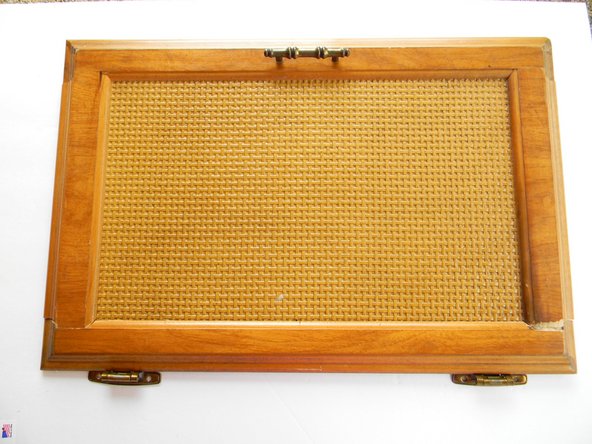
    • This is the broken dresser drawer, duct tape & 5 minute 2 part wood epoxy.

  2. How to Repair a Broken Cabinet: crwdns2935265:02crwdnd2935265:01crwdnd2935265:02crwdne2935265:0 How to Repair a Broken Cabinet: crwdns2935265:02crwdnd2935265:02crwdnd2935265:02crwdne2935265:0
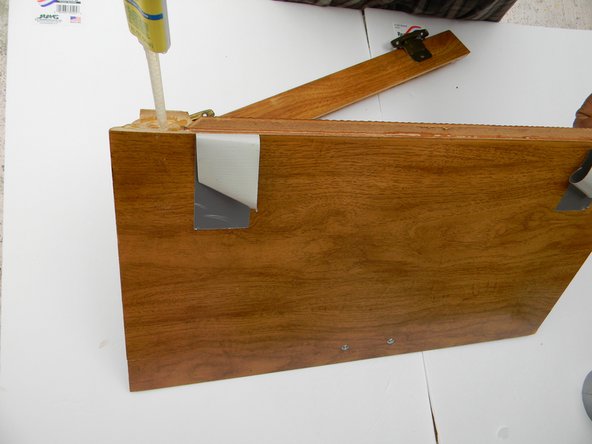
    • Take a piece of duct tape and put it on both sides for extra bonding support. Only put the tape on the bigger part of the dresser door for now. You will attach the other side with tape in a later step.

  3. How to Repair a Broken Cabinet: crwdns2935265:03crwdnd2935265:01crwdnd2935265:03crwdne2935265:0 How to Repair a Broken Cabinet: crwdns2935265:03crwdnd2935265:02crwdnd2935265:03crwdne2935265:0 How to Repair a Broken Cabinet: crwdns2935265:03crwdnd2935265:03crwdnd2935265:03crwdne2935265:0
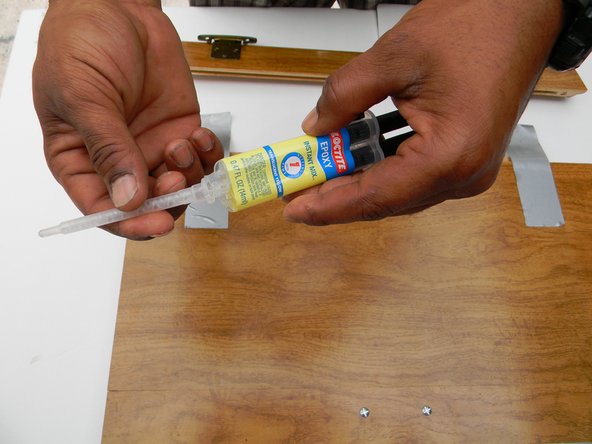
    • This is a 5 minute quick setting 2 part wood epoxy. Take the top off the epoxy. Connect the syringe tip and lock it in place. Press the plunger so you can fill the needle tip with epoxy.

  4. How to Repair a Broken Cabinet: crwdns2935265:04crwdnd2935265:01crwdnd2935265:03crwdne2935265:0 How to Repair a Broken Cabinet: crwdns2935265:04crwdnd2935265:02crwdnd2935265:03crwdne2935265:0 How to Repair a Broken Cabinet: crwdns2935265:04crwdnd2935265:03crwdnd2935265:03crwdne2935265:0
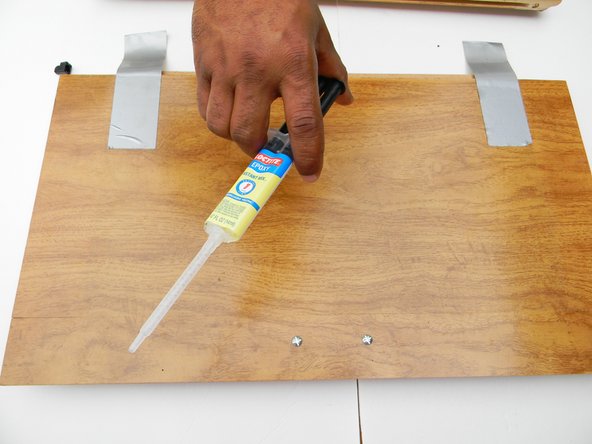
    • Run a thick bead of epoxy on the inside rim of the cabinet from one end to the other.

  5. How to Repair a Broken Cabinet: crwdns2935265:05crwdnd2935265:01crwdnd2935265:01crwdne2935265:0
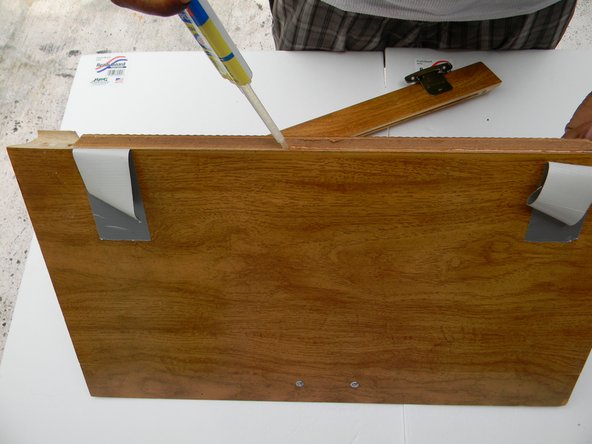
    • Run a thick bead of epoxy on the inside rim of the smaller piece of cabinet door.

  6. How to Repair a Broken Cabinet: crwdns2935265:06crwdnd2935265:01crwdnd2935265:03crwdne2935265:0 How to Repair a Broken Cabinet: crwdns2935265:06crwdnd2935265:02crwdnd2935265:03crwdne2935265:0 How to Repair a Broken Cabinet: crwdns2935265:06crwdnd2935265:03crwdnd2935265:03crwdne2935265:0
    • Attach and align the smaller cabinet door section to the bigger cabinet door section. Press them firmly together and apply the duct tape on both ends for bonding support.

  7. How to Repair a Broken Cabinet: crwdns2935265:07crwdnd2935265:01crwdnd2935265:03crwdne2935265:0 How to Repair a Broken Cabinet: crwdns2935265:07crwdnd2935265:02crwdnd2935265:03crwdne2935265:0 How to Repair a Broken Cabinet: crwdns2935265:07crwdnd2935265:03crwdnd2935265:03crwdne2935265:0
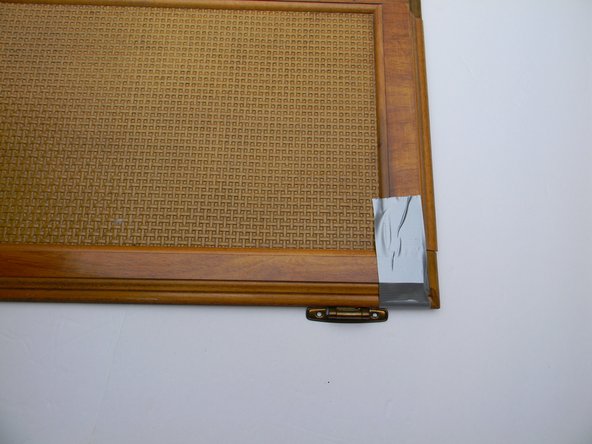
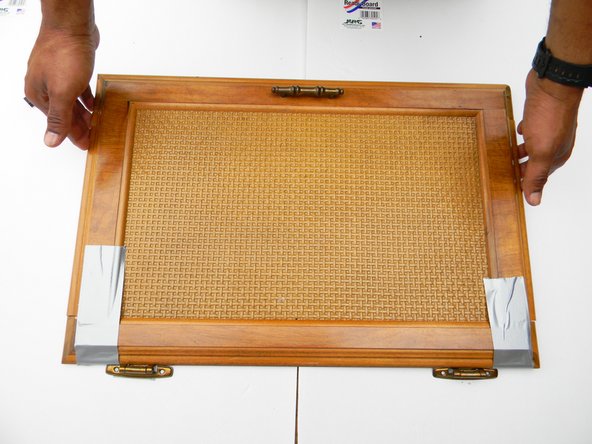
    • Flip door over to front side and tape both ends of the cabinet. This will add more support while it is drying.

  8. How to Repair a Broken Cabinet: crwdns2935265:08crwdnd2935265:01crwdnd2935265:03crwdne2935265:0 How to Repair a Broken Cabinet: crwdns2935265:08crwdnd2935265:02crwdnd2935265:03crwdne2935265:0 How to Repair a Broken Cabinet: crwdns2935265:08crwdnd2935265:03crwdnd2935265:03crwdne2935265:0
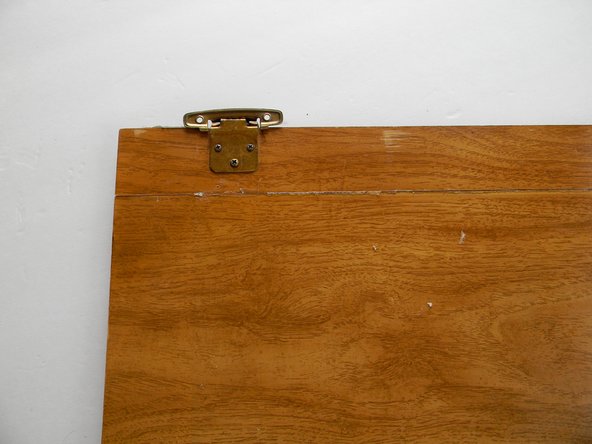
    • After at least 15 minutes you can pull tape off completely and wipe away any excess epoxy. It is now finished and ready to be re-installed back to the cabinet.

crwdns2915888:0crwdne2915888:0

To reassemble your device, follow these instructions in reverse order.

crwdns2935229:03crwdne2935229:0

Calvesta Walk

crwdns2935283:002/07/16crwdne2935283:0

254 crwdns2915208:0crwdne2915208:0

crwdns2935295:0crwdne2935295:0

crwdns2915084:0crwdne2915084:0

Pasco Hernando, Team 5-8, Prince Winter 2016 crwdns2935289:0Pasco Hernando, Team 5-8, Prince Winter 2016crwdne2935289:0

PHSC-PRINCE-W16S5G8

crwdns2934841:01crwdne2934841:0

crwdns2935303:01crwdne2935303:0

crwdns2917034:0crwdne2917034:0

crwdns2917038:0crwdne2917038:0

crwdns2936625:0crwdne2936625:0:

crwdns2936751:024crwdne2936751:0 7

crwdns2936753:07crwdne2936753:0 47

crwdns2936753:030crwdne2936753:0 243

crwdns2942667:0crwdne2942667:0 22,583