crwdns2933423:0crwdne2933423:0

How to Remove the Front Panel of Your Whirlpool Dryer

crwdns2862623:0crwdne2862623:0
crwdns2942641:0crwdne2942641:0

crwdns2942213:0crwdne2942213:0

  1. How to Remove the Front Panel of Your Whirlpool Dryer, Disconnect the door switch: crwdns2935265:01crwdnd2935265:01crwdnd2935265:03crwdne2935265:0 How to Remove the Front Panel of Your Whirlpool Dryer, Disconnect the door switch: crwdns2935265:01crwdnd2935265:02crwdnd2935265:03crwdne2935265:0 How to Remove the Front Panel of Your Whirlpool Dryer, Disconnect the door switch: crwdns2935265:01crwdnd2935265:03crwdnd2935265:03crwdne2935265:0
    • Use a small flat blade screwdriver or a spudger to unlatch both sides of the door switch connector.

    • Unplug the connector.

  2. How to Remove the Front Panel of Your Whirlpool Dryer, Unfasten the front panel: crwdns2935265:02crwdnd2935265:01crwdnd2935265:02crwdne2935265:0 How to Remove the Front Panel of Your Whirlpool Dryer, Unfasten the front panel: crwdns2935265:02crwdnd2935265:02crwdnd2935265:02crwdne2935265:0
    • Remove the upper front panel sheet metal screws.

    • Tilt the machine backwards and prop it securely, or have a friend hold it.

    • Remove the sheet metal screws on the bottom edge of the panel.

  3. How to Remove the Front Panel of Your Whirlpool Dryer: crwdns2935265:03crwdnd2935265:01crwdnd2935265:01crwdne2935265:0
    • Remove the screws inside the door area below the drum opening.

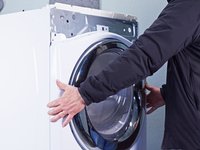
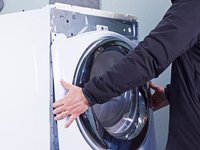
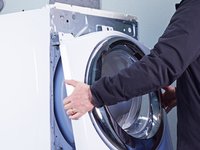
  4. How to Remove the Front Panel of Your Whirlpool Dryer, Remove the front panel: crwdns2935265:04crwdnd2935265:01crwdnd2935265:03crwdne2935265:0 How to Remove the Front Panel of Your Whirlpool Dryer, Remove the front panel: crwdns2935265:04crwdnd2935265:02crwdnd2935265:03crwdne2935265:0 How to Remove the Front Panel of Your Whirlpool Dryer, Remove the front panel: crwdns2935265:04crwdnd2935265:03crwdnd2935265:03crwdne2935265:0
    • The panel is heavy and awkward. You may want to have a friend help you with this step.

    • Pull the bottom of the panel away from the chassis about two to three inches.

    • Lift the front panel off the small tabs on the chassis near the top of the panel and remove it.

    • Make sure you don't snag the door switch wire harness as you remove the panel.

crwdns2915888:0crwdne2915888:0

To reassemble your device, follow these instructions in reverse order.

Repair didn’t go as planned? Ask our Answers community for help.

Bill Gilbert

crwdns2935283:006/30/22crwdne2935283:0

37,485 crwdns2915208:0crwdne2915208:0

crwdns2935297:0261crwdne2935297:0

crwdns2915084:0crwdne2915084:0

iFixit crwdns2935289:0iFixitcrwdne2935289:0

Staff

crwdns2931471:0121crwdne2931471:0

crwdns2935297:019,765crwdne2935297:0

crwdns2947412:00crwdne2947412:0

crwdns2917038:0crwdne2917038:0

crwdns2936625:0crwdne2936625:0:

crwdns2936751:024crwdne2936751:0 0

crwdns2936753:07crwdne2936753:0 0

crwdns2936753:030crwdne2936753:0 15

crwdns2942667:0crwdne2942667:0 33