crwdns2942213:0crwdne2942213:0
-
-
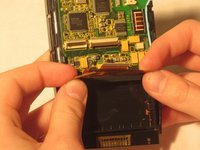
Reinsert the screen into the case that contains the buttons.
-
-
-
Put the Motherboard back into casing from right to left.
-
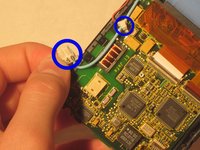
Make sure the black clips are securing the motherboard into the casing.
-
-
-
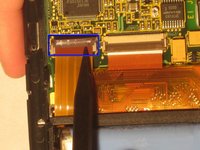
Secure the bottom two ZIF connectors into their slots by opening the flap and inserting the ZIF connectors.
-
Gently press down on the flap to secure the ZIF connector. This secures the screen and buttons to the motherboard.
-
-
-
-
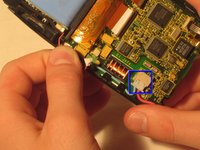
Connect the blue and red screen cables to the beige box they were removed from.
-
-
-
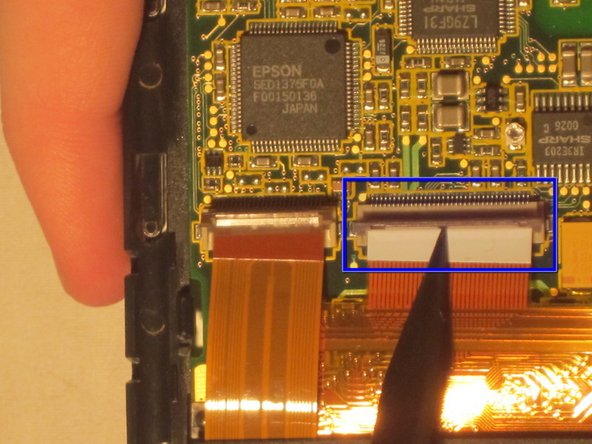
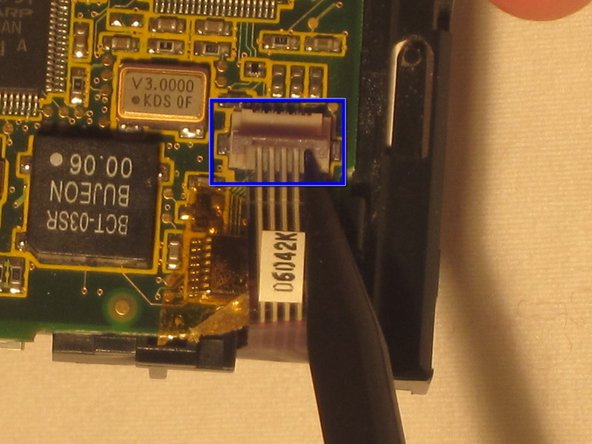
Open the ZIF connector box at the top of the motherboard by gently pulling up on the flap.
-
Insert the ZIF tab into the connector box.
-
Gently press down on the flap to secure the ZIF tab in place.
-
-
-
Attach the white box on the end of the red cable connected to the battery into the connector box on the motherboard.
-
-
-
Place the front and back covers around the casing containing the motherboard and screen.
-
Before securing the covers, place the sensor in between the front and back cover at the top of the device.
-
After the sensor is in place between the two covers, firmly secure the front and back covers.
-
-
-
Replace the long screws at the top of the back case with the Philips head screwdriver.
-
Replace the short screws to the bottom of the back case using the Philips head screwdriver.
-
After the screws are in place, insert the stylus.
-
-
-
Gently snap the flip cover back into place where it connects at the top of the Palm IIIc
-


crwdns2935221:0crwdne2935221:0
crwdns2935227:0crwdne2935227:0
crwdns2935287:0crwdne2935287:0

Ohio State, Team 1-5, Buehl Winter 2012 crwdns2935289:0Ohio State, Team 1-5, Buehl Winter 2012crwdne2935289:0
OSU-BUEHL-W12S1G5
crwdns2931471:05crwdne2931471:0
crwdns2935303:01crwdne2935303:0