crwdns2933423:0crwdne2933423:0

How to Install a Hard Drive Sled Adapter for Mac Pro First Generation

crwdns2862623:0crwdne2862623:0
crwdns2942641:0crwdne2942641:0

crwdns2942213:0crwdne2942213:0

  1. How to Install a Hard Drive Sled Adapter for Mac Pro First Generation, How to Install a Hard Drive Sled Adapter for Mac Pro First Generation: crwdns2935265:01crwdnd2935265:01crwdnd2935265:03crwdne2935265:0 How to Install a Hard Drive Sled Adapter for Mac Pro First Generation, How to Install a Hard Drive Sled Adapter for Mac Pro First Generation: crwdns2935265:01crwdnd2935265:02crwdnd2935265:03crwdne2935265:0 How to Install a Hard Drive Sled Adapter for Mac Pro First Generation, How to Install a Hard Drive Sled Adapter for Mac Pro First Generation: crwdns2935265:01crwdnd2935265:03crwdnd2935265:03crwdne2935265:0
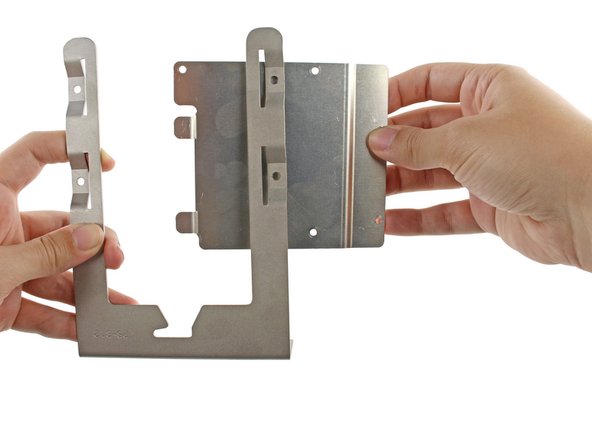
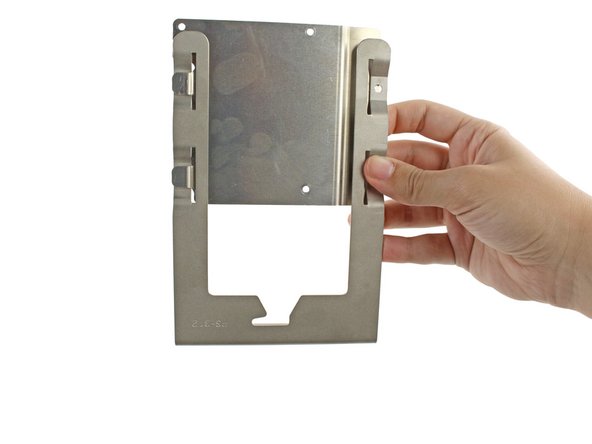
    • Insert the two tabs on the left side of the metal adapter bracket into the slots on the left side of the hard drive bay sled.

    • Align the holes on the right side.

  2. How to Install a Hard Drive Sled Adapter for Mac Pro First Generation: crwdns2935265:02crwdnd2935265:01crwdnd2935265:01crwdne2935265:0
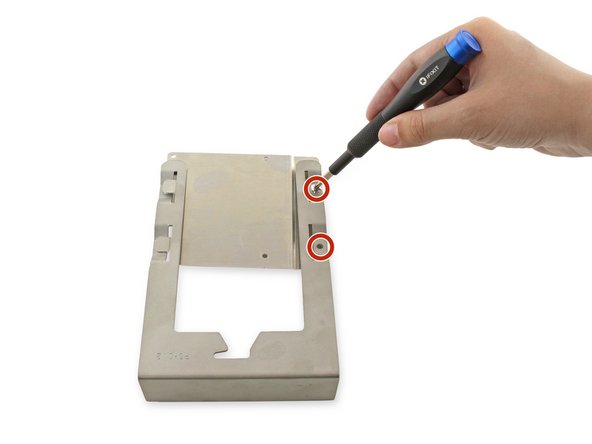
    • Screw the two 7.8mm PH0 screws into the two holes on the right.

    • Leave these screws slightly loose; they will be tightened once the hard drive is attached.

  3. How to Install a Hard Drive Sled Adapter for Mac Pro First Generation: crwdns2935265:03crwdnd2935265:01crwdnd2935265:03crwdne2935265:0 How to Install a Hard Drive Sled Adapter for Mac Pro First Generation: crwdns2935265:03crwdnd2935265:02crwdnd2935265:03crwdne2935265:0 How to Install a Hard Drive Sled Adapter for Mac Pro First Generation: crwdns2935265:03crwdnd2935265:03crwdnd2935265:03crwdne2935265:0
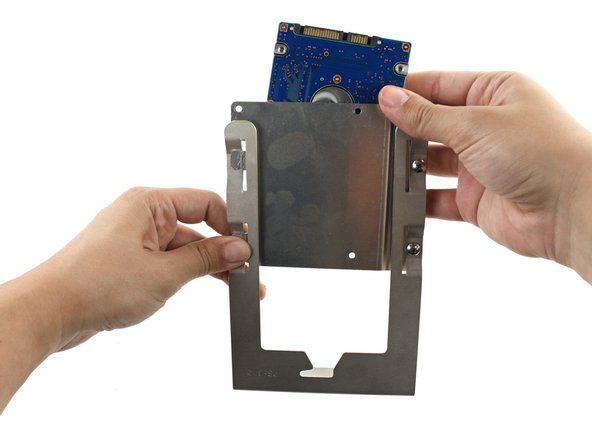
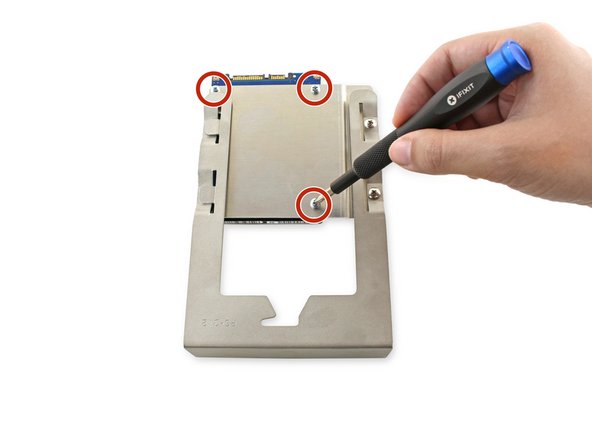
    • Align the holes in the hard drive with the three holes on the bracket.

    • Screw the three 6.1mm PH0 screws into the bracket and hard drive.

    • These screws can be secured tightly.

  4. How to Install a Hard Drive Sled Adapter for Mac Pro First Generation: crwdns2935265:04crwdnd2935265:01crwdnd2935265:01crwdne2935265:0
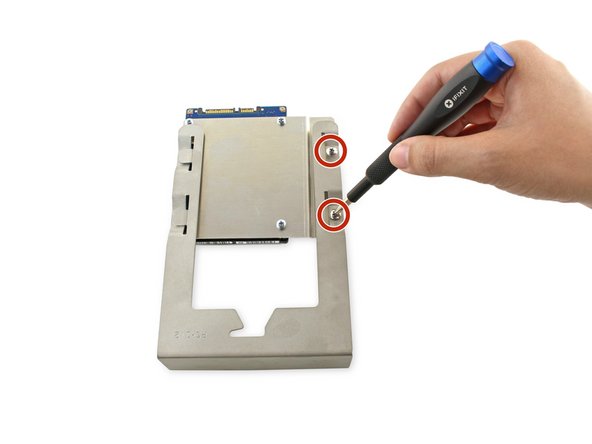
    • Tighten the two 7.8mm PH0 screws on the right side of the bracket.

crwdns2935217:0crwdne2935217:0

Kristen Gismondi

crwdns2935283:011/12/14crwdne2935283:0

81,782 crwdns2915208:0crwdne2915208:0

crwdns2935297:0200crwdne2935297:0

crwdns2915084:0crwdne2915084:0

iFixit crwdns2935289:0iFixitcrwdne2935289:0

Staff

crwdns2931471:0135crwdne2931471:0

crwdns2935297:016,817crwdne2935297:0

crwdns2944067:00crwdne2944067:0

crwdns2917038:0crwdne2917038:0

crwdns2936625:0crwdne2936625:0:

crwdns2936751:024crwdne2936751:0 0

crwdns2936753:07crwdne2936753:0 0

crwdns2936753:030crwdne2936753:0 0

crwdns2942667:0crwdne2942667:0 64